To configure advanced or custom options for a sync policy or connection object in Riva 2.4.43 through 2.4.52:
-
Best practice: If multiple option changes to the sync policy or connection are anticipated, stop the Riva synchronization service.
-
Edit the relevant sync policy or connection.
-
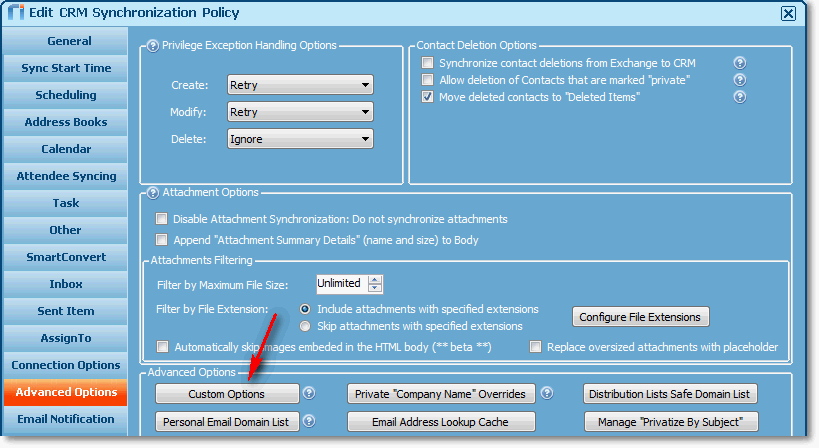
Select Advanced Options, and select Custom Options.
-
Best practice: In the Advanced Options window that appears, search for the key to confirm whether it already exists.
-
If the key exists, it appears in bold within the list. To change the value, select the key from the list, and in the right pane, within the Key Value area, change the value.
If the key name does not exist, select Add New. In the Option Properties panel, note that the Key Name has already been entered, and then enter the desired value in the Key Value.
Select Update, and verify that the key and value appear as desired in the list.
.png)
-
In order to add multiple keys and their values: For each key and value, repeat steps 4 and 5.
-
When done editing, select OK.
-
Save the sync policy or connection.
-
If the Riva synchronization service was stopped at step 1, start it.
Apply advanced or custom options to individual users in the Riva sync policy
To set advanced or custom options for specific users in Riva 2.4.43 through 2.4.52:
-
Best practice: If multiple option changes are anticipated, stop the Riva synchronization service.
-
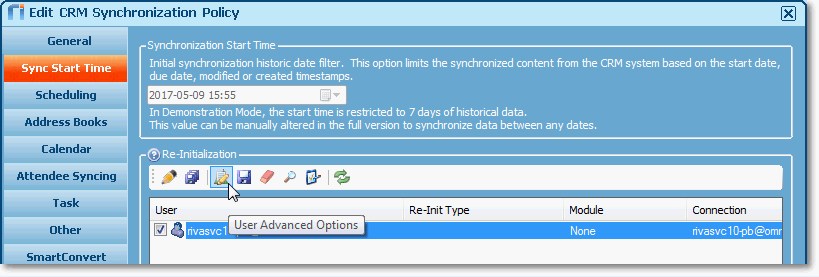
In the Riva sync policy, select the Re-Initialize or Sync Start Time tab.
Note: In sync policies created in Riva 2.4.46 or higher, the Re-Initialize page replaces the Sync Start Time page.
-
Select Load Users, select a user, and select the third icon from the left (User Advanced Options).
-
Best practice: In the Entity Advanced Options window that appears, search for the key to confirm whether it already exists.
-
If the key exists, the key will appear in bold within the list. To change the value, select the key from the list, and in the right pane, within the Key Value area, change the value.
If the key name does not exist, select Add New. In the Option Properties panel, note that the Key Name has already been entered, and then enter the desired value in the Key Value.
Select Update, and verify that the key and value appear as desired in the list.
.png)
-
Select OK to close the Entity Advanced Options window.
-
To save the changes,
- Right-click the selected user, and then select Save Changes; or
- Save the sync policy.
-
If the Riva synchronization service was stopped at step 1, start it.
