The procedure to reconfigure Riva to support upgrading Exchange mailboxes depends on each upgrade (or migration). This Knowledge Base article supports situations where user mailboxes are being upgraded within the same Exchange system; for example, Exchange 2007 mailboxes are moved from an Exchange 2007 mailbox store to an Exchange 2010 mailbox store.
Contents:
How Riva Tracks Synced Data
For each target user, Riva maintains a transaction record that identifies each data item that has been synced by the Riva sync engine service. Each Exchange item is tracked by using the "EntryID" created by the Exchange MAPI or EWS API that Riva uses.
If the move mailbox procedure results in changing the "EntryID" value for those items, Riva cannot sync to the corresponding items in the CRM. Depending on how the Riva sync policy is modified, duplicate items may be synced to the user's mailbox when Riva starts syncing to the re-located mailbox.
Exchange 2003 mailboxes upgrade to Exchange 2007+
If target user mailboxes are upgraded from Exchange 2003 to Exchange 2007, 2010, or 2013, Riva will have a formatting issue with the "EntryID" values:
- Riva uses MAPI to sync to Exchange 2003 mailboxes.
- By default, Riva uses EWS to sync to Exchange mailboxes 2007+.
- MAPI and the EWS API create EntryIDs in different formats.
The recommended best practice is to contact Riva support and request assistance with properly reconfiguring Riva to re-map the new Exchange EntryIDs for all previously synced data..
Exchange 2007 mailboxes upgrade to Exchange 2010+
If the target user mailboxes are "upgraded" from on-premise Exchange 2007 to a new version of Exchange by means of EMC or Powershell, the "EntryID" values should remain unchanged. It is possible to upgrade user mailboxes with minimal change to the Riva server.
Riva EWS Connection Test Mailbox Upgrade Feature
Riva 2.4.33.15180+ includes the ability to test a mailbox before and after a mailbox move and compare the results to ensure that there are no potential sync issues. The test checks the following:
- the user name remains unchanged
- the email address remains unchanged
- the EntryID values (for the folder structures in the mailbox that Riva syncs to) remain unchanged.
Test upgrading an Exchange mailbox in the Riva EWS connection
The following procedure is designed to run the move of a test user mailbox from the source storage server to the higher version storage server. We strongly recommend running this procedure before moving target user mailboxes in production.
For this procedure:
-
source - refers to the source Exchange storage or EWS server as applicable.
-
target - refers to the Exchange storage server that the mailboxes will be moved to as part of the upgrade process, or the newer version of the EWS server that supports the upgraded mailbox users.
The recommended test procedure include:
-
Perform an INTERIM upgrade of Riva to the latest Interim version (Riva 2.4.33.15180+).
-
In the current "source" EMC create a test user mailbox in the current Exchange storage server that the production mailboxes reside in. Ensure that the user has been logged into once in OWA or Outlook. Grant delegate full access permissions for this mailbox to the existing "source" Riva EWS connection user.
-
In the new "target" EMC create a mailbox user that will act as the Riva connection user to the new "target" Exchange EWS server. Grant delegate full access permissions to this user for the test user mailbox created in step 2.
-
In the Riva Manager, create a new EWS connection to the new "target" EWS server. Configure the connection to use the credentials of the user created in step 3.
-
In Windows explorer, create a "\Riva\Move-User-Test" folder to store some files.
-
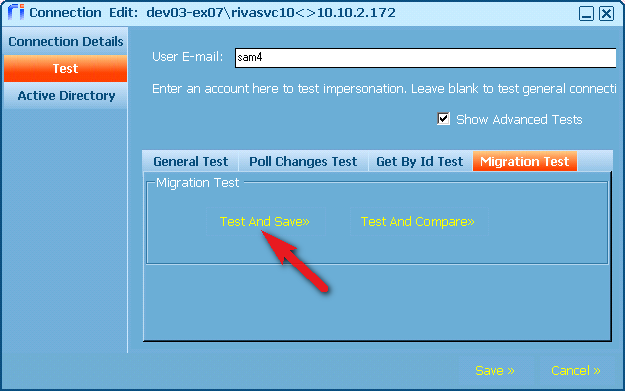
Double-click the "source" EWS connection. Under "Test" provide the user name of the test mailbox (created in step 2) and click the down arrow on the "Test" button to select "Test & Save"
-
If the impersonation test passes
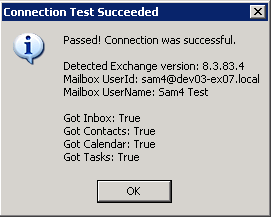
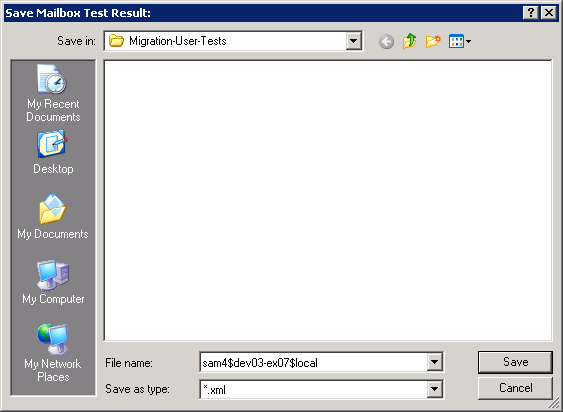
select OK which will open a prompt to save an XML file to record the values for the mailbox.
-
In EMC on the "target" new Exchange server, follow the steps to move the test user mailbox. Ensure that the mailbox move completes.

-
Once the test mailbox has been moved to the new "target" Exchange storage server, log in to the mailbox in OWA to confirm that it is accessible.
-
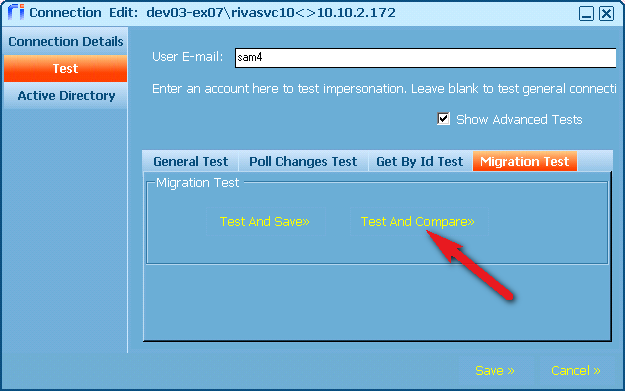
In the Riva Manager, under "Setup", double-click the new EWS connection created in step 4. Under "Test", perform a Test & Compare for the user that was just moved. If the impersonation test passes, click OK. Riva will prompt you to select the file saved in step 7.
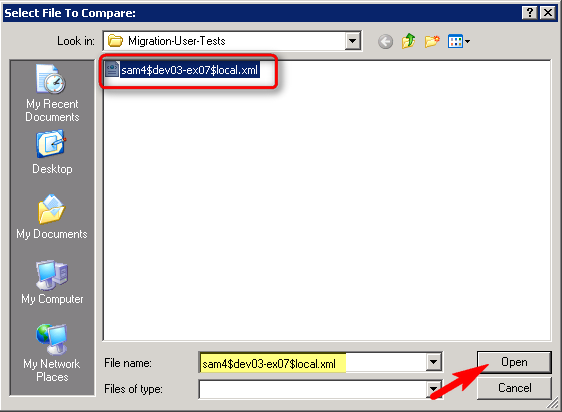
-
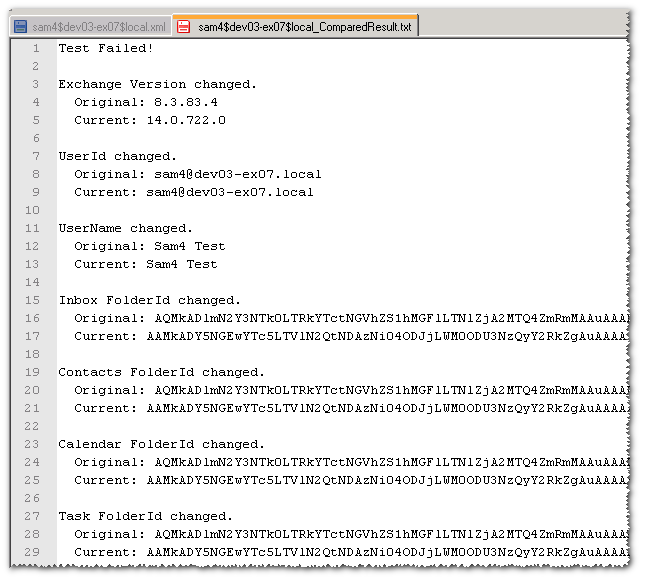
Riva will display a results window:
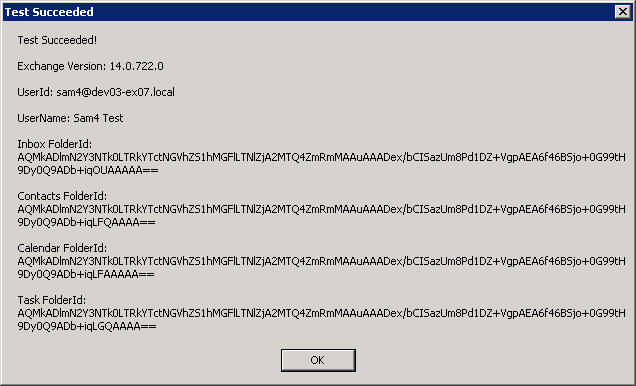
If the compare is successful, click OK to close the window and Cancel to close the EWS connection.
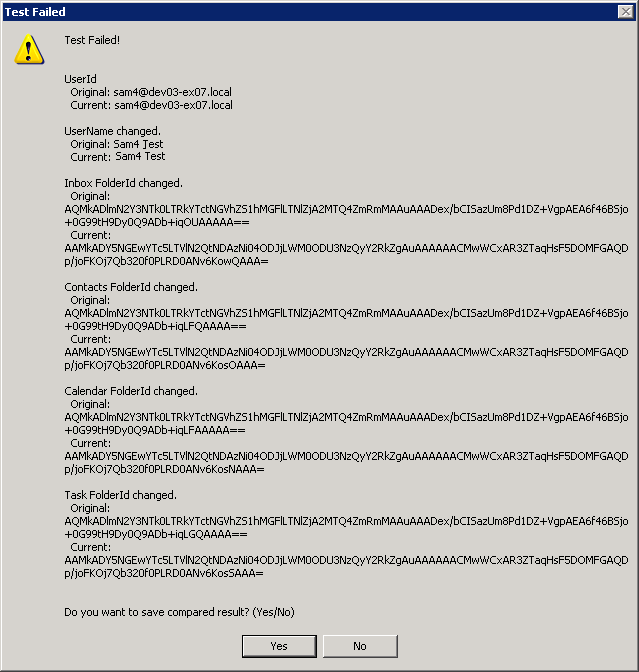
If the compare fails, click Yes to save a results file.
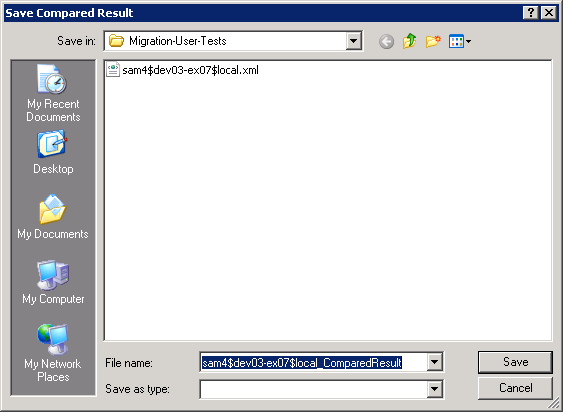
Once the file is saved, in the Riva EWS connection edit window, click Cancel to close the window.
If the compare result fails
If the compare result fails, that indicates that the match of the user name, email address, or folder IDs did not match. Submit a manual support request and attach the Compare Results file. This file will record the same information that was displayed in the results window.
If the compare result passes
If the compare result passes, that indicates that the mailbox move preserved the EntryID values and it is safe to move user mailboxes (from a Riva perspective). There are two possible procedures dependent on how the mailboxes will be migrated:
If all Riva synced mailboxes will be migrated at the same time
Use these steps to modify Riva to test data sync while preserving and using the transaction records from before the mailbox moves. The existing EWS connection will need to be modified to update the URL for the new CAS EWS server. That procedure would be:
-
In the CRM Service Monitor application, stop the service.
-
In EMC for the target Exchange server, upgrade the Riva connection user mailbox for the source EWS connection. Once that mailbox is upgraded, the original connection user will be able to impersonate the target user mailboxes.
-
In the Riva Manager application, double-click the source EWS connection, and change the Host value to point to the target new EWS server.
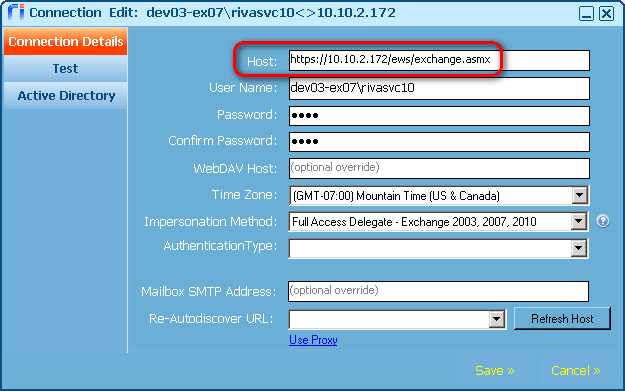
Select Save to save the connection.
-
Double-click the source EWS connection. In the Test tab, run an impersonation test for one or more production mailbox users.
All of those tests should pass.
-
In Windows Explorer, create a copy of the .policy files from the \Riva\Configuration folder in the Windows desktop.
-
In the Riva Manager application, on the menu bar, select Policies, and disable all the sync policies.
-
Edit a sync policy, and remove all but one or two target users, and then enable and save the sync policy. When prompted to start the service, choose No.
-
In the Riva CRM Monitor, choose to view all activity monitors, and start the service. Watch the activity monitor panes for the users, and confirm that you do not see any errors. In Outlook or OWA, perform a set of sync tests to confirm that Riva is syncing data as expected and that duplicate items have not been created in the mailbox or in the CRM system. If you see any errors or if any user reports sync issues, stop the service, and contact the Riva Success Team as soon as possible.
-
If after completing the testing, you are satisfied that it is safe to enable the rest of the users for sync, then in the CRM Monitor, stop the service.
-
In Windows Explorer, move the ".policy" files from the Windows desktop back to the \Riva\Configuration folder.
-
In the CRM Monitor application, start the service, and monitor sync activity to ensure that there are no errors.
If the mailboxes will be migrated in batches
We recommend creating a new service account (s_svc2_rivacrm) mailbox in the new mailbox storage server and assigning the applicable Exchange ApplicationImpersonation Role permissions (recommended for Exchange 2010+) or Delegate Full Access permissions. Once the second EWS connection has been created, the procedure to reconfigure Riva would then be:
-
In the CRM Service Monitor application, stop the service.
-
In the Riva Manager application, edit the sync policy, remove the users in the batch that will be migrated, and save the sync policy.
-
In the CRM Service Monitor application, start the service, and confirm that data sync resumes for the rest of the users.
-
Let the Message team migrate the user mailboxes to the new Exchange mailbox storage server.
-
After the mailboxes have been migrated, in the Riva Manager application, edit the sync policy, add the users in the batch that just completed the migration using the new EWS connection for the upgraded version of Exchange, and save the sync policy.
-
In the CRM Service Monitor application, start the service.
Riva adds the users to the active user sync queue and starts syncing those users.
-
Confirm that user sync resumes as expected.
For each batch of mailbox users that are being migrated, repeat steps 1 to 7.


