System Requirements
-
Exchange: Riva connects to Exchange 2003 using Messaging API (MAPI). For those hosted Exchange environments that do not support Exchange Web Services (EWS), use the Outlook Profile MAPI connection.
-
Outlook Client Required: MAPI connections require that a 32-bit version of the Outlook client be installed on the Windows system where the Riva Server is installed. Because of the Outlook client requirement, Riva must run on a system other than the Exchange 2003 server.
-
Outlook Mail Profile: An Outlook profile needs to be created for the Exchange account that has been configured with “Impersonate” permissions for the target Exchange accounts that will be synchronized with the corresponding target CRM accounts. That profile must meet the following requirements:
- “Cached Exchange Mode” is not enabled in the profile.
- For Exchange 2003, the profile is configured for HTTP (HTTP over RPC).
- For Exchange 2007 / 2010, the profile is configured for HTTP (Outlook Anywhere).
- Use either Basic Authentication or NTLM Authentication (as specified by the Hosted Exchange service provider).
Steps to Create an Outlook Profile MAPI Connection
Follow this procedure to create a MAPI connection to hosted Exchange server environments:
-
Launch the Riva Manager application.
-
On the menu bar, select Setup. In the left pane, select Microsoft Exchange 2003.
-
On the New Microsoft Exchange Connection Wizard's Welcome page, select Next.
-
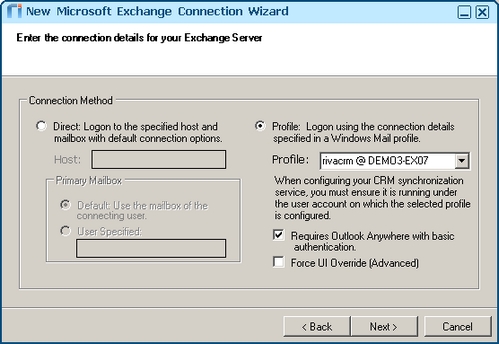
Configure the following settings:
-
Profile: Select the Outlook profile for the connection in the drop-down list; for example, rivacrm @ DEMO3-EX07
-
Requires Outlook Anywhere with Basic authentication:
-
If the Outlook profile is configured for basic authentication, select the check box.
-
If NTLM authentication is configured in the Outlook profile, clear the check box.
-
Select Next.
-
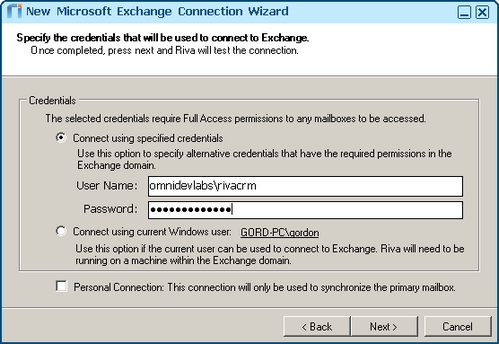
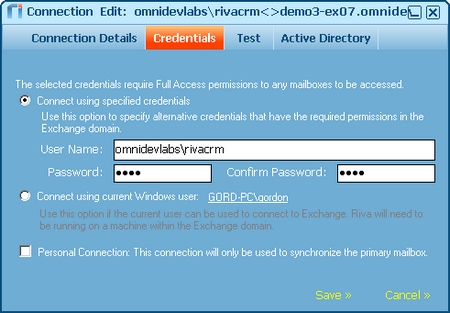
Select Connect using the specified credentials. Provide the login credentials for the Exchange account that has been configured with the "Full Access" or "Impersonate" permissions to the target Exchange accounts that will be synchronized with the target CRM system.
-
Select Next, and select Finish.
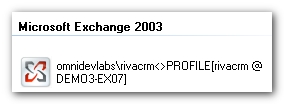
An Exchange 2003 connection object appears in the right pane of the Riva Manager application.
-
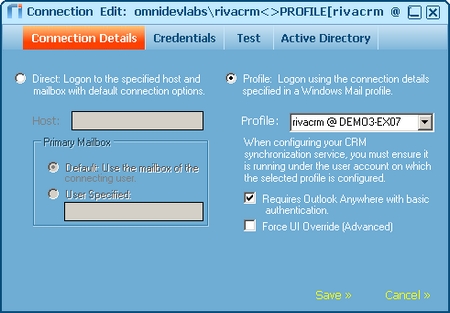
Double-click the connection object.
-
Select Connection Details, and confirm that the connection details look correct.
-
Select Credentials, and confirm that the credential details look correct.
-
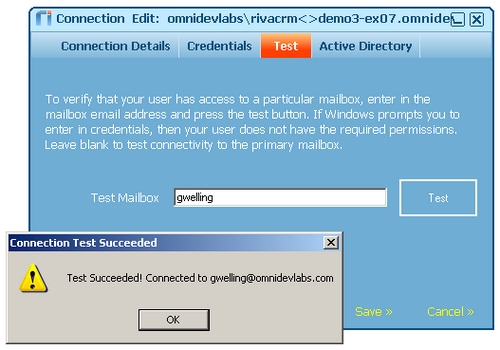
Select Test. On the Test tab, provide the Exchange account name for one of the Exchange accounts that will be synchronized with the target CRM, and select Test.
-
Whether the Connection Test Succeeded or Connection Test Failed message box appears, select OK, and select Save.
-
If the connection test fails, take measures to correct the “full access” or “impersonate” permissions assigned to the Exchange connection account. Repeat the test until it is successful.


