|
Article ID: 536
Last updated: 14 Mar, 2019
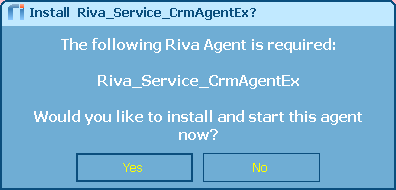
Note: The Riva sync service used to be called the Riva CRM Agent service. Contents: Install the ServiceAfter the first CRM sync policy has been configured, the policy can be saved and the Riva sync service can be installed. When prompted to save and start the Riva sync service, select Yes to install the corresponding Windows service. If the Riva sync service was not installed when the first Riva sync policy was saved or if the service had to be uninstalled, there are two methods to choose from to install or reinstall the service: Install the Riva Sync Service by saving a sync policy
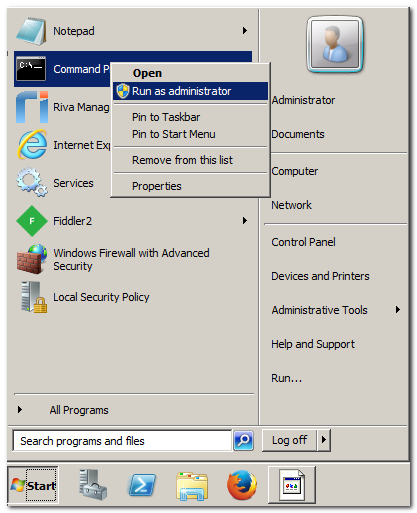
Manually install the Riva Sync Service
Configure the Riva Sync ServiceDepending on your environment, some configuration settings need to be set:
Service starts automaticallyBy default, the Riva sync service is installed so that it starts automatically on a Windows restart. Ensure that Startup type is set to Automatic (Delayed Start).
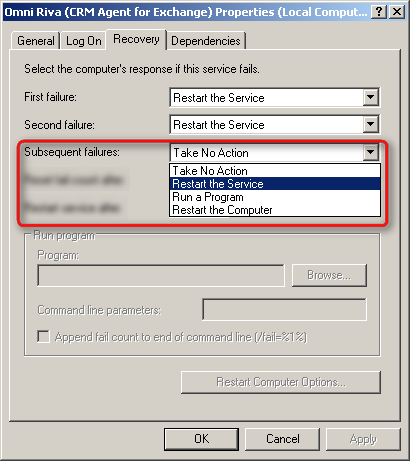
Set recovery optionsThe Riva sync service is sometimes not configured to restart if the service stops. Ensure that First failure, Second failure, and Subsequent failures are all set to Restart the Service.
This setting is especially important if there is a MAPI connection. Serious MAPI connection issues can force the service to exit or abort to a stop status. This setting forces the service to always restart. Set the same recovery options against any additional Riva connection Agent service that was installed when creating one of the following connections:
Set the Log On Identity: (Riva 2.4.47 or higher.) For connections to Exchange 2016, 2013, 2010, or 2007 SP1To set the Log On identity:
Set Log On Identity - for Direct MAPI or EWS on Windows 2008 or Windows 7For EWS connections, if an old version of Riva is installed on Windows Server 2008 or Windows 7 (x86 or x64), Windows UAC can prevent the service from running properly, leading to the service getting stuck in Stopping mode when attempting to restart. In some circumstances, Riva cannot open a file in a Windows Temp folder path or write to a local read-only database file. These issues can be prevented by configuring the service to log on as a local or AD account that is a member of the local Administrators group. For direct MAPI connections, the Windows operating system has to run the Riva sync service by using a local or AD account that is a member of the local Administrators group, so that all the appropriate Exchange connection code is properly initialized. To ensure that this happens, take the following corrective action:
Set Log On Identity - for Outlook Profile MAPI connections onlyFor Outlook Profile MAPI connections, the Windows operating system has to run the Riva sync service by using the Windows logged-on account that created the Outlook Profile that is configured in the Riva connection to Exchange. That account must be granted sufficient local Windows system permissions so that all the appropriate Exchange connection code is properly initialized. To ensure that this happens, take the following corrective action:
Configure the Riva Sync Service to restart dailySome COM-dependent Riva connections (like Infor CRM, GoldMine, and Exchange MAPI) can use so much Windows memory that the service stops functioning. The Riva server includes an app.setting option to force the Riva sync service to restart daily, which releases resources the service is using and helps improve stability. For instructions, see Force restart of the Riva sync service for COM-dependent connections.
This article was:
Helpful |
Not helpful
Report an issue
Article ID: 536
Last updated: 14 Mar, 2019
Revision: 14
Views: 13090
Comments: 0
Also read
Also listed in
|
-.png)
.png)