The default procedure is to add mailboxes, one at a time, to a Riva sync policy. For organizations that want to add many mailboxes to the policy, Riva supports three options:
Caution: Errors occur when users are renamed in the email-enabled group and CRM but not in the Riva sync policy. For more information, see the following:
Warning
Be absolutely sure that a user is not assigned to multiple CRM policies for the same environment. This would result in duplicate records in both the mailbox and the CRM.
If multiple sync policies will be created and users will be added by using different distribution groups, we recommend implementing a common transaction folder structure. Contact the Riva Success Team to ask to configure that structure for you.
For more information, see Do not run Riva twice against the same user: That article includes information on how to recover from running Riva twice against the same user.
Use Exchange Distribution Groups
Riva supports using Exchange-enabled AD groups (distribution groups). Both the distribution group and members of the group must be mail-enabled and visible in the global access list.
To add a distribution group:
-
Start the Riva Manager application. On the menu bar, select Policies. Right-click the sync policy, and select Edit.
-
In the window that appears, for the Mailboxes, select add >>.
-
In the Mailbox Browser window, enter the common name for the desired distribution group, and select check name >>.
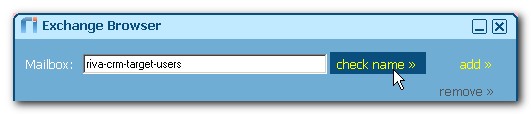
Result: The full email address assigned to the distribution group mailbox should resolve and be displayed.
-
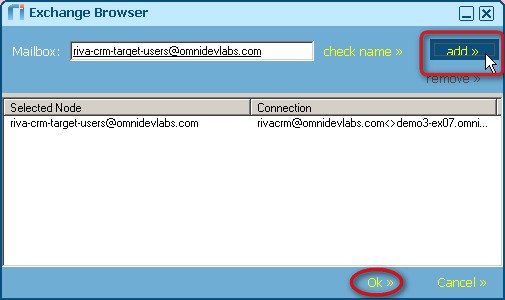
Select add >> to add the group to the list.
-
Select OK to close the Mailbox Browser window.
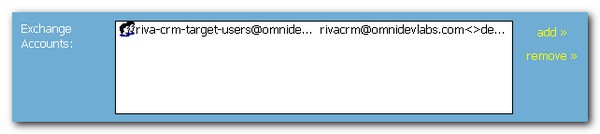
Result: The distribution group now appears in the list of Mailbox Accounts in the General tab of the sync policy.
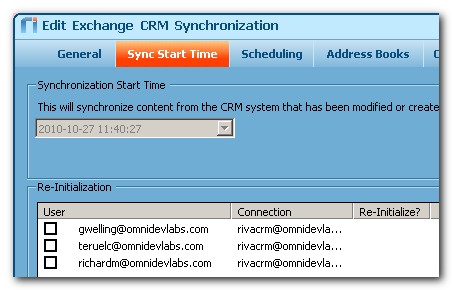
After the sync policy is saved and the initial synchronization cycle is complete for the users that are members of the selected distribution groups, the list of group members is displayed in the Re-Initialization list on the Re-Initialize or Sync Start Time page of the policy.
Note: In sync policies created in Riva 2.4.46 or higher, the Re-Initialize page replaces the Sync Start Time page.
Detecting changes to the members of distribution groups
By default, Riva dynamically refreshes changes made to the membership of distribution groups every 24 hours.
The list of users in assigned distribution groups is also gathered when the synchronization service starts.
- To Force Riva to Refresh: In the Riva Service Monitor application, select Restart or manually stop and start the service.
- To Enable Automatic Refresh: Starting with Riva 2.4.21, an advanced option can be applied to enable an automatic refresh of assigned distribution groups.
To enable automatic refresh interval:
Troubleshooting changes to the members of distribution groups
If changes made to the distribution group have not been detected by Riva, proceed as follows.
To troubleshoot changes to the members of distribution groups:
-
Confirm if the changes to users in the distribution group were made in Outlook. If so, confirm that the changes appear in the member list of the group. To do so, use Exchange Management Console, Exchange Manage Shell, or Exchange Admin Portal (Exchange 2013 or higher).
-
Confirm that users that have been added are visible in the Global Access List (GAL). If the user is not visible in the GAL, Riva cannot detect the user when resolving the membership list of the group.
-
If the user is not visible in the GAL, manually add the user to the sync policy file by using the steps described in Manually edit the policy XML file.
-
If the user is visible in the GAL, perform the following steps.
-
In the Riva Service Monitor application, stop the Riva sync service.
-
In the Riva Manager application, remove the distribution group from the sync policy.
-
Start the Riva sync service.
Result: Riva removes the group members from the active user sync queue.
-
Let Riva perform two or three complete sync polls of all of the active users.
-
Stop the Riva sync service.
-
In the Riva Manager application, add the distribution group back to the sync policy.
-
Start the Riva sync service.
Result: Riva resolves the member list of the distribution group members.
-
In the Riva Service Monitor application, confirm the users in the active user list.
Import Mailboxes from a .CSV File
(Release 2.4.40 or higher.)
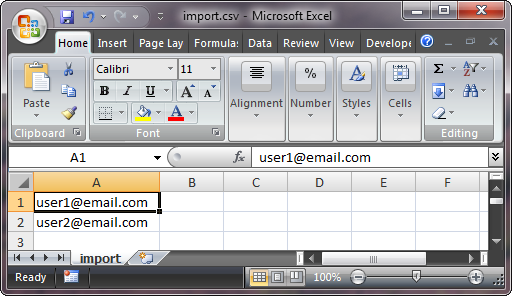
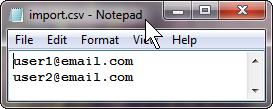
Required format for the .csv file:
One email address per line:
To import mailboxes from a .csv file:
-
In the Riva Manager application, on the menu bar, select Policies.
-
In the right pane, right-click the sync policy, and select Edit.
-
In the window that appears, to the right of the Mailboxes list box, select add >>.
-
At the bottom of the Mailbox Browser window, select Import >>.
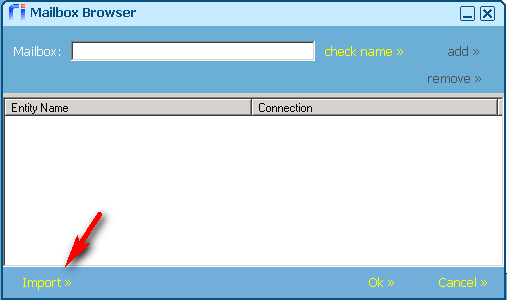 .
.
-
In the window that appears, navigate to the desired .csv file, and select Open.
Manually Edit the Policy XML File
To add multiple users to a sync policy, one method consists in manually editing the .policy XML file for the sync policy. Policy files are located in the Riva\Configuration folder and should be modified only if the Riva sync service is stopped.
-
In the Riva Manager application, edit the policy, and ensure that one target mailbox user has been added to the policy.
Note: This ensures that one example of the correct formatted EntityName entry is available to copy.
-
Do one of the following:
-
In the Riva Service Monitor application, stop the service; or
-
Use Windows services to stop the Omni Riva Sync Service. (In older versions of Riva, the service was named Omni Riva (CRM Agent for .... ).)
-
Make a backup copy of the applicable sync policy file, and move it out of the Riva\Configuration folder.
-
Use a standard ASCII text editor to open the applicable policy file. Copy the existing target exchange user immediately below the first entry. Modify the EntityName value entry to use the primary exchange mailbox email address of another user for synchronization.
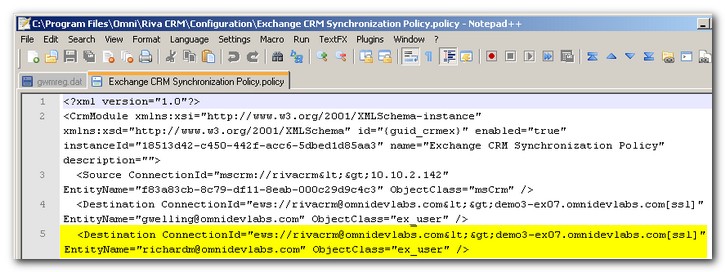
Note: Remember that the primary email address value of the CRM account must be identical to the email address value of the syncing Exchange mailbox account.
-
Save the .policy file.
-
In the Riva Manager application, edit the policy. On the General tab, ensure that the new users appear on the Mailbox Accounts list.
-
Do one of the following:
-
In the Riva Service Monitor application, start the service; or
-
In Windows services, start the Omni Riva Sync Service. (In older versions of Riva, the service was named Omni Riva (CRM Agent for .... ).)
-
In the Riva Service Monitor application, monitor the additional user accounts for possible email mismatch or license errors.
Applies to
- Riva On-Premise for Office 365 and Exchange:
