This article describes how to create and test an Enterprise GroupWise Connection in Riva. This type of connection depends on an eDirectory connection to read and select the target users in the Riva sync policy. This type of connection uses a GroupWise Trusted Application Key to provide admin level access to impersonate into the "target" user mailbox accounts:
Note: The Riva
Create trusted application key wizard works only with GroupWise 7 or 8 systems provided that the Riva system has admin level file system access to the wpdomain.db file of the primary GroupWise domain. The wizard produces a trusted application key that is not GroupWise 2012 compatible.
The recommended best practice for all Riva for GroupWise servers is to
manually create a GroupWise trusted application key. The steps in this article are based on using a manually generated GroupWise trusted application key.
For Riva servers that attempt to connect to an upgraded GroupWise 2012 server, the previously Riva-created trusted application key will fail. For instructions on how to correct this situation, see
Upgrade to GroupWise 2012 Breaks Riva Trusted App Key.
System Requirements
Before creating an Enterprise Riva connection to GroupWise, ensure that all of the system requirement preparations have been completed.
Create the eDirectory Connection
To create the eDirectory connection:
-
Start the Riva Manager application. On the menu bar, select Setup. In the left pane, select Novell eDirectory to start the eDirectory connection wizard.
-
On the Welcome to Novell eDirectory Connection Wizard page, select Next.
-
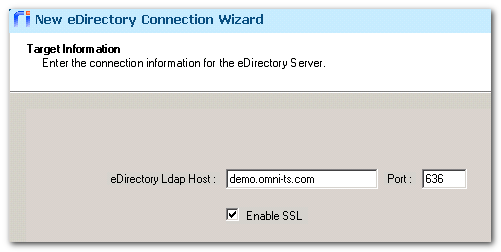
Provide the information for the eDirectory authentication server (the server the users authenticate to):
-
Select Next.
-
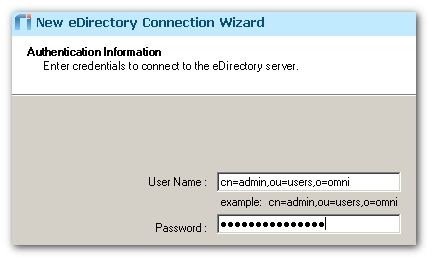
Specify the LDAP context name of the eDirectory connection user account that has supervisor rights to the root of the eDirectory tree.
-
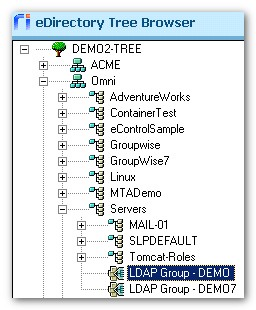
On the Collect "Ldap Group Distinguished Name" page, select the select >> button.
-
Browse to and select the LDAP Group for the server that you identified at Step 3. Select OK.
-
Select Next.
.png)
-
On the Results for matched/Not Matched Attribute List and map page, ensure that the Skip Mapping Step check box is cleared, and select Next.
-
On the Results for matched/Not Matched Class List and map page, ensure that the Skip Mapping Step check box is cleared, and select Next.
-
On the Refresh eDirectory LDAP Server page, select Next.
-
On the eDirectory connection successful page, select Finish, which should autostart the GroupWise Connection Wizard. Select Cancel.
This creates an eDirectory connection on the Riva Manager application's Setup page.
Test the eDirectory Connection
To test the eDirectory connection:
-
In the Riva Manager application, on the menu bar, select Setup. In the right pane, select the Novell eDirectory connection object.
-
On the General page, ensure that the user name for the connection is correct.
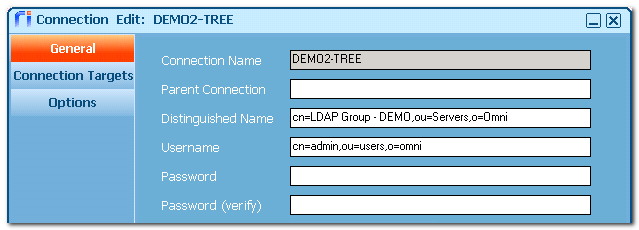
Note: If the user name is incorrect, close the Connection Edit window, right-click the connection, and select Remove. Re-run the eDirectory connection wizard to recreate an eDirectory connection.
-
On the Connection Targets page, select the target connection, and select Test the connection target.
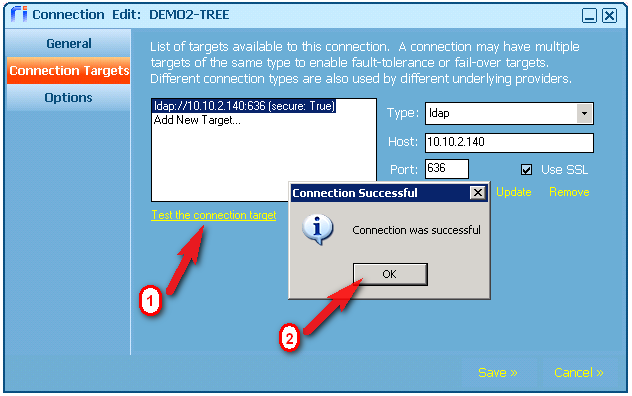
Select OK to close the test result message box.
-
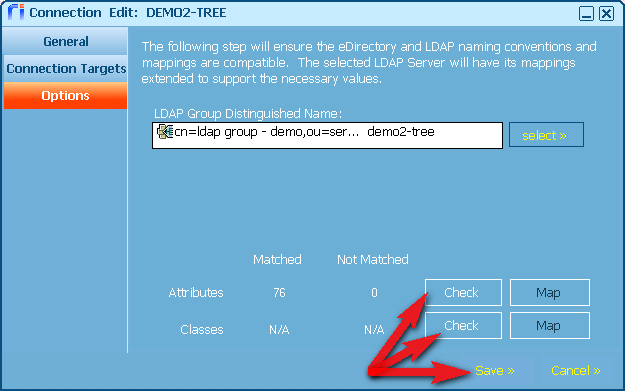
On the Options page, select both Check buttons to verify that the Attribute and Class mappings are complete.
-
Select Save to close the Connection Edit window.
Create an "Enterprise" Riva Connection to GroupWise
To create a Riva connection to GroupWise by manually providing the GroupWise trusted application key value:
-
In the Riva Manager application, on the menu bar, select Setup. In the left pane, select the Novell GroupWise connection wizard.
-
On the Welcome to the GroupWise Wizard page, select Enterprise Connection, and select Next.
-
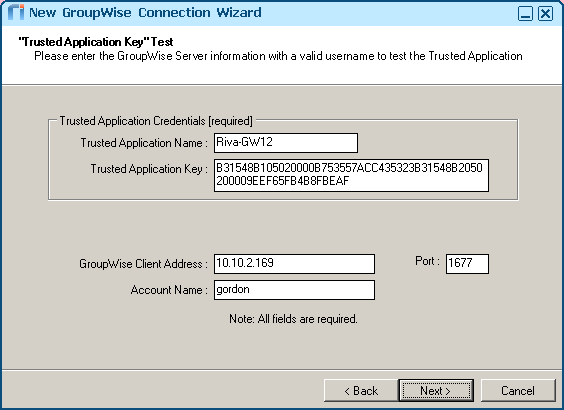
On the Trusted Application Key page, select the Manually Provide an existing Trusted Application Key option, and select Next.
-
Provide the trusted key values (see GroupWise trusted application key value), and the IP address, TCP port, and any GroupWise user name in that post office.
-
Select Next.
-
On the Choose detection type page, select Next.
-
On the Choose an eDirectory Connection page, select Next.
-
On the GroupWise Connections Detected page, leave the post offices and the primary domain, remove any domain that does not have post offices, and select Next.
-
On the Internet Addressing page, select the desired default address format from the drop-down list, and click Next.
-
On the Automatic Configuration Results page, select Finish.
Test the Trusted Key in the Post Office Connections
To test the Post Office objects for the new trusted application key:
-
In the Riva Manager application, select the Setup tab. In the right pane, double-click a post office connection.
-
In the Connection Edit window, select the Test Trusted Key tab.
The name of the new trusted key should be displayed.
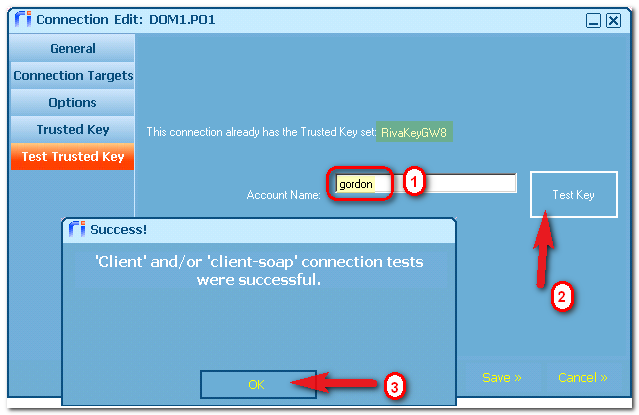
-
Enter a GroupWise user name from that post office, and select Test Key.
-
In the Success! message box, select OK.
-
Select Cancel to close the Connection Edit window.
Applies to
- Riva 2.4.37 or higher.
- Riva for GroupWise CRM Integration.
- Riva for GroupWise Policies & Reports.
- Riva for GroupWise Managed Applications.
- Riva for GroupWise Identity Integration Server.
