This article describes how to create and test a Direct GroupWise Connection in Riva. This type of connection uses the credentials of a GroupWise account that has been assigned GroupWise proxy access with full permissions to the target user GroupWise mailbox accounts. This type of connection is typically used when:
- GroupWise is installed on a SLES 10 server (not in the eDirectory tree), or
- a GroupWise trusted application key cannot be created, or
- the Riva server cannot authenticate to the eDirectory tree using a LDAP connection.
Contents
System Requirements
Before creating a "Direct" Riva connection to GroupWise, ensure that all of the system requirement preparations have been completed.
Create a "Direct" Riva Connection to GroupWise
To create a "Direct" Riva connection to GroupWise using the credentials of a GroupWise account that has been assigned proxy access to the target user mailbox accounts
-
Launch the Riva Manager application, and select the Setup tab. In the left pane, select Novell GroupWise to open the connection wizard.
-
On the wizard's Welcome page, select Direct / Private Connection, and select Next.
-
On the Welcome to Riva’s GroupWise Wizard page, select Next.
-
On the Enter the information to connect to GroupWise page, provide the credentials for the Riva connection user account. (See Prepare the Riva connection user account for GroupWise.)
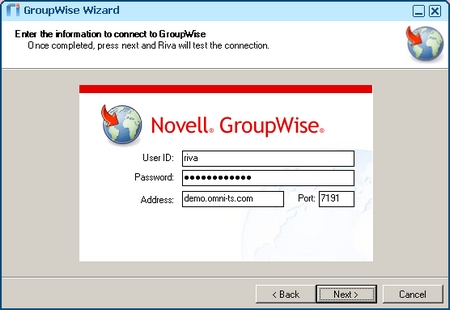
- User ID and Password for the Riva connection user.
- Address - Provide the DNS name or IP address for the post office hosting the Riva connection user's mailbox.
- Port - Provide the TCP port for SOAP that is assigned to the post office hosting the Riva connection user's mailbox.
-
On the GroupWise Wizard complete page, select Finish.
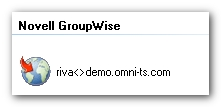
This creates a private GroupWise connection object.
Test the Direct GroupWise Connection
You can now test the Direct GroupWise connection object, and the test should pass.
-
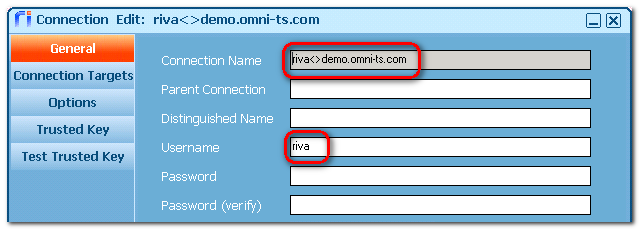
In the Riva Manager application, select the Setup tab. In the right pane, double-select the GroupWIse connection object to open the Connection Edit window.
- In the General tab, confirm that only the Connection Name and Username fields are populated with the correct connection information.
-
In the Connection Targets tab, select the target connection, and select Test the connection target.
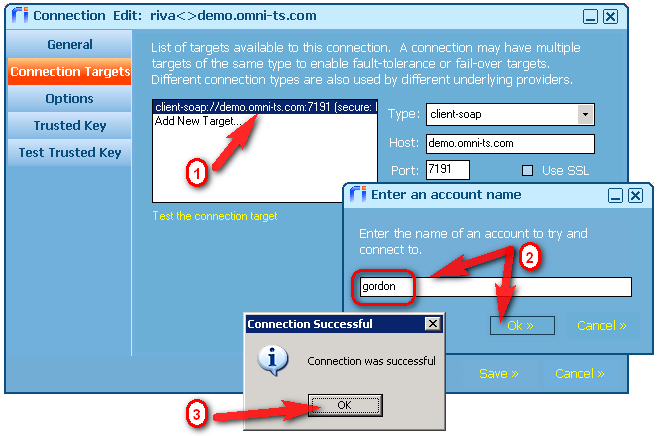
In the Connection Successful message box, select OK.
-
In the Options tab, specify the email domain name and address format configured for the connection.
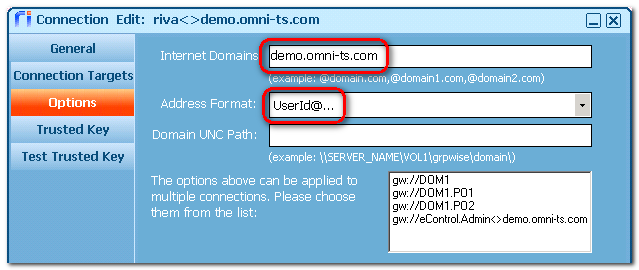
Do not add the Domain UNC Path value or select any of the GroupWise connections in the list.
-
Click Save to save the configuration changes and close the Connection Edit window.
Applies to
- Riva 2.4.37+
- Riva On-Premise for GroupWise
