|
Article ID: 560
Last updated: 15 Mar, 2016
WARNING: The Riva for Salesforce Single Sign-On connection strategy described in this article is not supported for new Riva On-Premise installations.
New Riva On-Premise installations include a new strategy to provide impersonation access into Salesforce: the Standard Impersonation Model. For instructions on implementing the Standard Impersonation Model, see Prepare Salesforce for Riva and Create and test a Salesforce connection. For current Riva On-Premise installations that use Salesforce Single Sign-On, administrators are encouraged to upgrade their Riva for Salesforce connection setup to the Standard Impersonation Model. For assistance, contact the Riva Success Team. The procedures in the following article have been deprecated. The information is being retained for clients who have not yet converted to the new Standard Impersonation Model. For single-user sync profiles (non-SSO), Riva server requires a dedicated connection to Salesforce for each target user. This article will cover: System RequirementsPrior to starting this procedure, ensure the following requirements are met:
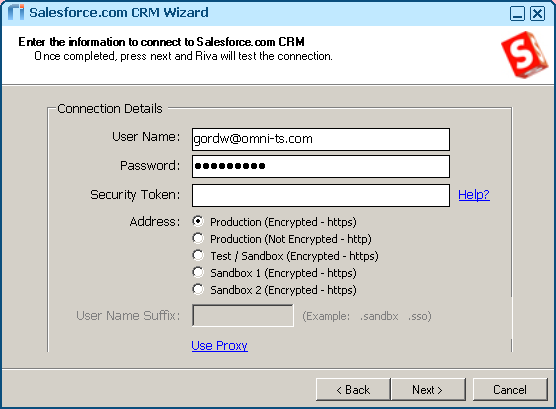
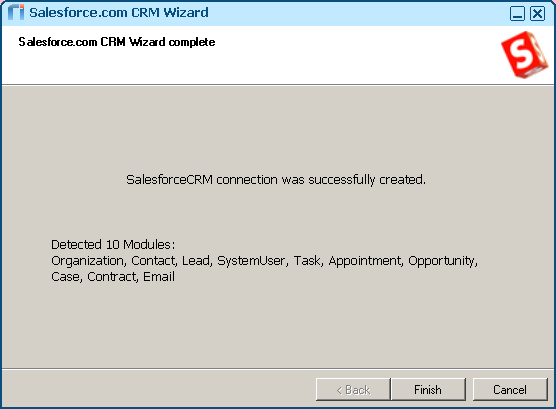
Create the Riva connection to Salesforce
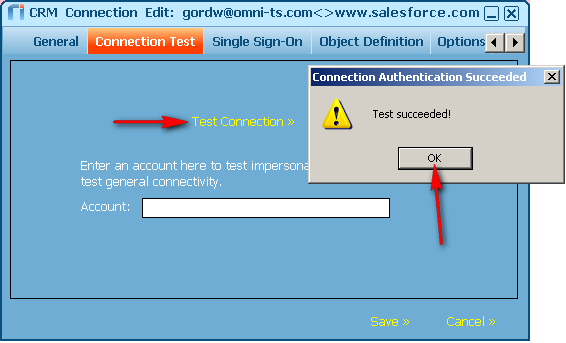
Test the Riva connectionThese steps can be used at any time to test that the Riva connection can connect to the target Salesforce.com organization using the credentials of the target Salesforce user.
Since this is a single-user connection which is not enabled for Single Sign-on, adding a Salesforce user name to the "account" field and clicking Test Connection >> will always fail.
Article ID: 560
Last updated: 15 Mar, 2016
Revision: 2
Views: 4752
Also read
|