|
Article ID: 534
Last updated: 15 Mar, 2016
WARNING: The Riva for Salesforce Single Sign-On connection strategy described in this article is not supported for new Riva On-Premise installations.
New Riva On-Premise installations include a new strategy to provide impersonation access into Salesforce: the Standard Impersonation Model. For instructions on implementing the Standard Impersonation Model, see Prepare Salesforce for Riva and Create and test a Salesforce connection. For current Riva On-Premise installations that use Salesforce Single Sign-On, administrators are encouraged to upgrade their Riva for Salesforce connection setup to the Standard Impersonation Model. For assistance, contact the Riva Success Team. The procedures in the following article have been deprecated. The information is being retained for clients who have not yet converted to the new Standard Impersonation Model. The target Salesforce user accounts that will be enabled for Riva SSO must be granted a special SSO-related permission. This is done by enabling the required permission in Salesforce user profiles and/or permission sets that the user will be assigned to. Once users are added to an SSO-enabled user profile or permission set, their Salesforce login will change to use their Exchange account password. NOTE - The steps in this article apply to Salesforce.com Enterprise and Unlimited organizations only. Salesforce.com Professional organizations do not provide the ability to create/assign user profiles. All users (except system administrators) automatically become SSO-enabled as soon as the Delegated Authentication Gateway URL is set.
Because organizations may not want to enable all of their Salesforce users for SSO, the best practise is to "clone" existing user profiles and enable those cloned profiles for SSO, or create and enable permission sets for SSO. This article discusses:
RequirementsEnsure that the following requirements are met before enabling Salesforce users for SSO:
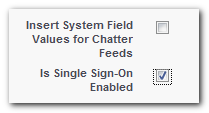
Options for enabling SSO for Salesforce UsersEnabling SSO involves checking the "Is Single Sign-on Enabled" permission against a user profile or a permission set. If a user is assigned to an SSO-enabled user profile or permission set, Salesforce will pass all authentication requests to the DA-SSO gateway URL. Deciding which option to use depends on how Salesforce user accounts will be enabled for SSO:
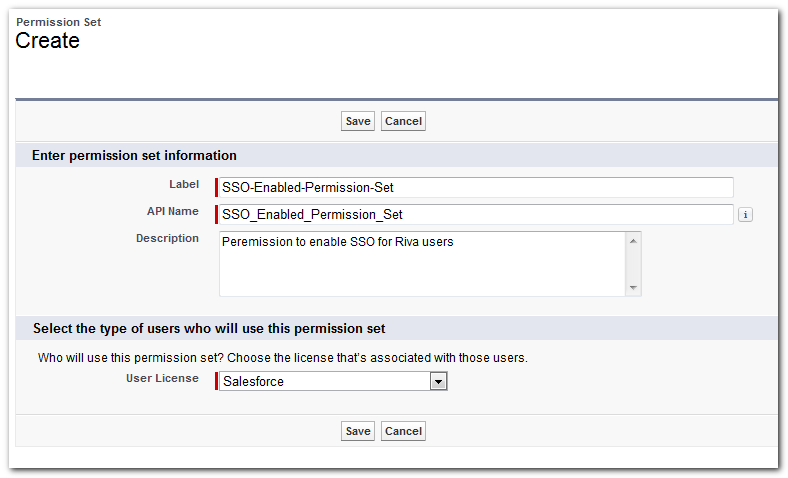
How to create and configure a Permission SetTo create and configure a permission set for SSO:
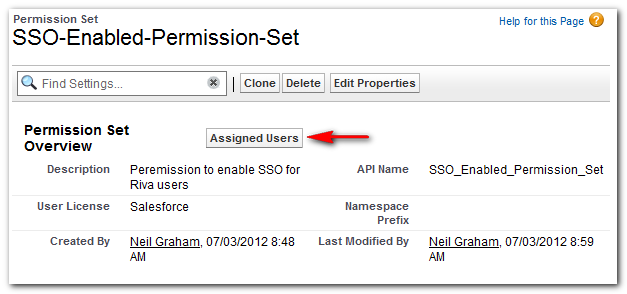
Assign Users to a Permission SetTo assign Salesforce users to a permission set:
IMPORTANT NOTE - Do not assign target Salesforce users to SSO-enabled permission set UNTIL you are ready to switch the user's authentication method to Single Sign-on. Once a Salesforce user is enabled for SSO, the user's login to Salesforce will change to use the AD/Exchange password. The Salesforce password changing features will become disabled for that user.
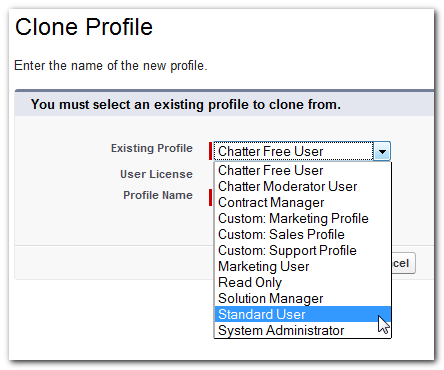
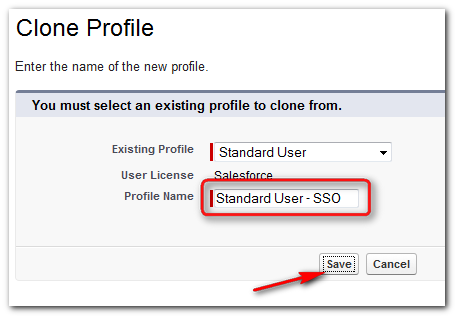
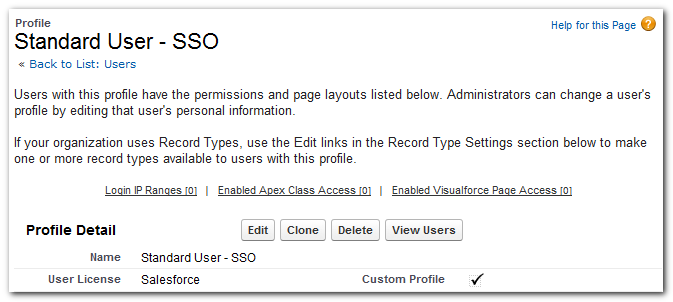
How to clone a User ProfileAs a best practise, we recommend creating a clone of existing user profiles for SSO-enabled users: To clone a user profile:
How to enable a User Profile for SSOTo enable a user profile for SSO:
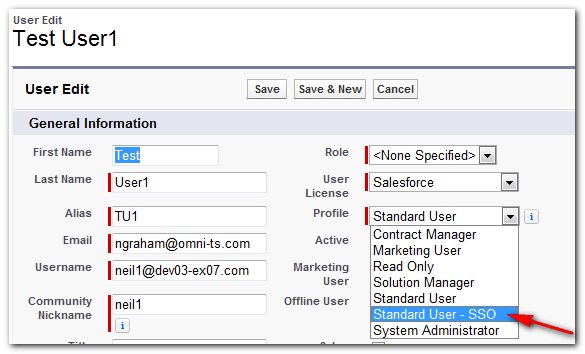
Assign users to an SSO-enabled User ProfileW A R N I N G - Do not assign target Salesforce users to SSO-enabled user profiles UNTIL you are ready to switch the target user's authentication method to Single Sign-On. Once a Salesforce user is enabled for SSO, the user's login to Salesforce will change to use the AD/Exchange password. The Salesforce password changing features will become disabled for that user.
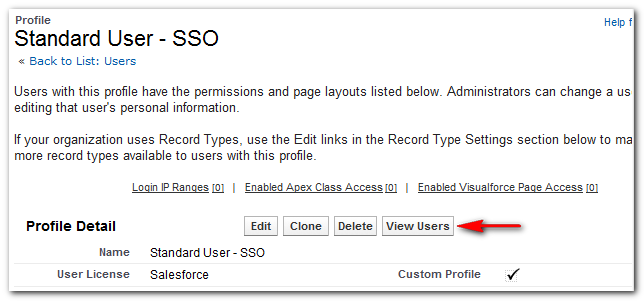
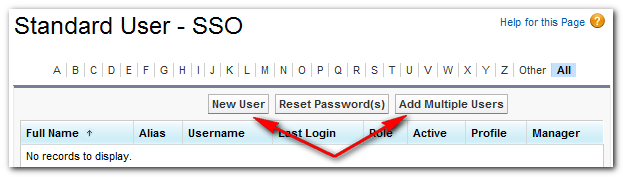
You can assign Salesforce users to a user profile from the Profile Detail page or from a user's page under Manager Users. For more information, see the following procedures. To assign users on the Profile Detail page to an SSO-enabled user profile:
To assign a user from the user's page to an SSO-enabled user profile:
Article ID: 534
Last updated: 15 Mar, 2016
Revision: 3
Views: 18612
Also listed in
|