If a GroupWise admin adds a new Post Office and/or domain, the appropriate connections have to be added to the Riva Manager application before Riva can sync user mailboxes from the new post office to their corresponding CRM user accounts.
This article applies to "
Legacy" GroupWise connections for
GroupWise 2012, 8,x and 7.x. GroupWise 2014 connections are not eDirectory-based. If the users in the new Post Office cannot be synced by using the existing GroupWise 2014 connection, add a new connection by using the steps in
Create & Test a GroupWise 2014 Connection.
This article discusses:
Add the Post Office Connection
To add a Riva connection for a new or existing post office:
-
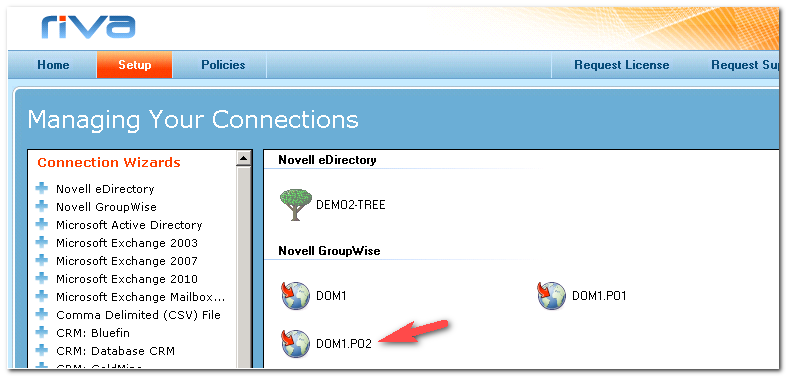
Launch the Riva Manager application, and select the Setup tab. In the left pane, select Novell GroupWise.
-
On the Welcome to the GroupWise Wizard page, select Enterprise Connection, and select Next.
-
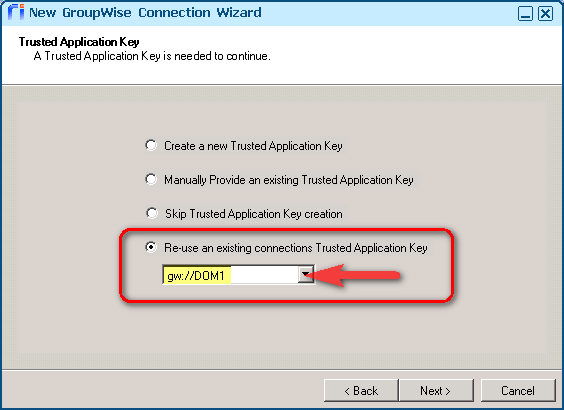
On the Trusted Application Key page, select Re-use an existing connection Trusted Application Key, and select Next.
-
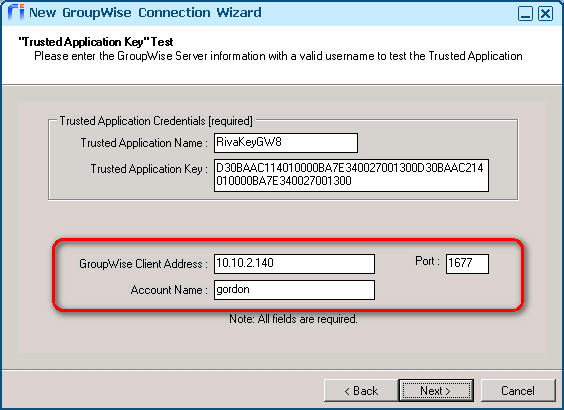
On the Trusted Application Key Test page, add the correct IP address, TCP Port value and username for a user in a post office that Riva is already syncing, and select Next.
-
On the Choose detection type page, select Next.
-
On the Choose an eDirectory Connection page, select Next.
-
If an error message box reports not detecting whether SOAP is enabled for certain connections, select OK.
-
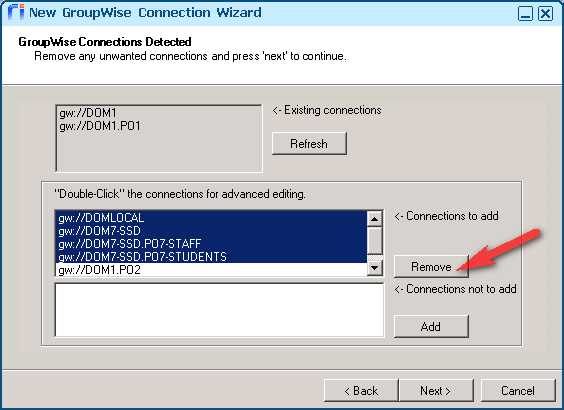
On the GroupWise Connections Detected page, select the connections that you do not want to add, and select Remove.
-
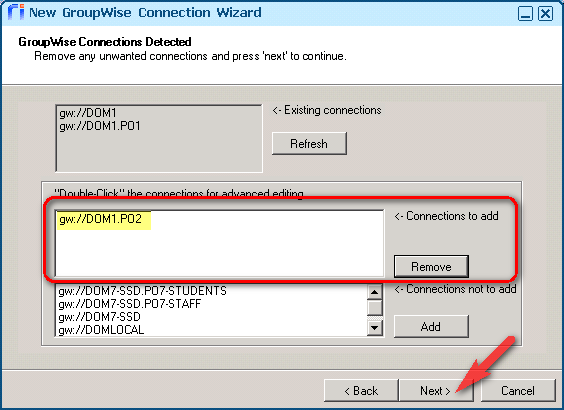
On the same page, confirm that the post office that you want to add is the only item in the Connections to add list, and select Next.
-
On the Internet Addressing page, select the desired default address format from the drop-down list, and select Next.
-
On the Automatic Configuration Results page, select Finish.
A GroupWise connection for the new post office will appear in the list.
Test the connection
To confirm that the connection is detecting user mailboxes through the new post office connection:
-
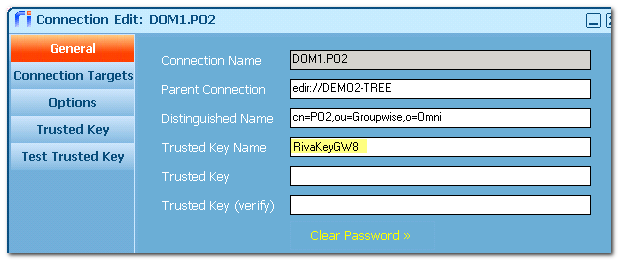
Double-select the new post office connection object.
-
In the Connection Edit window's General tab, confirm that the Trusted Key Name value is visible.
-
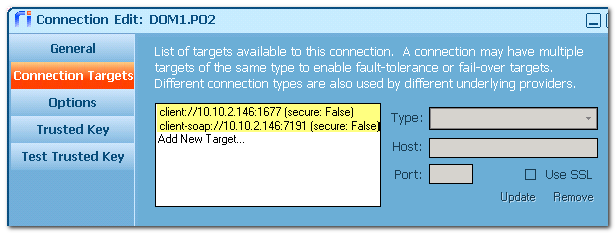
In the Connection Targets tab, confirm that the IP address and TCP port values match the post office connection properties.
-
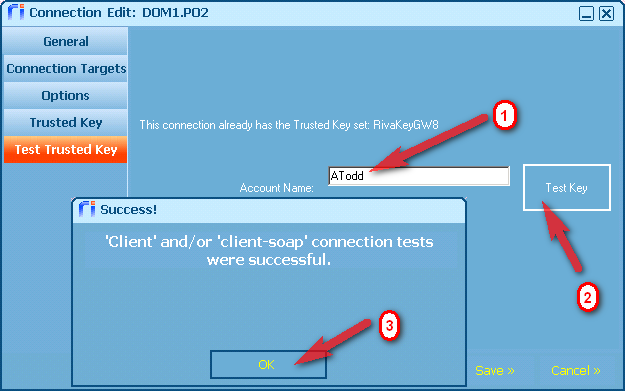
In the Test Trusted Key tab, add a username from that post office, and select Test Key. In the Success! message box, select OK.
-
In the Connection Edit window, click Cancel to close the window.
Applies to
- Riva for GroupWise Enterprise Impersonation Connections (for Groupwise 7, 8, 2012)
