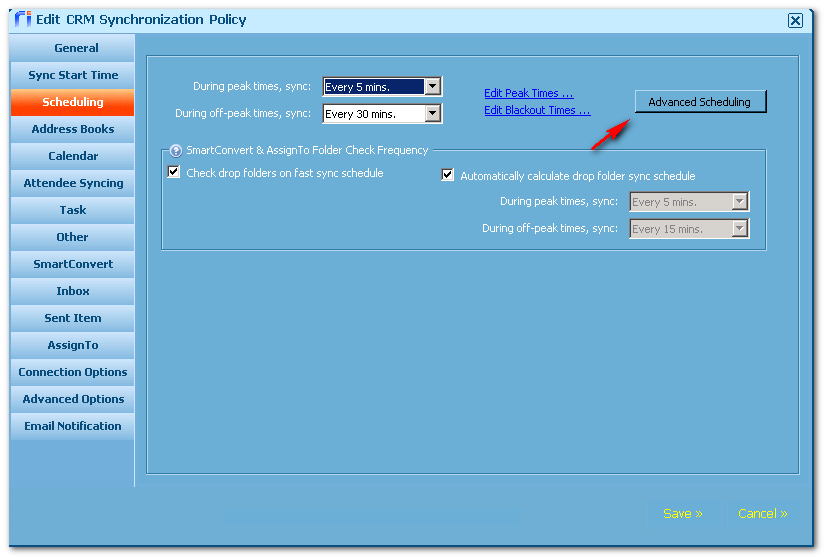
An advanced scheduling page provides the following options:
On the Scheduling page of the sync policy, select Advanced Scheduling.
-
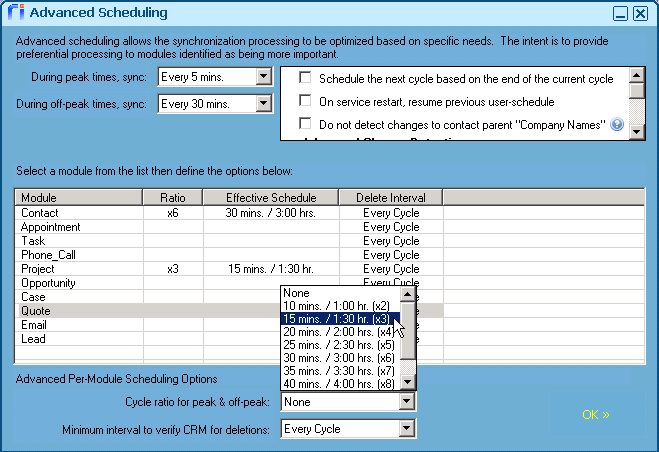
In the Advanced Scheduling window, set the default Peak and Off-peak sync times to apply to all modules.
-
Set unique schedules for any of the modules to meet specific sync requirements.
To set or edit a module schedule:
-
In the table, select the desired module.
-
Below the table, select the Cycle ratio for peak & off-peak, and select the desired ratio.
Example: (x3) sets a module schedule that is 3 times longer than the base schedule.
-
Select Add >> to set that module schedule.
-
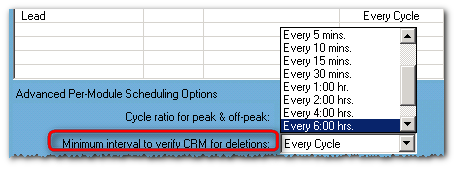
Set the Minimum interval to verify CRM deletions.
This option controls how often Riva syncs deletions detected in the CRM. The default value is Every Cycle. Use this option to reduce the amount of sync work performed to remove stale data.
To remove a module schedule:
-
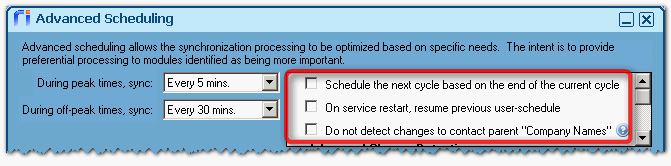
Choose to enable or disable any of the three options above the table:
-
Schedule the next cycle based on the end of the current cycle: By default, Riva schedules the next sync based on the start time of the current sync cycle. For example, if this cycle starts at 1:05 and the schedule is set for every 10 minutes, the next cycle is scheduled for 1:15. This option changes the schedule based on the stop time of the current sync cycle. For example, if this cycle starts at 1:05 and stops at 1:06, the next sync cycle will be scheduled for 1:16. This is designed to reduce the occurrences of high utilization by evenly spreading out sync cycles. This option is not usually desired by users, because they can never tell when the next sync cycle will start.
-
On service restart, resume previous user-schedule: If the sync service restarts, Riva normally reloads the user list into the sync queue and starts syncing at the top of that list. If the service is restarted repeatedly, the users at the bottom of the user queue might not get a chance to sync data. With this option, when the sync service is restarted, Riva loads the user list in the sync queue and starts sync users where it left off before the service was restarted. This ensures that all users get a sync cycle regardless of how many times the service is restarted. This option is very useful when there is a large number of users to sync.
-
Do not detect changes to contact parent "Company Name": This option disables the polling of account or organization options in the CRM, which reduces the amount of work that is required for each sync cycle. For more information, see Disable account synchronization.
-
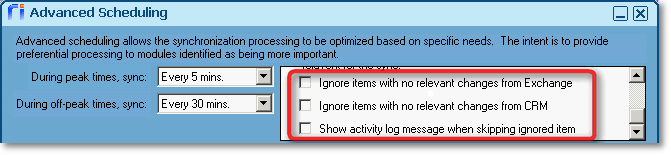
Scroll down to enable or disable Advanced Change Detection Options.
The item modification date is used to detect most changes. In some cases, an item can be modified but none of those changes are relevant for a sync (the change cannot be synced to the corresponding system). If enabled, these options ignore items with no relevant changes:
-
Ignore items with no relevant changes from Mailbox: If the check box is selected, Riva ignores all of the user's modified mailbox items where those changes will not modify the corresponding item in the CRM.
-
Ignore items with no relevant changes from CRM: If the check box is selected, Riva ignores all modified CRM items where those changes will not modify the corresponding item in the user's mailbox.
-
Show activity log messages when skipping ignored items: If this check box is selected, Riva logs a record of ignored items to the user's Activity Monitor Log file.
-
Select Ok to save the advanced schedules and options.
Applies to
- Riva 2.4.34 or higher.
- Riva On-Premise for Exchange and IBM Notes.
