|
Article ID: 491
Last updated: 19 Jan, 2018
You can choose to deploy Riva On-Premise yourself with the available Deployment Checklists or schedule a Get Started Bundle with the Riva Success team, who will lead you through the process. Learn more about deployment options at How to get started with Riva On-Premise. This article provides an overview of deploying a Riva On-Premise server for trial evaluations. These procedures can be used for "pilot" and "production" deployments of Riva On-Premise. A Riva On-Premise Deployment Model involves the following steps:
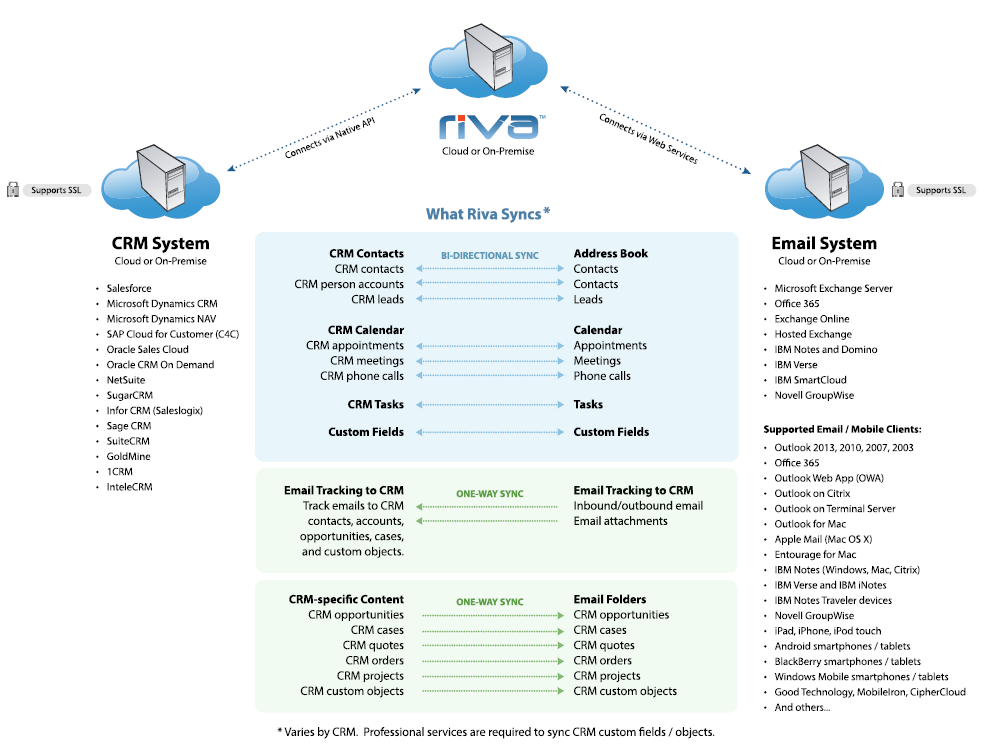
What Is Riva On-PremiseThe Riva On-Premise server provides server-to-server transparent data sync between your email and CRM systems. Riva is installed and configured once on a server. There are no plug-ins or other software to install on any of your desktop or mobile email clients.
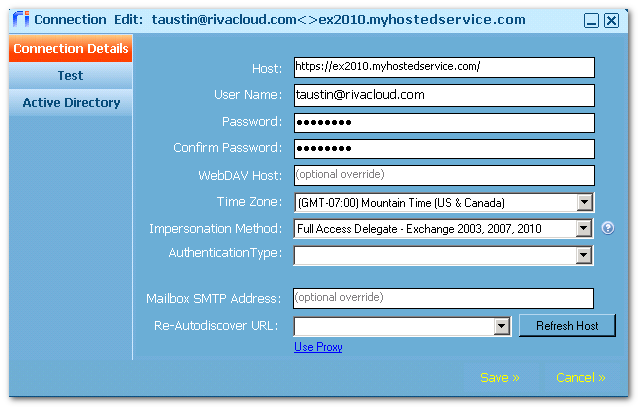
Because Riva provides server-side sync of data between your email and CRM system, Riva supports ALL email and and mobile devices that communicate with your email server. See Supported email and CRM systems and clients. Step 1: PrepareRiva is installed on a host Windows system. The Riva CRM Sync Agent Service needs to be able to connect to the target email and the CRM systems by using accounts that impersonate the target users and allow Riva to gain proxy access to the target users' mailbox and CRM account. Each email system and CRM system does have unique requirements. On the checklist, review the requirements for your CRM and email systems. Step 2: InstallInstalling Riva includes the following actions:
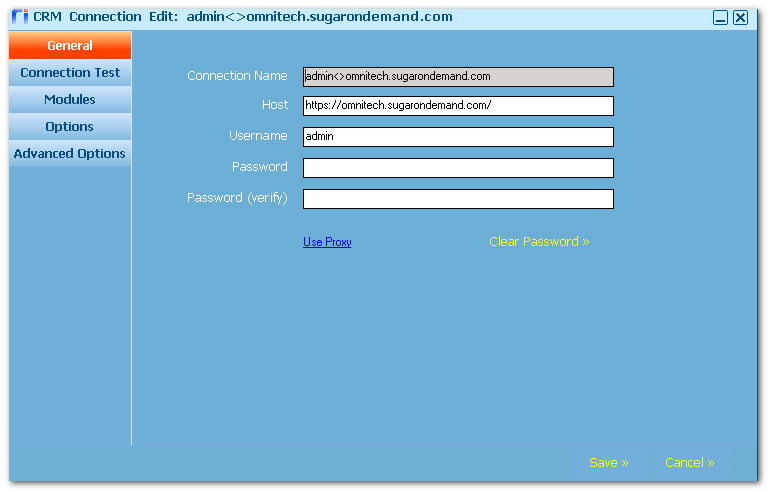
Create email and CRM connectionsA typical Riva deployment involves creating one connection to the email system by using an email account that has the necessary permissions to access the target user's mailbox to read, modify, create, and delete contacts, calendar items, tasks, email, address books, and folders, and create and assign categories and category colours. This is typically known as full access impersonation. Riva supports all hosted on-premises versions of Office 365; Exchange 2016, 2013, 2010, 2007, 2003; G Suite and Gmail; and GroupWise 7.0.3 and higher. On the checklist, follow the link to the specific CRM connection requirements.
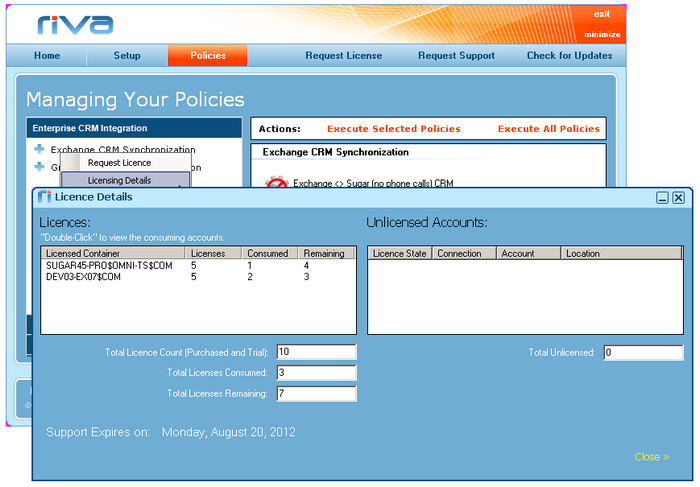
A typical Riva deployment involves creating one or more connections to the CRM system by using a CRM account that has the necessary permissions to access the target user's CRM account to read, modify, create, and delete contacts, accounts, leads, calendar items, tasks, email, and applicable activity history. Riva supports the industry leading CRM systems. License RivaIt is not required to license Riva for all of your CRM or email users. Riva is licensed for the number of users whose CRM and email accounts will be synchronized by Riva. To start the wizard that submits a licence request, select Request License in the Riva Manager application.
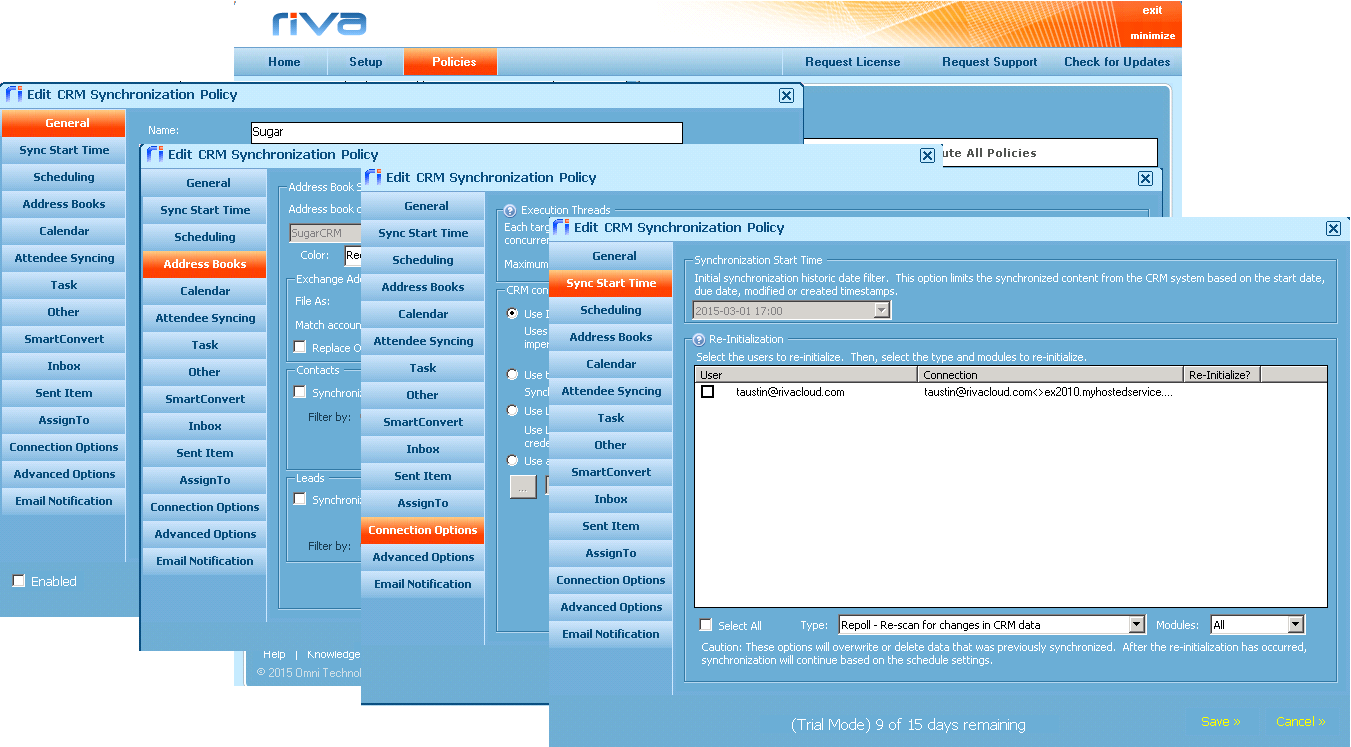
The Riva Manager application is used, among many other things, to request and activate a licence for your installation. Step 3: ConfigureAfter installing Riva, the Riva administrator uses the Riva Manager application to Configure data sync policiesOne or more CRM sync policies can be created to meet the different sync requirements of groups of users. A sync policy defines the target users, the types of data to sync, and how often data will sync. With Riva, you can apply filters to control the displayed contents and creation of data on the target systems. In addition to the options available in the Riva Manager application, numerous options can be configured on the Advanced Options page to further refine the sync process.
Install and configure the Riva CRM Agent ServiceAfter you configure the first CRM sync policy and select Save, the Riva Manager application prompts you to install the Riva CRM Agent Service. Select Yes, and the Riva sync agent will be installed with the Startup Type of Automatic (Delayed Start). (For information on this setting, see Service starts automatically.) The following window displays the Riva CRM Agent configured to start automatically on system restart.
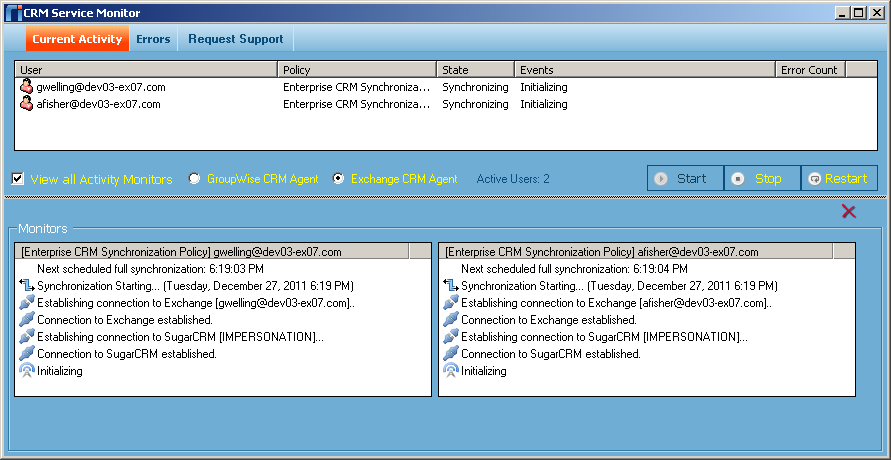
This Windows service is configured to use a local system account. The service performs the sync activities between the target user's corresponding email and CRM accounts. This service also maintains a transaction record for each piece of data that is synchronized. When the service detects that data has been modified in either of the target systems, it then syncs the data to the target system. To know how to monitor the sync service in real time, see the next section. Step 4: EnableBefore enabling a sync policy, the Riva administrator starts the CRM Service Monitor application and selects View All Activity Monitors. After saving all the desired options to the connections and sync policy, the Riva administrator enables the sync policy in the Riva Manager application.
Once the sync policy is enabled, the Riva sync service connects to the CRM and email systems, performs some initialization tests, and starts a first time sync poll of data, during which Riva syncs data from the CRM to the user's mailbox.
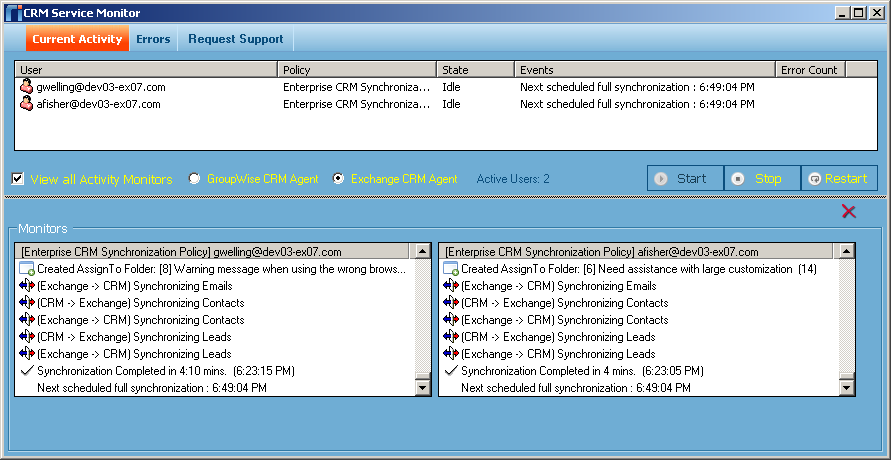
The CRM Service Monitor application displays each user's sync poll in real-time mode in an individual monitor activity pane.
The sync monitor application does not need to be open for synchronization to occur. You can Stop, Start or Restart the sync service from the monitor. The sync monitor also allows you to view all sync warnings and errors. Step 5: EvaluateA 15-day no-cost trial license should provide sufficient time to learn how Riva syncs data. You can prepare a structured test plan to help discern if customizations are required to meet specific data sync needs. You can then use a modified version of that test plan to confirm that the customizations work before deploying the solution to a "Pilot" or "Production" Riva On-Premise server. After Reading This ArticleGet started by using an available Deployment Checklist or by scheduling a Get Started Bundle with the Riva Success Team.
Article ID: 491
Last updated: 19 Jan, 2018
Revision: 9
Views: 18433
Also read
|
.png)
.png)