|
Article ID: 421
Last updated: 18 Nov, 2015
Riva supports data synchronization between NetSuite and Exchange, Google, IBM Notes, or GroupWise. This article describes how to prepare a NetSuite company account and the Riva server to support a Riva impersonation connection to NetSuite. To prepare NetSuite CRM for Riva
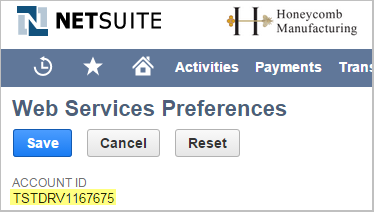
Step 1: Confirm Access to NetSuiteFrom the Windows system that will host the Riva server, confirm that you can log in to the NetSuite company account by using an admin account and a normal user account. Step 2: Enable NetSuite Web ServicesThis is a Riva requirement To enable the NetSuite free SuiteFlex Web Services feature
Step 3. (Optional.) Set Up SuiteCloud Plus Web Services LicensingRiva supports web services enabled in NetSuite roles offered in default NetSuite subscriptions. For large, enterprise NetSuite environments, Riva supports NetSuite accounts that are subscribed to SuiteCloud Plus licenses: SuiteCloud Plus licenses are not required for Riva. Step 4: Prepare a Riva Connection User in NetSuiteThe Riva connection to NetSuite uses the Standard Impersonation Model. Riva uses the permissions of the CRM user configured in the Riva CRM connection to create and modify items and data in the CRM. When Riva creates new items or modifies existing items in the CRM, Riva assigns ownership to the target user. But because the actions are being performed by the "Riva connection user", the audit fields in CRM record the "Riva connection user" as the user that created and modified the item. The Riva connection to NetSuite must use the credentials of a NetSuite user that is assigned to a default Web Services role that has sufficient permissions to create, edit, remove, export, and import data to be synchronized by Riva. Most customers create or use an existing user that is assigned to the Administrator role and configure that role as the default web services role for the NetSuite account. See How to create and configure a Riva connection account for NetSuite. If you employ custom roles that trigger workflow processes and Riva-synced data needs to trigger the same workflows, then the Riva connection user can use a custom role with sufficient permissions for the required workflow processes. There are two ways to accomplish that objective, depending on the Riva connection user default role:
For detailed instructions, see How to create and configure a Riva connection account for NetSuite. Step 5: Prepare the Target User Accounts in NetSuite
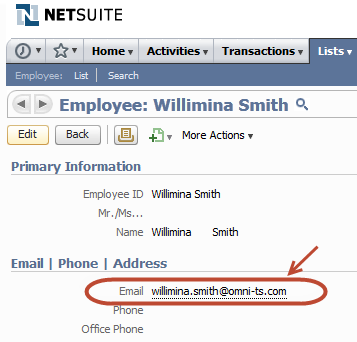
When using Riva with a connection method of impersonation, a single connection user is used to authenticate with NetSuite. This connection user synchronizes on behalf of each mailbox added to Riva. For the sync to match a mailbox with a NetSuite employee, Riva requires the NetSuite employee record to have an email address that matches the Primary SMTP Email Address. Example: If the NetSuite email address for Ian Sample is iansample@mycompany.com, then the SMTP email address value for the corresponding email account must also be iansample@mycompany.com. Because Riva connects to NetSuite with a single connection user, this user must be a privileged NetSuite user. However, this also allows Riva to synchronize data on behalf of any employee in NetSuite, even if that employee does not have a NetSuite user record. Riva can sync data on behalf of a NetSuite advanced partner center user. Bear in mind that Riva still needs to connect to NetSuite by using a privileged platform user to sync each employee's NetSuite information to the employee's mailboxes. Also, ensure that the user in Netsuite has the Sales Rep role and the Support Rep role. This is required for syncing advanced modules such as quotes, cases, and opportunities. Note: Ensure that both the Login Access and the Inactive fields are made visible on the Employee details profile.
Step 6: Gather Information Required for Creating a Riva NetSuite ConnectionGather the following information:
All of that information is required when you create the Riva connection to the NetSuite system.
Article ID: 421
Last updated: 18 Nov, 2015
Revision: 9
Views: 8744
Also listed in
|