|
Article ID: 41
Last updated: 26 Sep, 2017
Many environments require an HTTP proxy service to access internet-based resources. To access any hosted services, access the Riva online update services, or complete the Riva support request process, an active internet connection is required. Riva uses the default HTTP proxy settings set by the Internet Explorer settings. For proxies that do not require authentication, no further configuration should be required. However, for proxies that require authentication, the Internet Explorer settings do not store user credentials. The credentials must be specified for Riva to access network resources. There are three methods to configure HTTP Proxy authentication credential options:
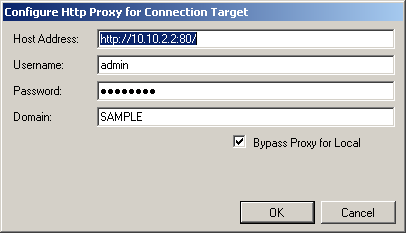
Configure HTTP Proxy for the Riva Manager Application (Release 2.4.31+)A window includes all of the option keys except Web.Proxy.BypassList. Using this window writes the option keys and values to the RivaApp.exe.config file, which can then be manually copied to the applicable Riva CRM Agent .config file.
Configure App.Setting OptionsProxy settings requiring authentication can be added to a .config file for the Riva Manager application and the Riva CRM Agent service. Six options can be applied.
If the installed version of Internet Explorer does not support storing user credentials for web proxy authentication, those settings can be set manually by adding the keys and values to the App.Setting config files. For detailed instructions, see How to create an App.Setting file to enable advanced options. Add the necessary option keys and values to the following .config files:
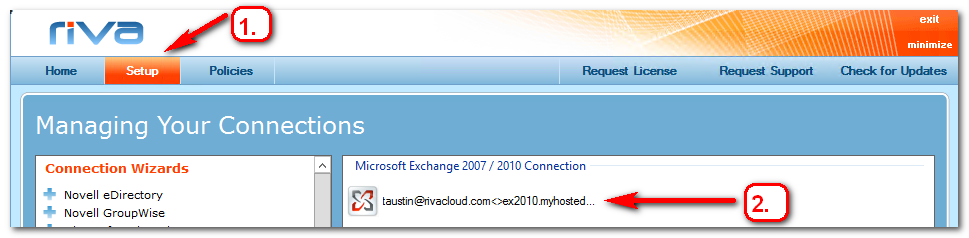
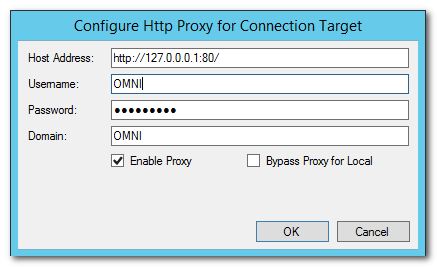
Configure HTTP Proxy Settings on CRM and Email Connections (Release 2.4.36+)Riva can be configured to go through a Proxy on the CRM connection and on the email connection. By default, Riva uses the information in Internet Explorer for the Proxy settings, but if a username and password is required, it must be set on either the email connection or CRM connection. Configure Riva proxy setting on the email connectionIn the email connection window, proxy settings can be added. Note: HTTP Proxy Settings are not supported on GroupWise connections.
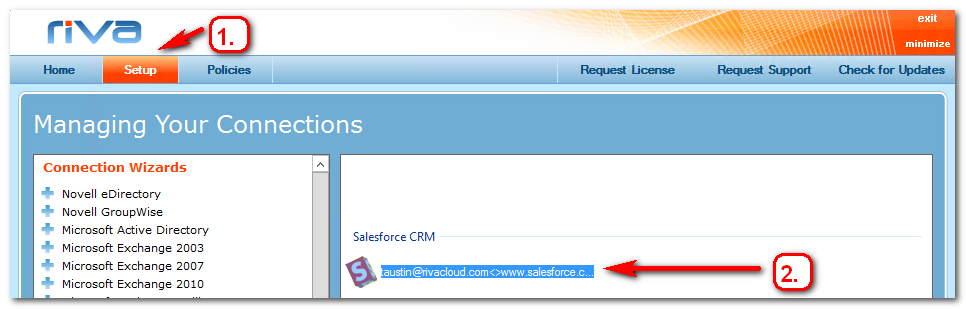
Configure Riva proxy setting on the CRM connectionIn the CRM connection window, proxy settings can be added.
Article ID: 41
Last updated: 26 Sep, 2017
Revision: 9
Views: 16805
Also read
Also listed in
|