Because a GoldMine server is on a remote machine, the GoldMine WCF Service is required to implement a GoldMine sync.
- Install the GoldMine WCF Service on the GoldMine Local Machine, where the GoldMine license is located.
- Verify that the GoldMine WCF Service is installed.
- On the remote computer where Riva On-Premise is installed, configure the WCF service.
Step 1: Install GoldMine WCF Service on the GoldMine Local Machine, Where the GoldMine License Is Located
By default, port 8888 is used to listen to the WCF communication. For the following example, port 8885 has been configured instead.
Optional: To configure the WCF communication port:
To install the GoldMine WCF Service on the GoldMine local machine:
-
Start the Riva Manager application.
-
On the menu bar, under Connections, select Add CRM, and then choose GoldMine.
-
On the Welcome page of the GoldMine Wizard, select Next.
-
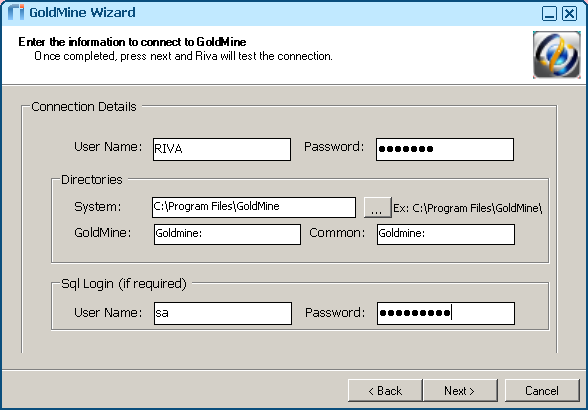
Provide the required information.
-
User Name: This must be a master-level GoldMine account that Riva will use to connect to the GoldMine system.
-
Password: Provide the password for the master account.
-
System: Select the "..." button, browse, and select the local path to the installation folder for GoldMine. Note: This must be a local path. Do not use a mapped network drive or a UNC path.
-
GoldMine and Common: Use the values specified in the GM.INI file located in the installation folder of the GoldMine server.
-
SQL Login: If required, provide the username and password of the "sa" level account to the SQL database that GoldMine is connected to.
-
Select Next.
-
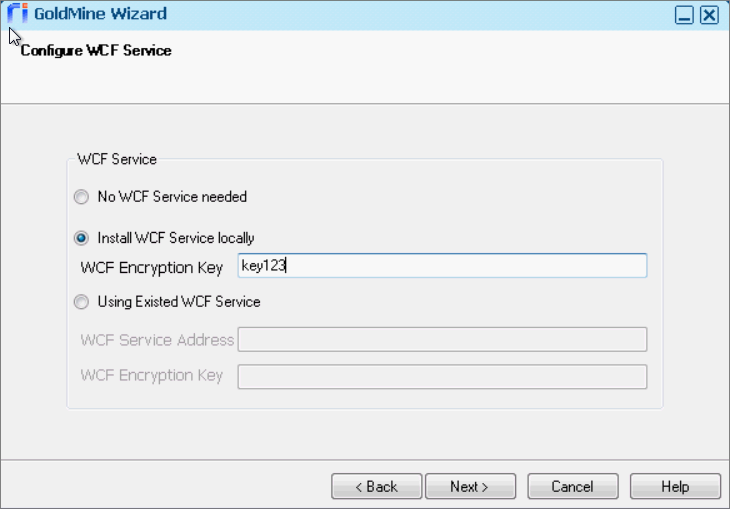
On the Configure WCF Service page that appears, provide the following information:
-
Select Install WCF Service locally.
-
Specify an encryption key, for example "key123".
Recommended: Make the encryption key as secure as possible, for example: eight or more characters including at least one lowercase letter, at least one uppercase letter, at least one digit, and at least one symbol [!@#^&*()+_,.{}?- etc.].
-
Select Next, and then select Finish.
Results: If all the connection settings are configured well,
- The GoldMine connection is created and appears in the right pane; and
- The GoldMine WCF Service is installed successfully.
-
In the right-pane, double-click the GoldMine connection to edit it.
-
In the CRM Connection Edit window that appears, select the Options tab.
-
On the Options page, in the WCF Service field, replace the default IP address with the correct one.
Notes:
- http is supported. https is not required, because it is a local machine.
- Format: http[s]://nnn.nnn.nnn.nnn:pppp, where the nnn's represent the IP address and pppp is the port number.
Step 2: Verify that the GoldMine WCF Service Is Installed
-
On the GoldMine local machine, navigate to the Services management.
-
Verify that the Omni Riva(GoldMine WCF Service) is listed there.

Step 3: Make the Same Connection Setup on the Remote Computer
On the remote computer, Riva On-Premise needs to be installed.
To configure the GoldMine WCF Service on the remote computer:
-
Start the Riva Manager application.
-
On the menu bar, under Connections, select Add CRM, and then choose GoldMine.
-
On the Welcome page of the GoldMine Wizard, select Next.
-
Provide the required information.
-
User Name: This must be a master-level GoldMine account that Riva will use to connect to the GoldMine system.
-
Password: Provide the password for the master account.
-
System: Select the "..." button, browse, and select the local path to the installation folder for GoldMine. Note: This must be a local path. Do not use a mapped network drive or a UNC path.
-
GoldMine and Common: Use the values specified in the GM.INI file located in the installation folder of the GoldMine server.
-
SQL Login: If required, provide the username and password of the "sa" level account to the SQL database that GoldMine is connected to.
-
Select Next.
-
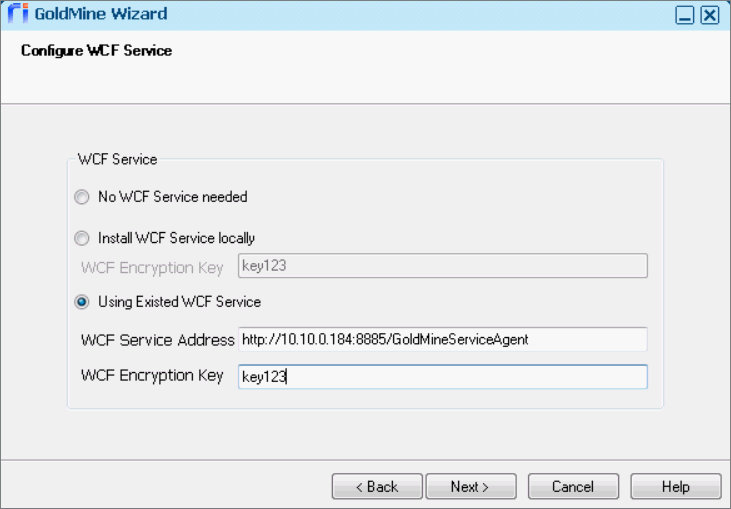
On the Configure WCF Service page that appears, provide the following information:
-
Select Use Existing WCF Service.
-
WCF Service Address: The GoldMine local machine's IP address. In our example, it is http://10.10.0.184:8885/GoldMineServiceAgent.
-
WCF Encryption Key: The same secure key that was specified when you installed the GoldMine WCF Service.
In our example, "10.10.0.184" is the IP address of the local machine where GoldMine WCF Service was installed, and "8885" is the port number we specified in the .config file when we installed the GoldMineWCF Service.
-
Select Next, and then select Finish.
