Riva CRM Integration - Documentation and Knowledge Base

Create a Traditional Salesforce Connection: Riva Cloud

Article ID: 908
Last updated: 14 Feb, 2020
The default Salesforce connection for Riva Cloud supports OAuth. The following instructions are for clients who prefer to use the older, traditional connection that requires trusted authentication.

Riva Cloud supports connections to both active Salesforce user accounts and sandbox Salesforce user accounts.

Trusted authentication is required. A Riva Cloud attempt to log in to Salesforce is authorized if it meets one of the following conditions:

  • The connection and login originate from a trusted network IP address (recommended), OR
  • The connection and login includes a security token.

Advantage of using a trusted network IP address: It is much easier to support Salesforce password changes for Riva Cloud connections when the Riva Cloud service is configured as a trusted network. A user who changes the Salesforce password can save the new password in the Riva Cloud connection to Salesforce, and data sync will resume.

Challenge with using Salesforce security tokens: The primary challenge with using Salesforce security token based authentication for Riva Cloud connections is that if the Salesforce password is changed, the Riva Cloud connection does not work until both the new password and new security token are saved in the Riva Cloud connection for Salesforce.

Procedure:

  1. Do one of the following:
  2. Create a non-OAuth Riva Cloud connection for Salesforce.

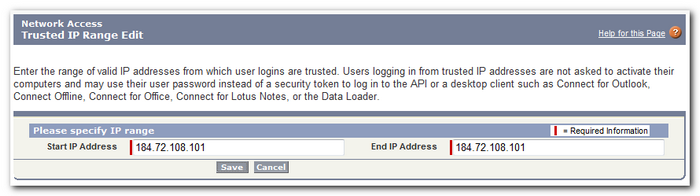
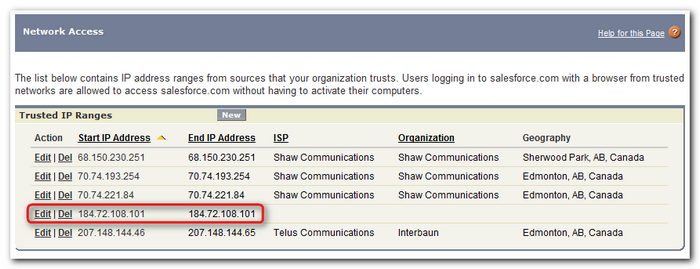
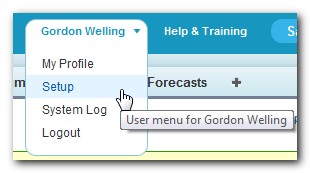
How to Configure Riva Cloud as a Trusted Network in Salesforce

Salesforce provides a mechanism to enable trusted network access for the Salesforce account. This must be configured in the Setup settings when logged in to Salesforce. If you cannot perform this task, ask your Salesforce admin to do it.

To implement Salesforce trusted network access:
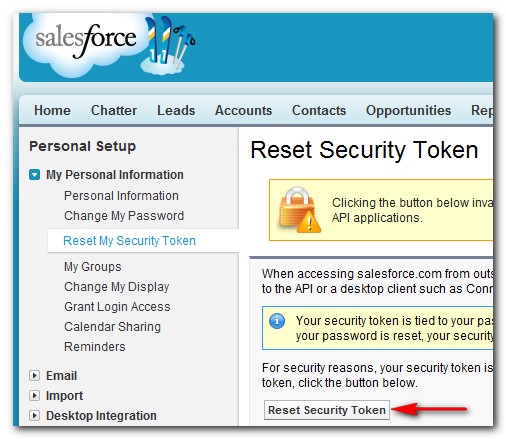
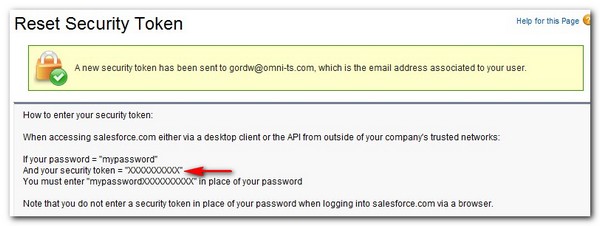
  1. Contact the Riva Success Team to obtain the latest IP address for the Riva Cloud service.

  2. Log in to Salesforce as the organization admin account.

  3. From the top navigation links, select Setup.

  4. In the left pane, under Administration Setup, select Security Controls and Network Access.

    The Network Access detail page displays a Trusted IP Ranges table.

  5. Select New.

  6. Add the IP address provided by the Riva Success Team for both the Start IP Address and End IP Address values. Select Save.

    Note: The IP address 184.72.108.101 is not an approved IP address. It is used on the screen shots for this procedure for illustrative purposes only.


  7. Confirm that the IP address appears in the list of Trusted IP Ranges.

    After the trusted network has been saved, the security token is no longer required for the Riva connection for Salesforce. If your Salesforce password is changed, the Riva Cloud connection for Salesforce needs to be modified to use the new password, but the security token does not need to be specified.

How to Obtain a Security Token

To obtain a Salesforce account token:

  1. Log in to your Salesforce account.

  2. Select your name. On the drop-down menu, select Setup.

  3. In the left pane, under My Personal Information, select Reset My Security Token. In the Reset Security Token pane, select Request Security Token.

  4. Confirm the request.

    A confirmation window appears. You will receive an email with your new security token.

  5. If you experience any challenges: on the menu bar, select Contact Us to send us a support request.

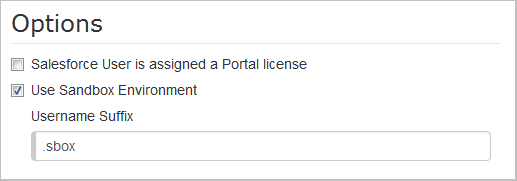
How to Create a Non-OAuth Riva Cloud Connection for Salesforce

To create a non-OAuth Riva Cloud connection to Salesforce:

  1. Ensure that you are not logged in to Salesforce.

  2. Log in to https://www.rivacloud.com.

  3. On the Get Started page, select Configure your CRM.

  4. Select the Salesforce logo.

  5. On the Salesforce page, select Use Traditional Authentication.

  6. Complete the Riva Cloud connection form:

    • User name: Provide the Salesforce user name that you log in with.

    • Password: Provide the Salesforce password that you log in with.

    • Security Token:

      • If Riva Cloud is a trusted network, leave this blank.

      • If Riva Cloud is not a trusted network, provide your security token.

    • For Sandbox accounts: Select the Use Sandbox Environment check box, and provide the suffix.

  7. Select Save.

    The Riva Cloud connection to your CRM account is tested with the credentials and connection information you provided. If the connection works, the CRM connection is added to your Riva Cloud account.

  8. If you experience any challenges: on the menu bar, select Contact Us to send us a support request.

This article was:   Helpful | Not helpful
Report an issue
Article ID: 908
Last updated: 14 Feb, 2020
Revision: 11
Views: 5134
Comments: 0