Riva CRM Integration - Documentation and Knowledge Base

Sample Outlook Rule for Inbound Email Filter to Autosync Email

Article ID: 607
Last updated: 11 May, 2016
The information in this article is deprecated for Riva 2.4.33 or higher.

For up-to-date information, see
Automatically sync all Sent Items and/or all Inbox emails.

The following procedure can be used to create an Outlook rule to move inbound email from the Inbox to the "- Create New Email" folder.

Using Riva On-Premise or Riva Cloud as an email archiving solution IS NOT recommended. Most CRM data stores are not designed for robust storage of email. Auto-archiving of email into a CRM can greatly increase storage space requirements and reduce the performance of the CRM system over time.

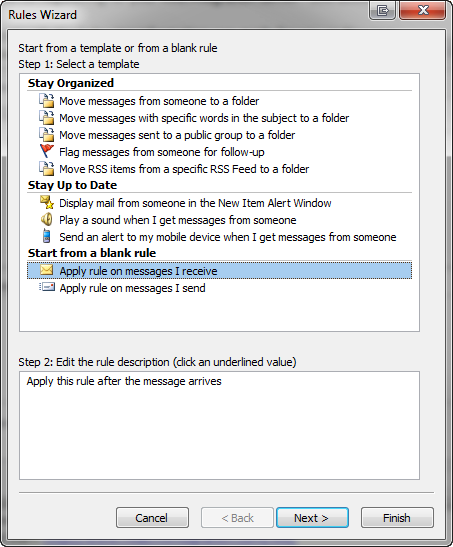
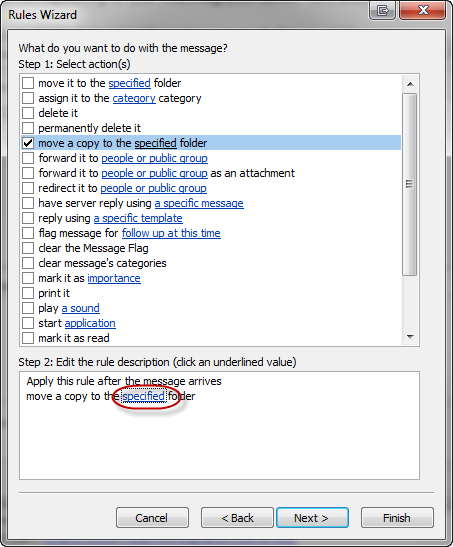
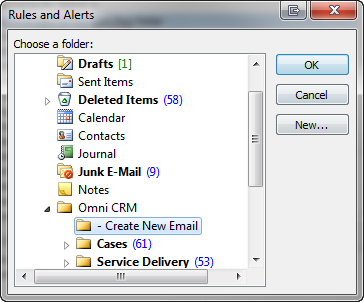
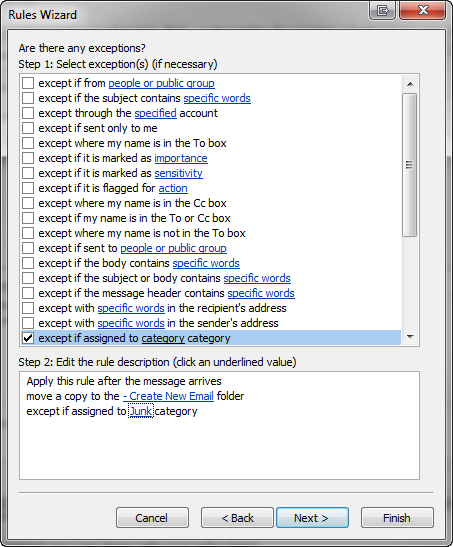
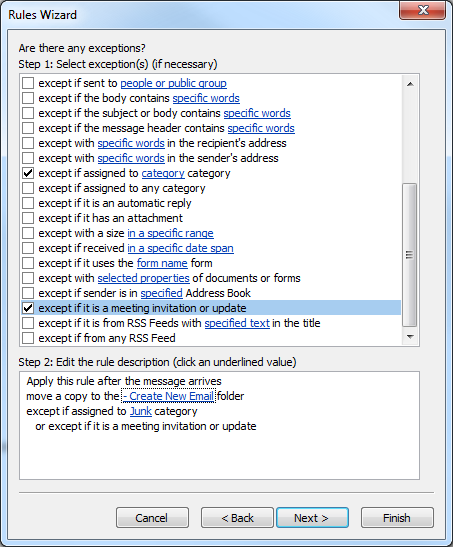
Various professional archiving solutions perform this task much more efficiently and are certified as email archive solutions that meet regulatory requirements.

To create (in Outlook 2013, 2010, or 2007) a rule to move email from the Inbox to the Riva-generated "- Create New Email" folder:

  1. On the File menu, select Manage Rules & Alerts.

  2. In the Rules and Alerts window, on the Email Rules tab, select New Rule.

  3. Under Start from a blank rule, select Apply rule on messages I receive, and select Next.

  4. On the Which condition(s) do you want to check? page, do not select any conditions, and select Next.

  5. In response to "This rule will be applied to every message you receive. Is this correct?", select Yes.

  6. On the What do you want to do with the message? page, under Step 1: Select action(s), select the move a copy to the specified folder check box. Under Step 2: Edit the rule description (click an underlined value), select specified.

  7. In the Rules and Alerts window, under Choose a folder, navigate to the Riva-generated root folder for archiving emails, for example "Omni CRM", select the "- Create New Email" folder, and select OK.

  8. On the What do you want to do with this message? page, note that the "- Create New Email" folder is now specified at Step 2.


    Select Next.

  9. On the Are there any exceptions? page, under Step 1: Select exception(s) (if necessary), select except if assigned to category category. Under Step 2: Edit the rule description (click an underlined value), select category.

  10. In the Color Categories window, select Junk, and select OK.

  11. On the Are there any exceptions? page, note that under Step 2, the Junk category is now visible.

  12. Under Step 1: Select exception(s) (if necessary), scroll down, and select the except if it is a meeting invitation or update check box.


    Select Next.

  13. On the Finish rule setup page, provide a name for the rule, and ensure that under Step 2, the Turn on this rule option is selected.


    Select Finish.

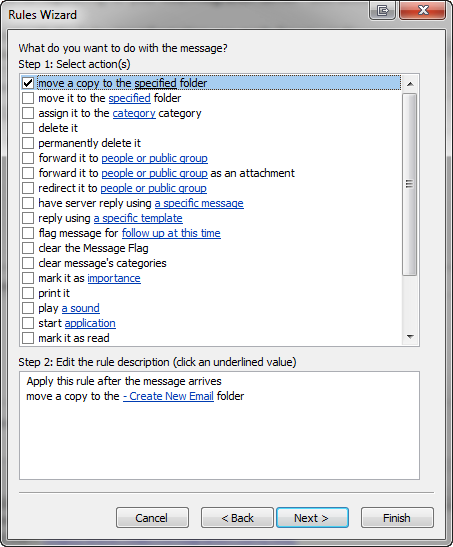
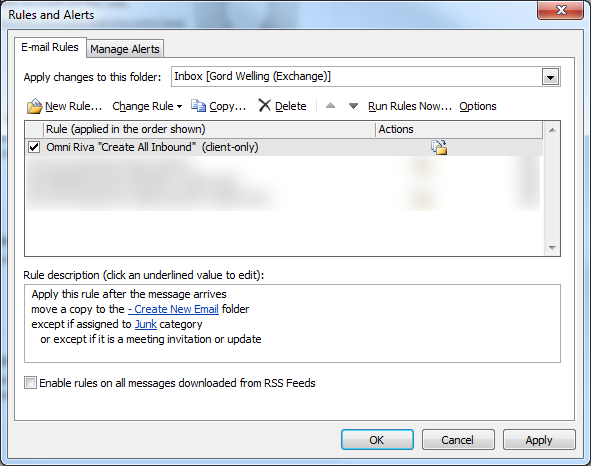
Your new inbound email handling rule should now be visible.

Article ID: 607
Last updated: 11 May, 2016
Revision: 4
Views: 11161