|
Article ID: 440
Last updated: 15 Mar, 2016
WARNING: The Riva for Salesforce Single Sign-On connection strategy described in this article is not supported for new Riva On-Premise installations.
New Riva On-Premise installations include a new strategy to provide impersonation access into Salesforce: the Standard Impersonation Model. For instructions on implementing the Standard Impersonation Model, see Prepare Salesforce for Riva and Create and test a Salesforce connection. For current Riva On-Premise installations that use Salesforce Single Sign-On, administrators are encouraged to upgrade their Riva for Salesforce connection setup to the Standard Impersonation Model. For assistance, contact the Riva Success Team. The procedures in the following article have been deprecated. The information is being retained for clients who have not yet converted to the new Standard Impersonation Model. A Riva On-Premise attempt to log in to Salesforce with Salesforce Single Sign-On is authorized if it meets one of the following conditions:
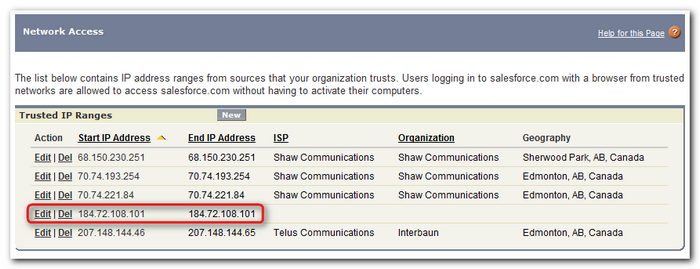
ChallengesThe primary challenge with using security token based authentication is if the authentication credentials (password and security token) are changed, the Riva On-Premise connection for Salesforce fails until the new credentials (with a new security token) are saved into the connection. ResolutionSalesforce provides a mechanism to enable trusted network access for the Salesforce account. This must be configured in the Setup settings for the Salesforce administrator account. If you cannot perform this task, ask your Salesforce admin to do it. To implement Salesforce.com trusted network access
Applies toUse this procedure to enable Trusted Network Access for:
Article ID: 440
Last updated: 15 Mar, 2016
Revision: 7
Views: 7106
|


