Audience: Riva Insight administrators.
It is possible to configure the Riva Insight context view display results without having to write custom code. Templates are provided for this purpose.
The modules that appear can be configured, as well as the parameters below:
- The pagesize can be configured (default: 5);
- The maxresults can be configured (default: 250);
- The upcoming range can be configured (default: 90 days);
- The recent range can be configured (default: 90 days).
Contents:
To configure the date range for Opportunities and Tasks:
- In the top-right corner of Riva Insight in Outlook, select the hamburger icon and choose Settings.
- In the bottom-left corner of the Settings window, double-click on the version number:
.PNG)
You'll be directed to a page featuring configuration samples & settings currently in use, as below:
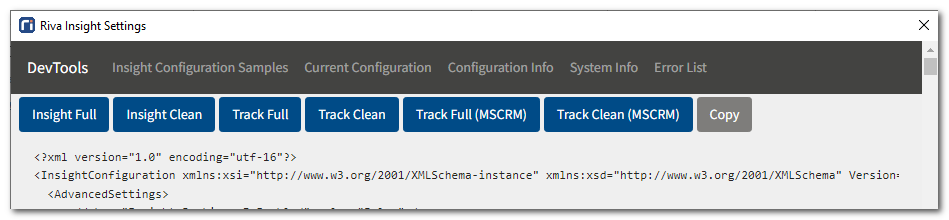
- Select the Insight Full button on the top left-hand side. This provides the sample configuration to copy settings from.
- Select the Copy button, and paste into \Insight\App_Data\Config\OnPremise\InsightConfiguration.xml. If the file isn't present. create one with a binary text editor.
- Edit the following keys' default values to the desired ones.
<add key="Insight.Panels.ForPluginRecent.DaysAfter.Opportunity" value="90" />
<add key="Insight.Panels.ForPluginRecent.DaysAfter.Task" value="90" />
<add key="Insight.Panels.ForPluginUpcoming.DaysBefore.Opportunity" value="90" />
<add key="Insight.Panels.ForPluginUpcoming.DaysBefore.Task" value="90" />
For reference:
PageSize: Number of results returned in Riva Insight context view.
DaysAfter: Defines the date range AFTER the item date.
DaysBefore: Defines the date range BEFORE the item date.
- Close & save the file, then reload the settings: go to Insight context view > Settings > Reload Settings.
To configure the global date range and page size for modules (except Opportunities and Tasks):
- Open \Insight\App_Data\Config\OnPremise\InsightConfiguration.xml in a binary text editor.
- For the following keys between the Advanced Settings tags, set the values to the ones desired:
<add key="Insight.Panels.ForPluginKeyword.PageSize" value="20" />
<add key="Insight.Panels.ForPluginRecent.DaysAfter" value="0" />
<add key="Insight.Panels.ForPluginRecent.DaysBefore" value="90" />
<add key="Insight.Panels.ForPluginRecent.PageSize" value="5" />
<add key="Insight.Panels.ForPluginUpcoming.DaysAfter" value="90" />
<add key="Insight.Panels.ForPluginUpcoming.DaysBefore" value="0" />
<add key="Insight.Panels.ForPluginUpcoming.PageSize" value="5" />
- Close & save the file, then reload the settings: go to Insight context view > Settings > Reload Settings.
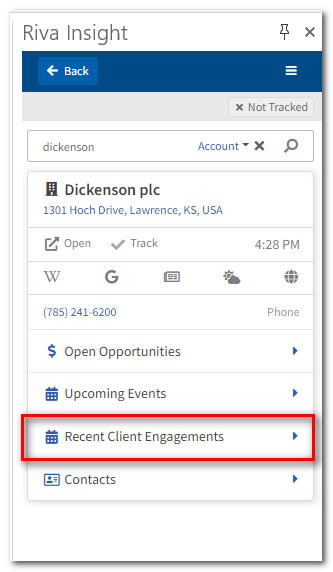
To change the displayed title for a section under a module (for this example, we'll change Recent Events under the Organization module to Recent Client Engagements):
- From the config sample, copy everything between the <Panels> tags & paste into \Insight\App_Data\Config\OnPremise\InsightConfiguration.xml, under <DisplaySettings Module="Organization">.
- In InsightConfiguration.xml, find <Panel Id="RecentInteractions"> . On the line underneath it, change <label>Recent Events</> to <label>Recent Client Engagements</>.
- Add a closing tag </DisplaySettings> just after the pasted lines.
- Close & save the file, then reload the settings: go to Insight context view > Settings > Reload Settings.
Result: Under the Organization module, Recent Client Engagements is now displayed.