Applies to Riva Insight Server On-Premise.
Contents:
Riva Insight Requirements
Ensure that the server and add-in client meet the Insight requirements before starting an Insight on-premise installation:
Important: The supported versions of Exchange and Office 365 differ based on which client is installed for end users.
Riva Sync Prerequisites
Highly recommended:
- A Riva on-premise sync server running the same version number of Riva Insight that is being installed.
- The synchronization policy will need to be prepared for Riva Insight.
- The users must go through at least one sync cycle (may take up to an hour) for the Track in CRM feature of Riva Insight to function properly.
Riva Insight On-Premise - Install Script
Starting with Riva Insight 2022.1, most Insight installation steps have been automated through PowerShell scripts. The new packages will have “install” in the package name.
Example: RivaInsight.OnPremise.Install.2022.2.zip
Script Requirements
• Windows Server 2016 or higher;
• Local admin privileges to install the script.
To extract and run the installer:
- Download the Insight Install package to any location on the server.
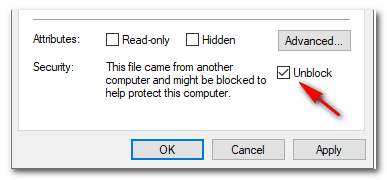
- Unblock the package by right-clicking on the zip and selecting Properties.
- Note: If the package is blocked, you will see an Unblock option on the bottom-right of the Properties screen. Check the box to unblock the package.
- Extract the installation package to the desired Riva Insight folder structure on a local drive. Mapped network drives cannot be used. Examples of valid folder structures:
c:\Riva\Riva Insight\
c:\Riva Insight\
d:\Riva Insight\ (Example for secondary volume.)
- From the extracted folder, right-click on Insight-InstallMain.ps1 and select Run with PowerShell.
- If you are prompted with an execution policy warning, type Y to proceed.
- A prompt will appear informing you that the script will open as an Administrator. Press Enter to proceed. On the User Account Control box that appears, select Yes.
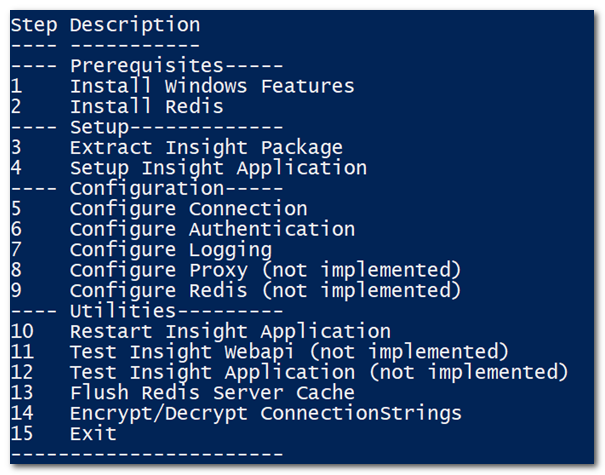
- You will see the following menu:
Install the Riva Insight Pre-Requisites
If Riva Insight is being installed on a server for the first time, run the following steps:
Step 1: Install Windows Features
- Installs all of the requirements to run Riva Insight in IIS.
Step 2: Install Redis
- If the install fails from the script, it can be run manually from the Redis folder of the extracted install package.
Install the Riva Insight Application
Run the following steps to extract the Insight Server application files and configure Riva Insight in IIS:
Step 3: Extract Insight Package
- Prompts for an install location;
- Extracts the Insight server application files and places them in the install location;
- Sets the file permissions to be able to write settings and write logs.
Step 4: Setup Insight Application
- Creates and configures the application pools for Insight and WebAPI;
- Creates the main Riva Insight app;
- Note: If IIS was previously installed, it will remove the default website.
- If the Riva Insight app was previously in IIS, it will be replaced.
- Creates/converts the Insight and WebApi app (including the Auth providers and SDK endpoints);
- Unlocks the Auth sections;
- Creates a self-signed certificate.
Configure the Riva Insight Application
Once the Riva Insight Application has been installed, you may now start configuring the application.
Step 5: Configure Connection (required)
- Allows you to browse and select the Riva sync CRM connection file.
Step 6: Configure Authentication (default: WindowsAD)
- Allows you to switch between WindowsAD and Salesforce authentication;
- Salesforce authentication – allows for entry of the Salesforce connection app settings:
- Callback URL; Key; Secret.
Step 7: Configure Logging (default logging level: Error.)
- Select which level of logging to use:
Step 8: Configure Proxy (not implemented)
- Enable or disable proxy;
- Enter hostname or IP address, and port number;
- Set password.
Step 9: Configure Redis (not implemented)
- Enter hostname or IP address, and port number;
- Enter username and password (optional).
Riva Insight Utilities
A few utilities have been provided:
Step 10: Restart Insight Application
- Performs a restart of IIS & the Riva Insight application.
Step 11: Test Insight WebAPI (not implemented)
- Opens the WebAPI compatibility page (option to select browser to open);
- Used to ensure WebAPI loads and that there are no errors.
Step 12: Test Insight Application (not implemented)
- Opens the Insight main page (option to select browser to open);
- Uses to ensure Insight loads and there are no errors.
Step 13: Flush Redis Server Cache
- Flushes the Redis server cache;
- Logs out all logged in users.
Step 14: Encrypt/Decrypt ConnectionStrings
- Encrypts or decrypts the webConnectionStrings file;
- Used if manual changes need to be made to the webConnectionStrings file.
