Riva Insight 2021.3 or higher.
Audience: Your company's Riva Insight administrators.
Note: Your company's Riva Insight administrators can also configure the display of data in the Riva Insight context view.
To add a field to Track in CRM and position it in the layout:
-
Near the top right of Riva Insight, on the  menu, select Settings.
-
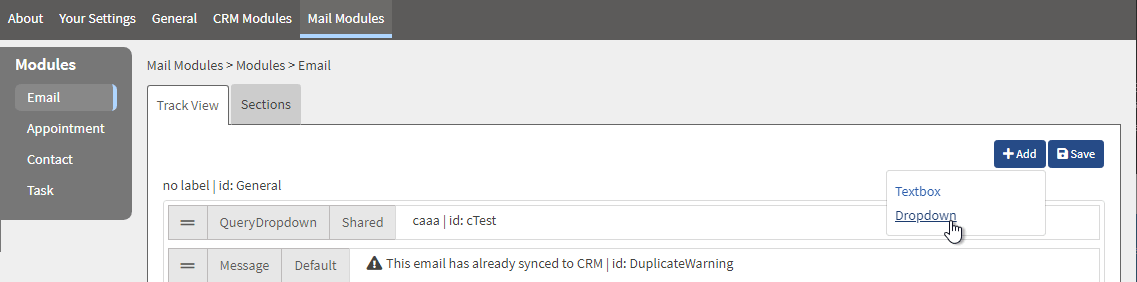
In the window that appears, on the top menu, select the Mail Modules tab.
-
On the left menu, select a module, for example Email.
-
On the right pane, select the Track View tab.
-
To the far right, click +add, and then choose the type of field to add, for example Dropdown.
-
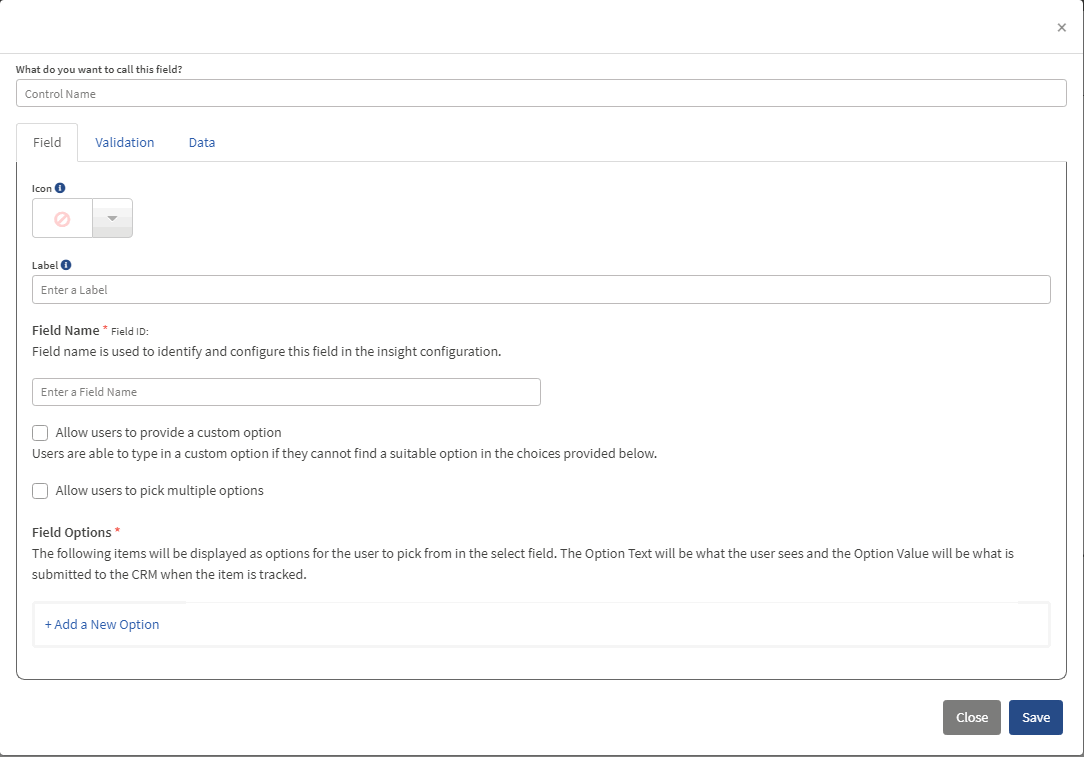
In the top field, enter the name that the new field will have in Track in CRM for the selected module.
-
Navigate the three tabs — Field, Validation, and Data. On each tab, follow the instructions to provide the information regarding the new field.
-
In the bottom right corner, click Save.
Result: The Add window closes, and the new field appears in the Track View tab, under Unassigned.
-
When you are ready to test the new field, drag it from the Unassigned section to the section above it and drop the field above or below another field.
Note: You con drag and drop any of the fields above the Unassigned section until the fields appear in the sequence you want for the layout.
-
In the top right corner, click Save.
Expected result: When you Track an item of the module you added a field to, the new field will be visible and function as you configured it, and the fields will appear in the sequence you set up.
-
If you do not see the expected result, then near the top right of Riva Insight, on the menu, select Reload.
To edit a Track in CRM field:
-
Near the top right of Riva Insight, on the menu, select Settings.
-
In the window that appears, on the top menu, select the Mail Modules tab.
-
On the left menu, select a module, for example Email.
-
On the right pane, select the Track View tab.
-
To the right of the field you want to edit, click 
Note: If you try to edit a default field or a field shared between multiple mail modules, the default or shared field remains intact and a module-specific copy of the field is created.
-
Optional: In the top field, edit the name that the field will display in Track in CRM for the selected module.
-
Optional: Navigate the three tabs — Field, Validation, and Data. On each tab, follow the instructions to change the value or values that were assigned to any field.
-
In the bottom right corner, click Save.
-
Back in the Track View tab, in the top right corner, click Save.
Expected result: When you Track an item of the module you edited a field of, the field will function as you configured it.
-
If you do not see the expected result, then near the top right of Riva Insight, on the menu, select Reload.
To order (sequence) the Track in CRM fields on a module's layout:
-
Near the top right of Riva Insight, on the menu, select Settings.
-
In the window that appears, on the top menu, select the Mail Modules tab.
-
On the left menu, select a module, for example Email.
-
On the right pane, select the Track View tab.
-
Do one or more of the following:
-
To hide a field from the end users, drag and drop it into the Unassigned section.
-
To make a field available to the end users, drag and drop it into the top section (above the Unassigned section).
-
To order (position) the fields in the sequence you want for the layout, drag any field up or down and drop it above or below another field until you achieve the sequence you wanted.
-
In the top right corner, click Save.
Expected result: When you Track an item of the module you sequenced the fields of, the fields will appear in the order you set up.
-
If you do not see the expected result, then near the top right of Riva Insight, on the menu, select Reload.
