To create a Graph Azure application for Riva:
-
Register an application.
-
Configure the authentication.
-
Set the API permissions.
Step 1: Register an Application
-
Log in to the Azure portal as your company's Riva connection user, for example our-Riva-admin@our-domain.com.
-
From the Portal, select App Registrations, and click New Registration.
-
In the Name field, enter the application's title.
-
At the bottom of the pane, select Register.

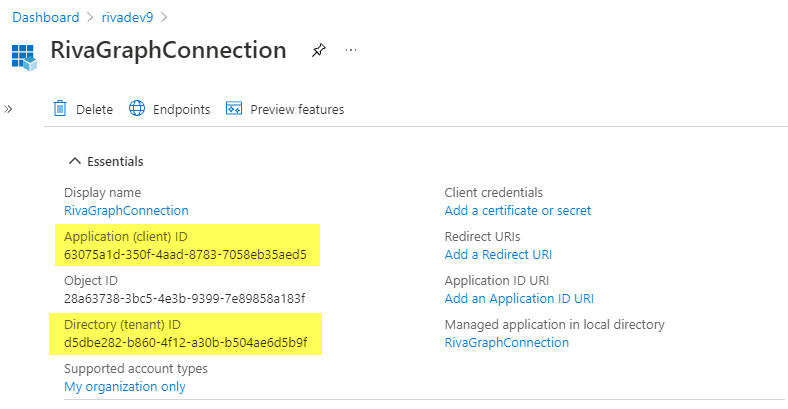
Result: The application is created.
-
Locate the Application (client) ID and the Directory (Tenant) ID, and copy them.
Note: It will be used as the Client ID and Tenant Id in the connection.
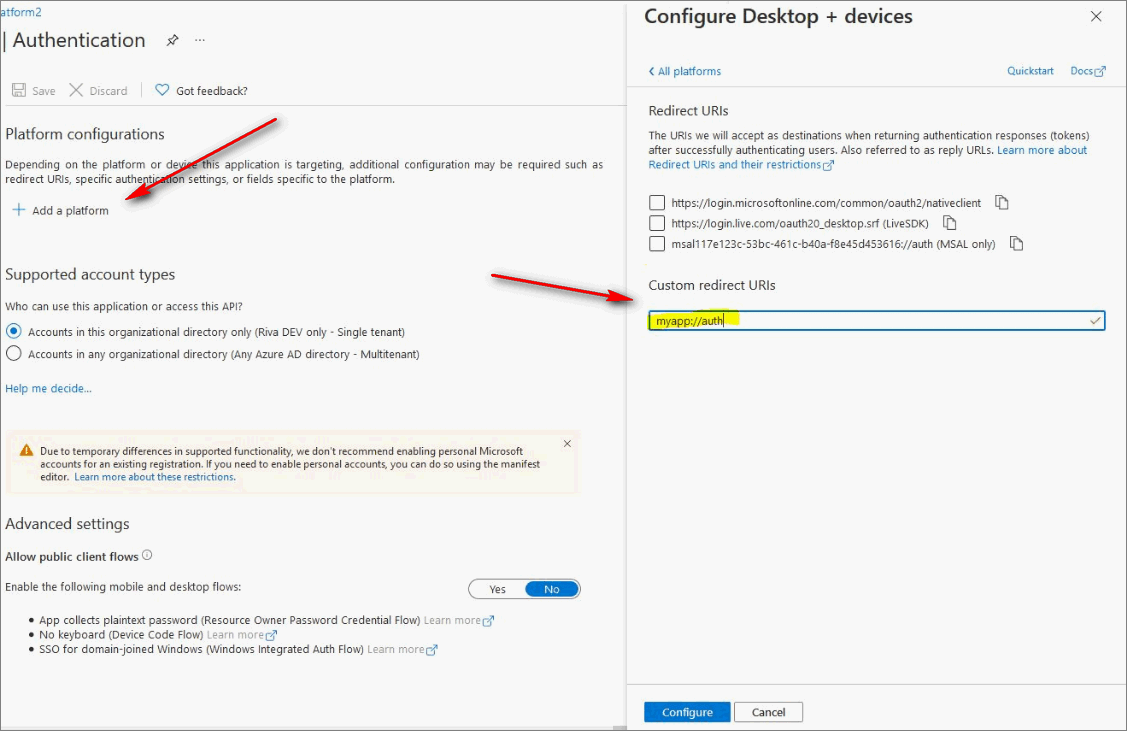
Step 2: Configure the Authentication
-
On the left menu, under Manage, select the Authentication tab.
-
Under Platform Configurations, select Add a platform.
-
On the Configure platforms pane that appears to the right, select Mobile and desktop applications.
-
On the Configure Desktop + devices pane that appears, below Custom redirect URIs, add a custom URI.
Note: The custom URI can be whatever you want & it will be used as the Redirect URL in the connection later. (Example - myapp://auth)
-
At the bottom of the pane, select Configure.
-
On the left menu, select the Certificates & Secrets tab.
-
On the Certificates & Secrets pane that appears to the right, below Client Secrets, select New Client Secret.
-
Enter a name for the client secret, and set the expiry date, and select Add.
Note: Setting a custom expiry beyond 24 months is not applicable.
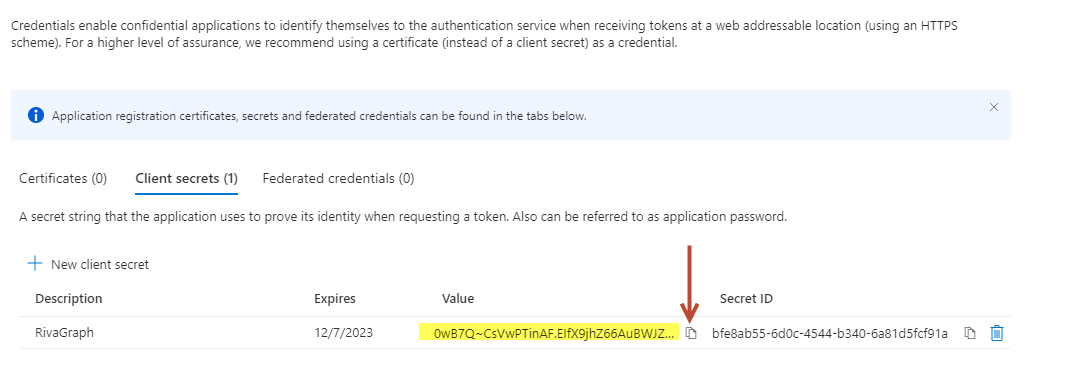
- Copy the Value to a secure place. Note: It will be used as the Client Secret in the connection.
WARNING: After leaving this page, you can no longer retrieve this value.
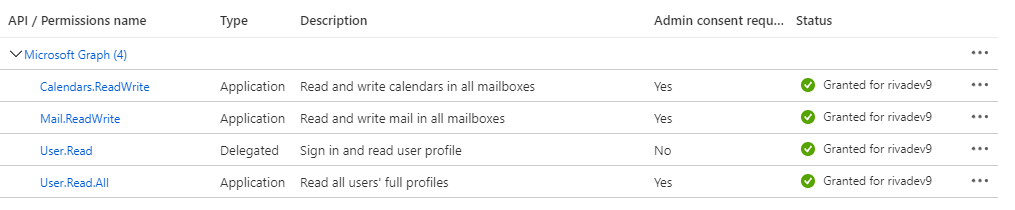
Step 3: Set the API Permissions
-
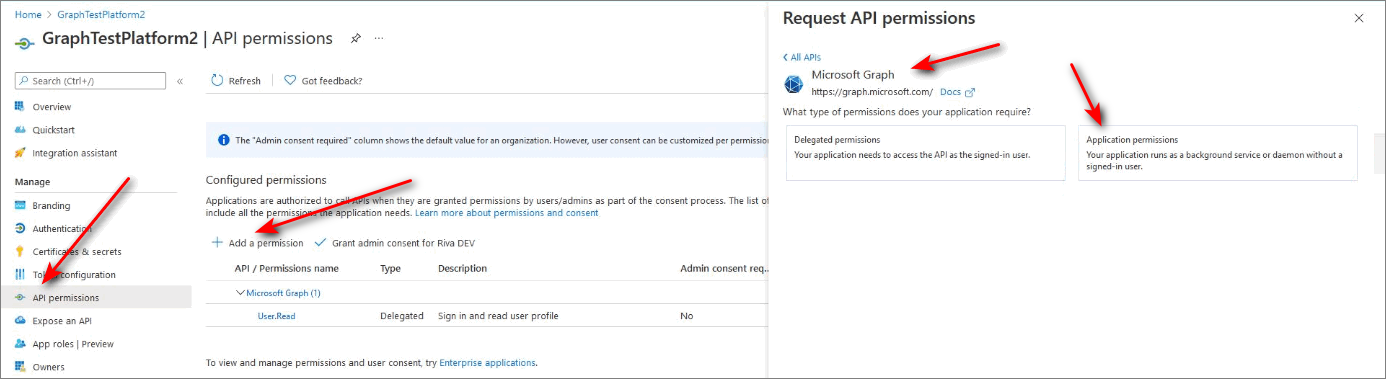
On the left menu, select the API permissions tab.
-
Select Add a permission, and then select Microsoft Graph and Application Permissions.
-
For a list of recommended permission sets, click here.
-
On the permissions list, select the permissions required, and then select Add permissions.
-
User.Read is a delegated permission and is added by default, and is assigned automatically on app creation; all others are application permissions.
-
Select the Grant admin access for [the name of your app] check box, and then click Yes.
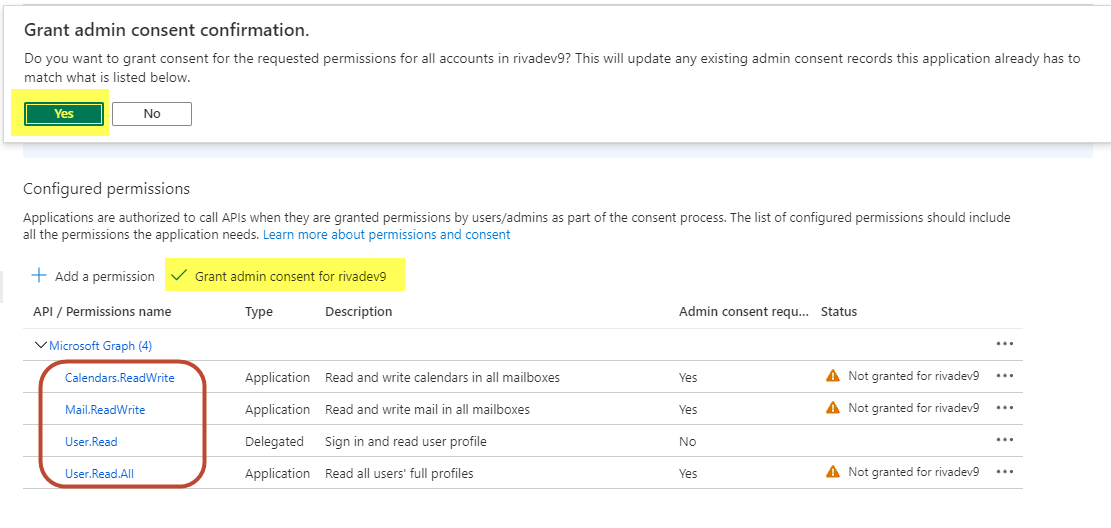
- The Status on all of the permissions will be set to "Granted for [the name of your app]".