An Identity Provider application on Azure can be used to configure SAML authentication for logging in to Riva Cloud.
To create an Identity Provider application on Azure, for Riva:
-
Navigate to Azure Active Directory; in the left pane, select Enterprise applications.
-
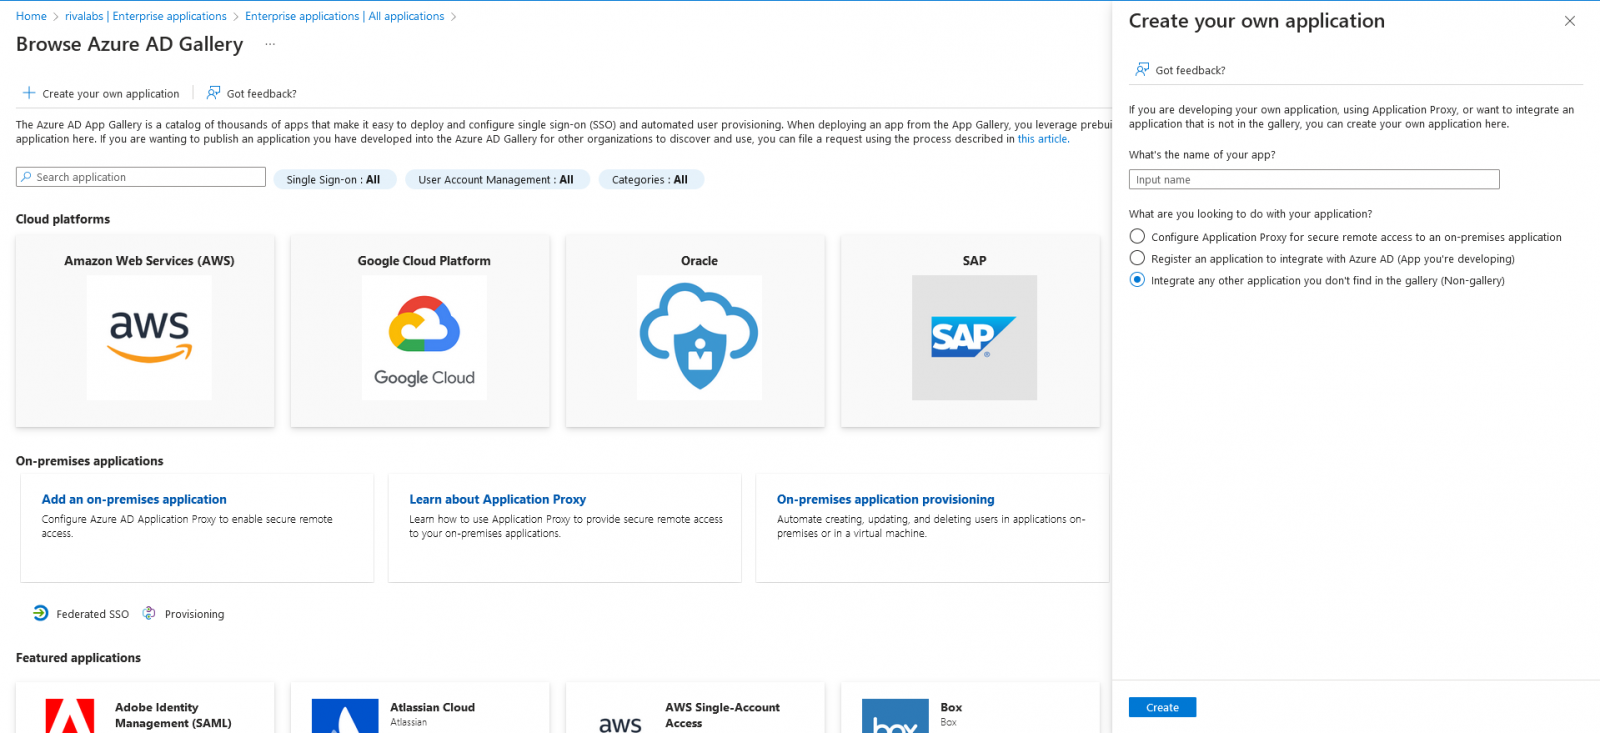
On the Enterprise applications page, select New application.
-
On the Browse Azure AD Gallery page, select Create your own application, then choose Integrate any other application you don't find in the gallery (Non-gallery).
Suggested: Name the application something like Riva Cloud. Select Create.
-
In the left pane, select Users and groups. Choose Add user/group.
-
On the Add assignment page that appears, choose None Selected. In the right pane, under Users and groups, find the Riva Cloud admin user, and choose Select. At the bottom of the page, select the Assign button.
-
In the left pane, under Manage, select Single sign-on.
-
In the right pane, under Select a single sign-on method, select SAML.
Result: The new UI (the Set up Single Sign-On with SAML page) appears.
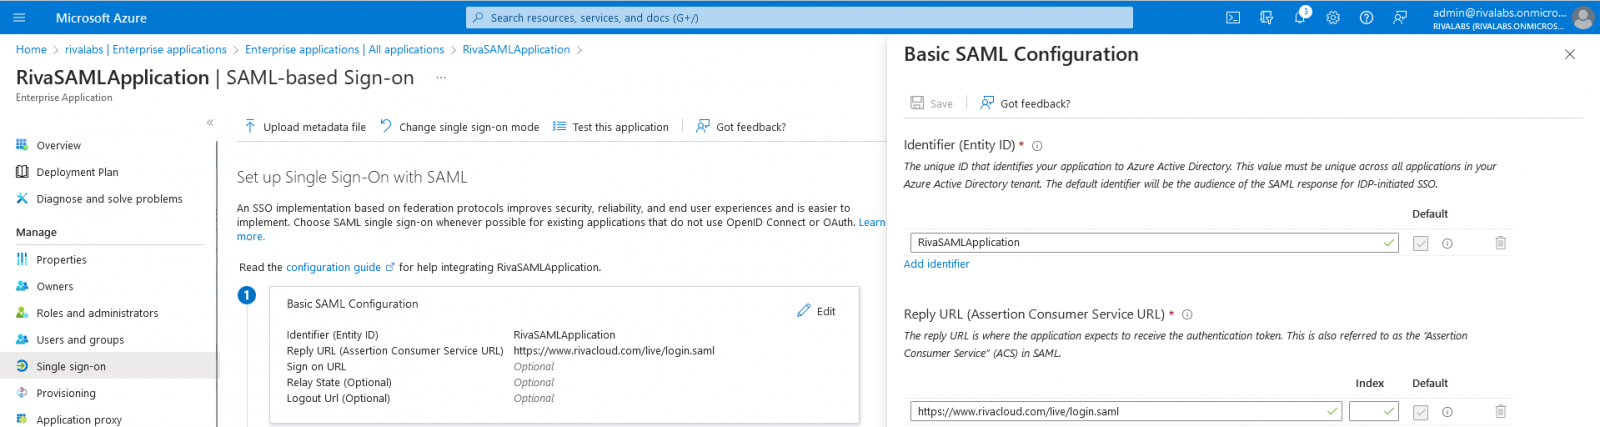
Heads up: In the next few steps, you will need to copy several values to a secure location. When you are done in Azure, you will need to enter those values on the Riva Cloud SAML Configuration page.
-
In section 1: Basic SAML Configuration, set the following:
-
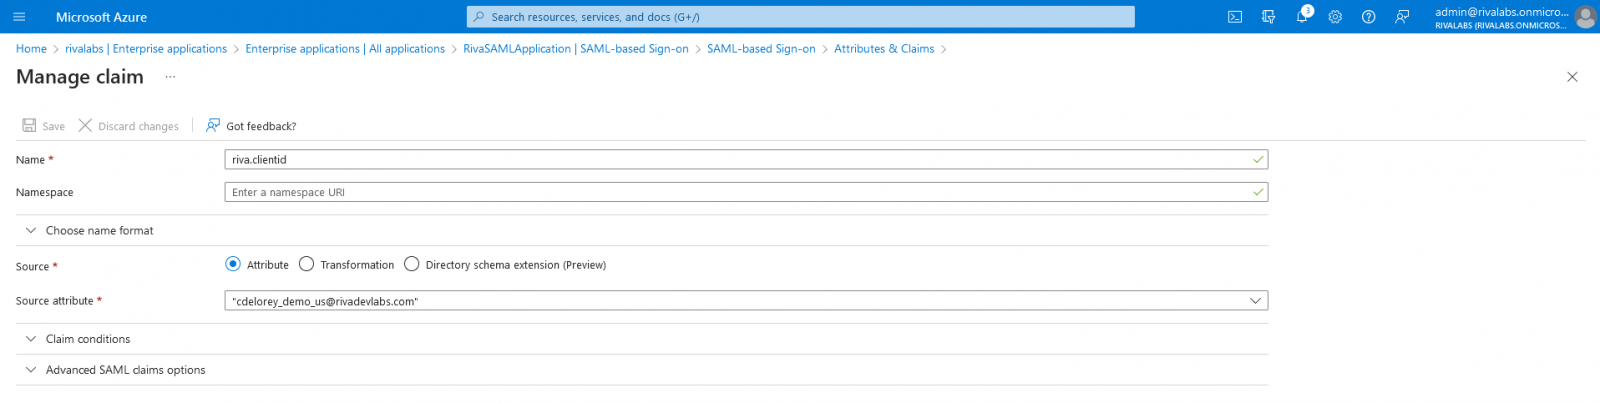
In section 2: Attributes & Claims, to the far right, select the pencil.
-
In the Attributes & Claims pane that appears, do the following:
-
Near the top, select + Add new claim.
-
On the page Manage claim, fill the fields as follows:
-
Select Save.
-
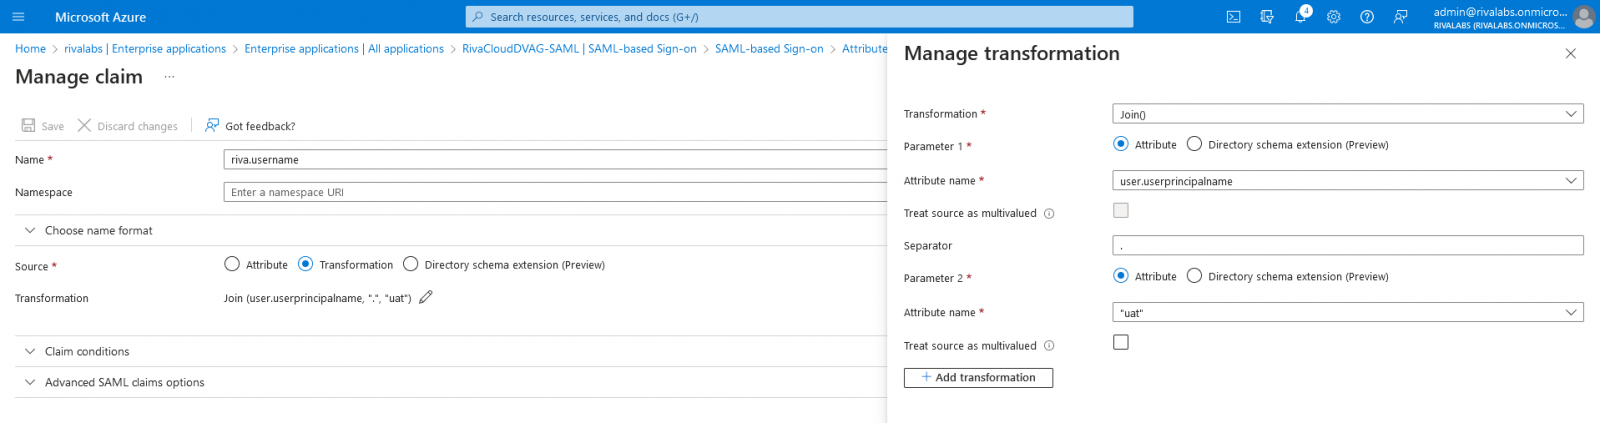
Additional Claims - Optional: If you have multiple Riva Cloud accounts (for example, UAT and Production) and you want to have the same user in each Riva Cloud account, this can be achieved with distinct Azure SAML Applications and a transform claim.
-
Select Add new claim.
- Name: riva.username
- Source: Transformation
- Transformation: Join (user.userprincipalname, "." "uat")
- In section 3: SAML Signing Certificate, download one of the following to a secure location:
-
Certificate (Base64); or
-
Federation Metadata XML.
-
If you have downloaded the Certificate (Base64), then in section 4: Set up Riva Cloud, copy the Azure AD Identifier to a secure location.
-
Optional: In section 4: Set up Riva Cloud, set the following value. Optionally copy this value to a secure location: the field is not required in Riva Cloud.
-
When entering the SAML login authentication details in Riva Cloud, copy the values of the following Azure fields or items to the following Riva Cloud fields:
| Field Status |
Azure Field or Item |
Riva Cloud Field |
| Required |
Azure AD IdentifierNote 1 |
Identity Provider Entity ID |
| Optional |
Sign on URL |
Identity Provider Signin Url |
| Optional |
Logout URL |
Identity Provider Logout Url |
| Required |
Certificate (Base64)Note 2 |
Identity Provider Certificate Content Base 64
Note: Omit the "Begin Certificate & "End Certificate" lines
|
Notes:
- You can also find the Azure AD Identifier in the Federation Metadata XML file.
- You can also find the Base-64 certificate in the Federation Metadata XML file.