Audience: End users and Riva administrators.
To install Riva Insight on your local computer, you need to have administrator access to your local computer.
- Ensure that the Notes Application Manager has been enabled in Notes.
- Download and extract the Riva Insight Installation files.
- In IBM Notes, select Riva Insight for installation, and launch the installation.
- Restart IBM Notes, and initialize Riva Insight.
If you have questions or require additional help, contact us.
Step 1: Ensure that the Notes Application Manager Has Been Enabled in IBM Notes
-
Start IBM Notes.
-
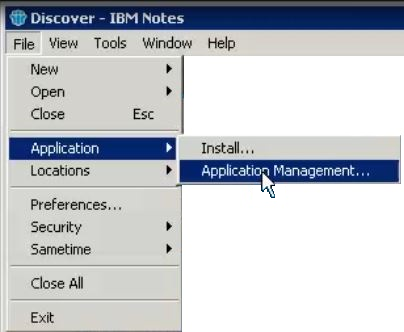
On the File menu, expand Application.
-
If you see Application Management as illustrated below, download and extract the Riva Installation files.
If you do not see Application Management, do one of the following:
-
In the Notes workspace folder “\.metadata\.plugins\org.eclipse.core.runtime\.settings\”, edit the file com.ibm.notes.branding.prefs to change “enable.update.ui=false” to “enable.update.ui=true”; or
-
In C:\Program Files (x86)\IBM\Notes\framework\rcp, edit the file plugin_customization.ini to either add "com.ibm.notes.branding/enable.update.ui=true" (without the quotation marks) or change "com.ibm.notes.branding/enable.update.ui=false" to "com.ibm.notes.branding/enable.update.ui=true".
For more information, see Managing features in the IBM Lotus Notes 8.5.x Client.
Step 2: Download and Extract the Riva Insight Installation Files
-
Download Riva Insight for IBM Notes. (Version 1.0.62.)
-
In Windows Explorer, navigate to your default download location, and create a new folder named "Riva Insight Install Files".
-
Extract the contents of the compressed file into this folder. (For example, right-click the compressed file, and select Extract.)
Step 3: In IBM Notes, Select Riva Insight for Installation, and Launch the Installation
-
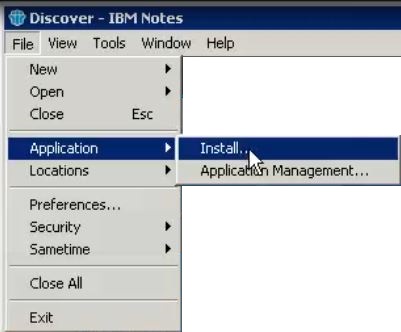
Start IBM Notes. On the File menu, expand Application, and select Install.
-
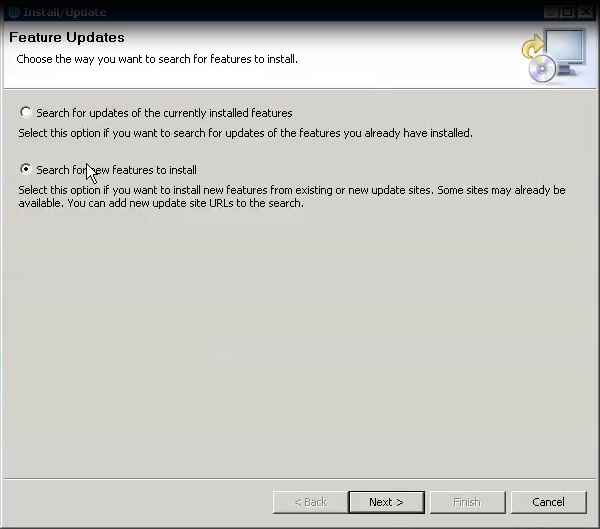
Select Search for new features to install, and select Next.
-
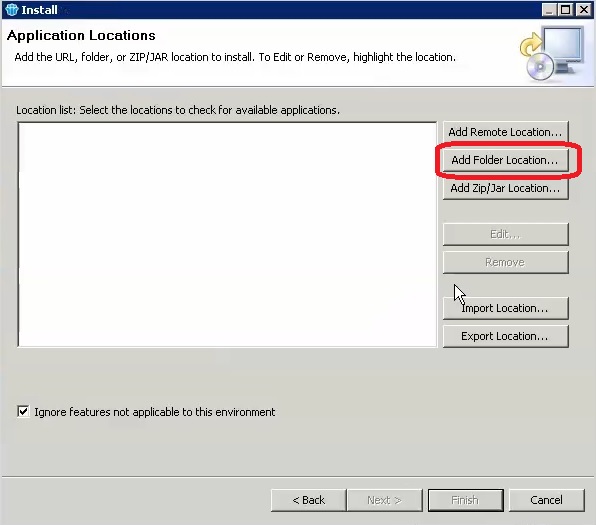
Select Add Folder Location.
-
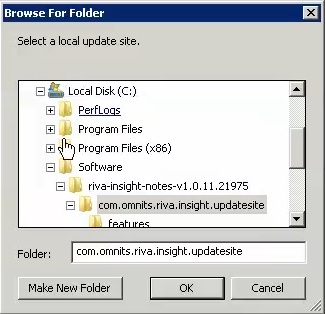
Browse to the com.omnits.riva.insight.updatesite folder, which is the installer service being investigated, and select OK.
-
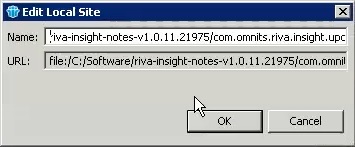
In the Name field, verify that com.omnits.riva.insight.updatesite appears, and select OK
-
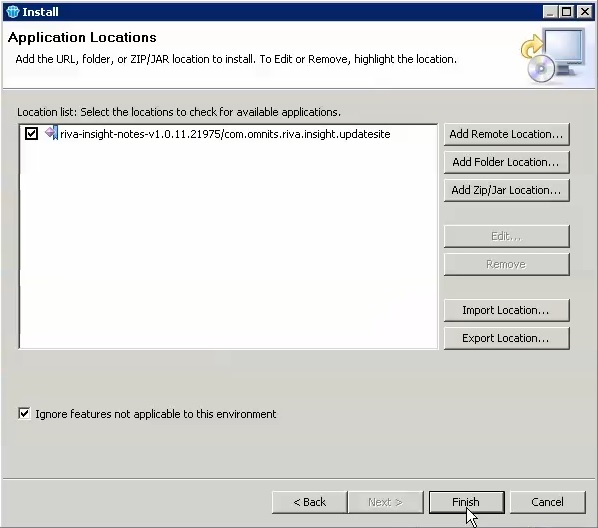
In the list box, verify that the com.omnits.riva.insight.updatesite Riva Insight update service has been added to the IBM Notes client, and select Finish.
-
In the list of available updates, expand the Riva Insight nodes by selecting the + signs.
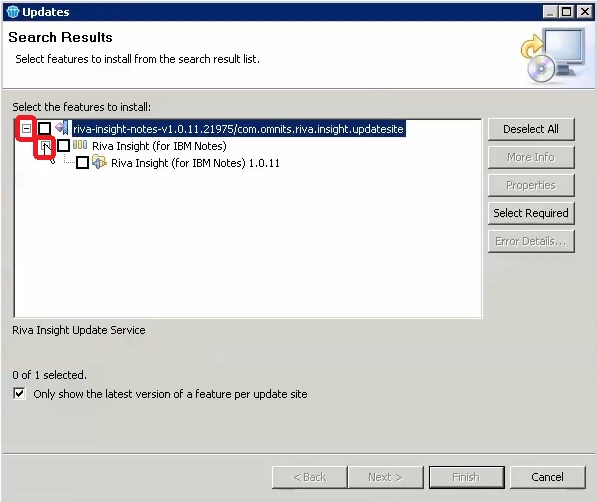
-
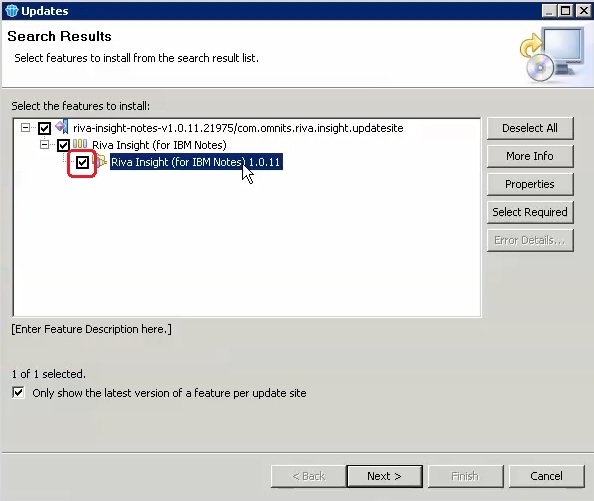
On the third level, select Riva Insight (for IBM Notes), and select Next.
-
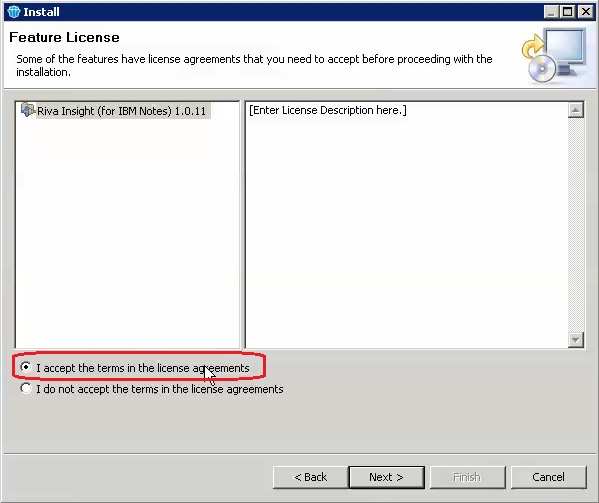
Select I accept the terms in the license agreements, and select Next.
-
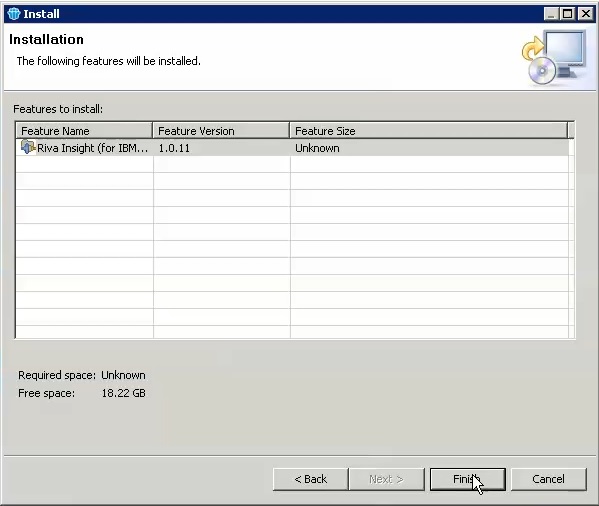
Verify that Riva Insight (for IBM Notes) is in the list of features to install, and select Finish.
-
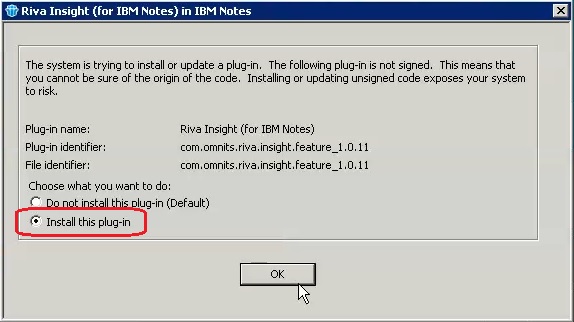
Select Install this plug-in, and select OK.
-
Allow the installation to proceed.

Step 4: Restart IBM Notes, and Initialize Riva Insight
-
When you see the following,
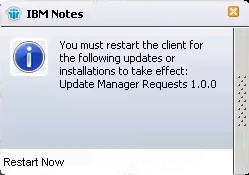
... restart IBM Notes.
-
On the right side of the IBM Notes window, look for Riva Insight, and expand it.
-
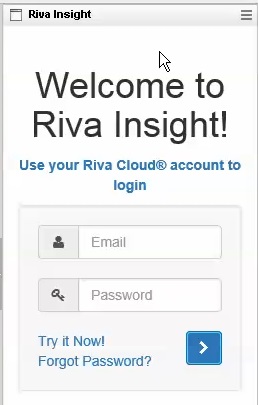
Enter your Riva Cloud user name and password to initialize Riva Insight.