|
Article ID: 2516
Last updated: 23 May, 2024
Introduction:This article will walk you through the prerequisites and setup steps needed to configure the Sales Engagement feature set within your Riva Cloud environment. By the end of this article, you will have configured and enabled the Sales Engagement features in the Sales Engagement portal and be ready to move on to advanced configuration and onboarding steps. There are multiple different deployment options, for this document we will be using:
Only the Riva Insight Web Add-in supports Sales Engagement Features, if you're using the Windows Add-in - Contact our support team to upgrade.
Roles required to set up Sales Engagement Features
Contents Exchange Permissions Office 365 Exchange Permissions (Exchange On-Premises) Step 2: Test your Email Connection - Optional Step 4: Configure your Account Supported SystemsCurrently, Riva Sales Engagement features are supported for the following email and CRM platforms:
Deployment Options
Notes: *Cloud: Services are hosted on Riva Cloud, which is hosted on the Amazon infrastructure. Email Bursts and Opens & Clicks utilize the Riva insight Side panel. Every customer has a dedicated single-tenant “container” that is isolated to each customer. Each customer’s configuration and application data is isolated and maintained in per-customer “document collection”. ** This can be achieved with the Sales Engagement platform using the web-based portal and Riva Insight on-premises. For more details regarding Riva’s statement on security and privacy, see the following article: https://kb.omni-ts.com/entry/2479/ and https://kb.omni-ts.com/entry/255/. *** Please reach out to the Riva support team for further info Notes: *Cloud: Services are hosted on Riva Cloud, which is hosted on the Amazon infrastructure.
** This can be achieved with the Sales Engagement platform using the web-based portal and Riva Insight on-premises.
*** Please reach out to the Riva support team for further info Prerequisites:Ensure the following are completed before enabling Sales Engagement features. Riva Sales Engagement features require a separate Exchange/Office 365 connection apart from any current connection you may have for the sync policy.
Riva Insight 2024.X.XX
Exchange Permissions Office 365To allow Riva access to Exchange in Office 365, you need to give consent to Riva. For customers using Office 365, Riva offers two authorization models to enable Riva to access customer’s protected Exchange resources:
OR
Note: you do not need to make any changes in your Azure AD manually, Riva will take care of this when Microsoft you are prompted to grant the consent in the “Grant Consent” step to follow. Exchange Permissions (Exchange On-Premises)For customers using Exchange On-Premises. Prepare credentials for exchange users with "Application. Impersonation" permissions.
Enable Autodiscover
Testing Exchange AutodiscoveryThis guide will help you test your Exchange server’s Autodiscover capabilities.
Setup & DeploymentStep 1: Sign into Riva CloudLog into your Riva Cloud Account using your administrator account.
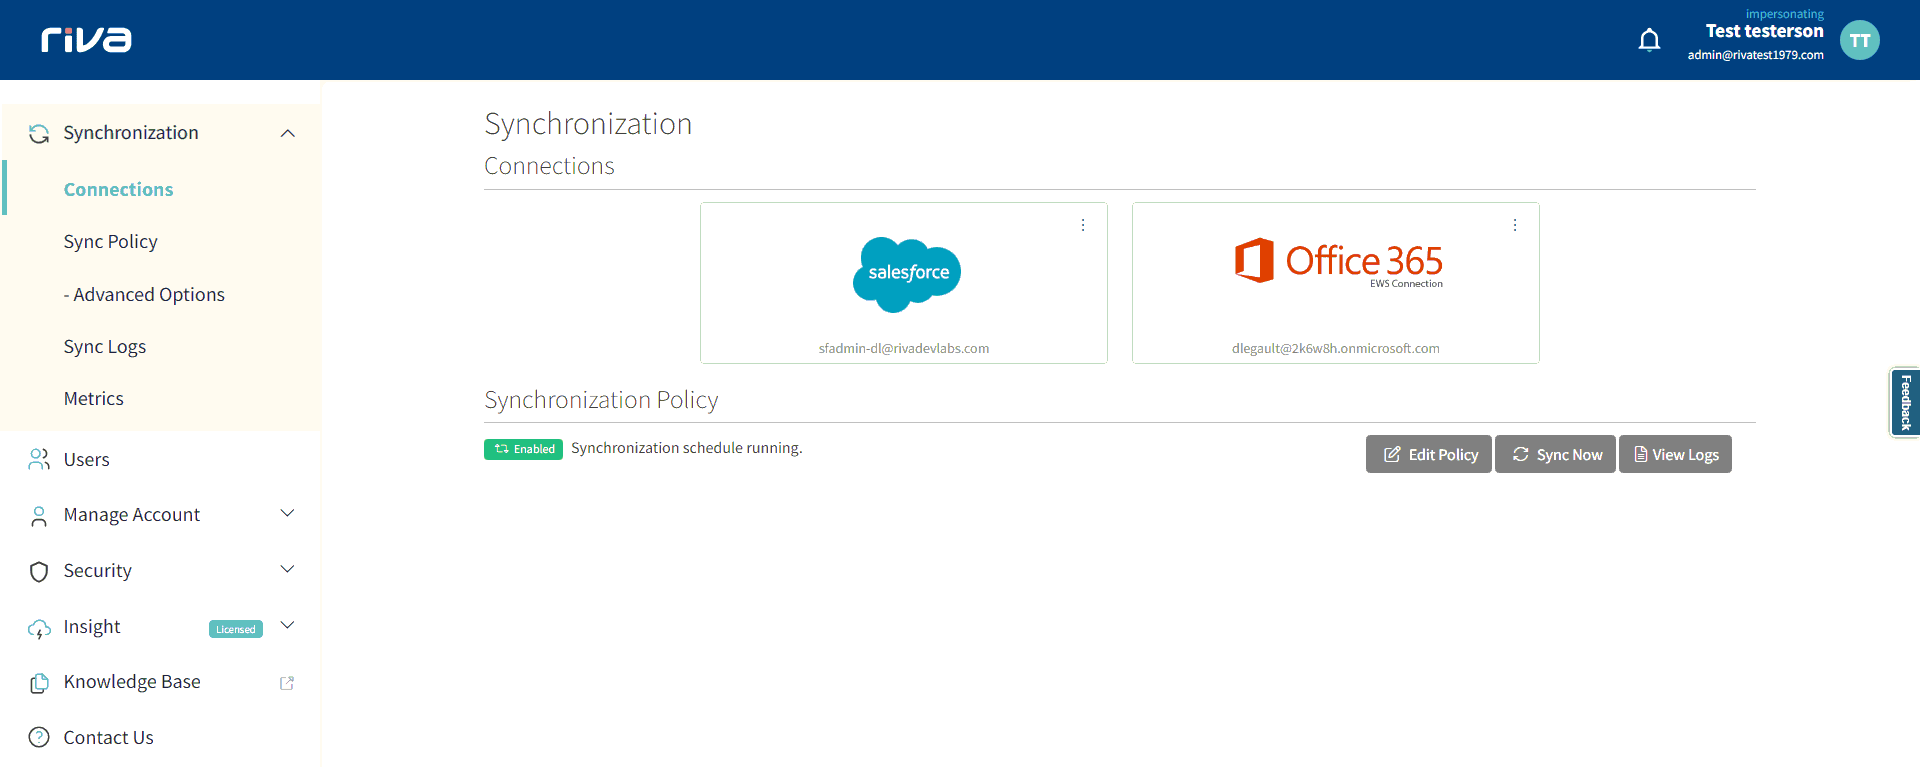
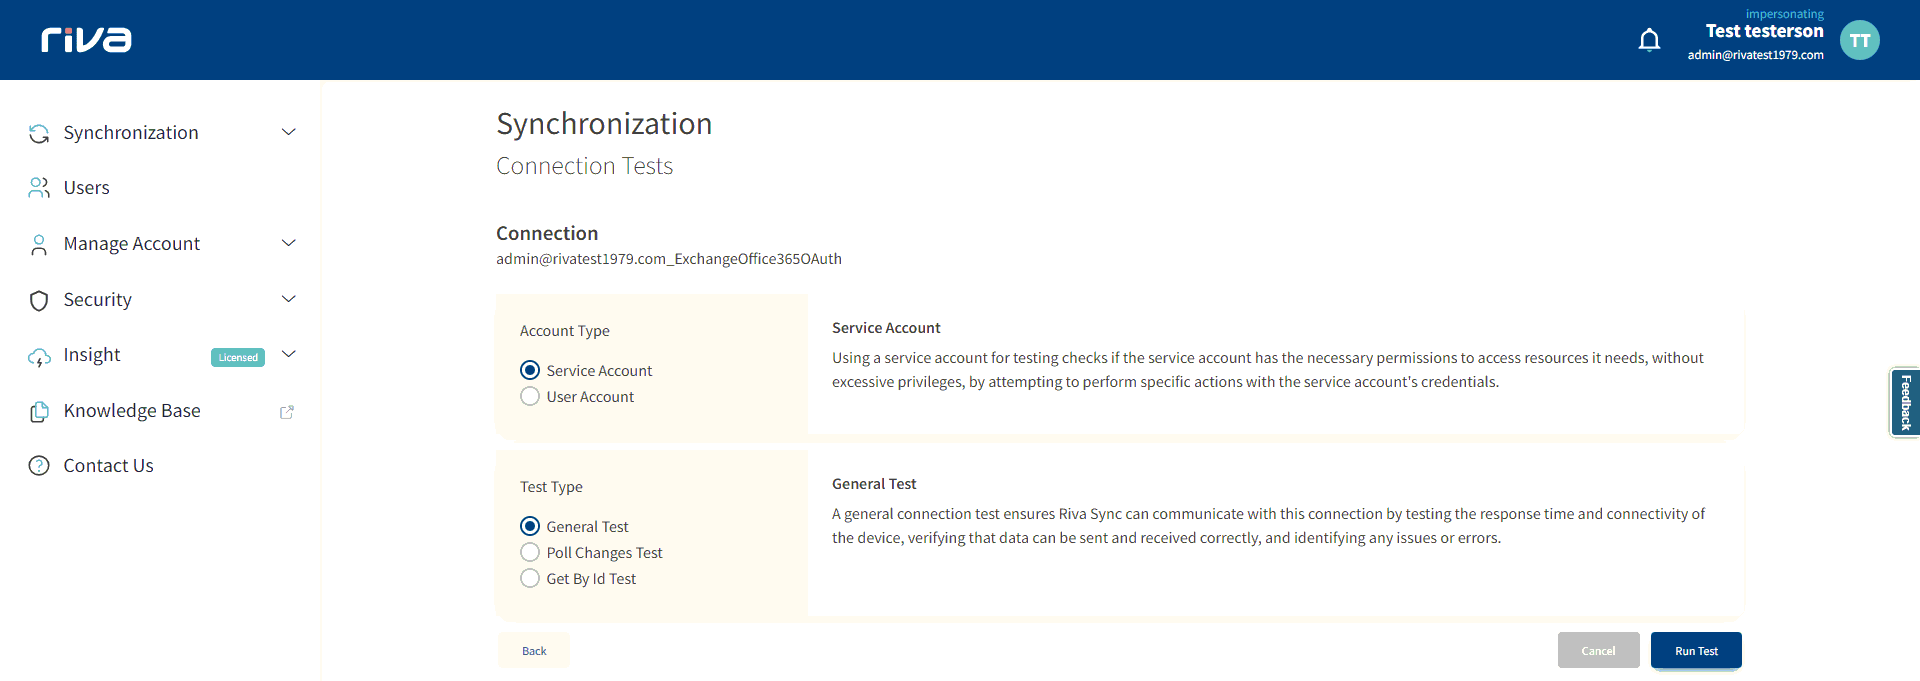
Step 2: Test your Email Connection (Optional)The default page displayed is the connections page. The email connection information is used to set parameters like domain and admin user for Riva bookings. These settings cannot be changed and will impact the Riva insight functionality if not set. It’s recommended to click the three dots in the upper right corner of the connection and choose “Edit.”
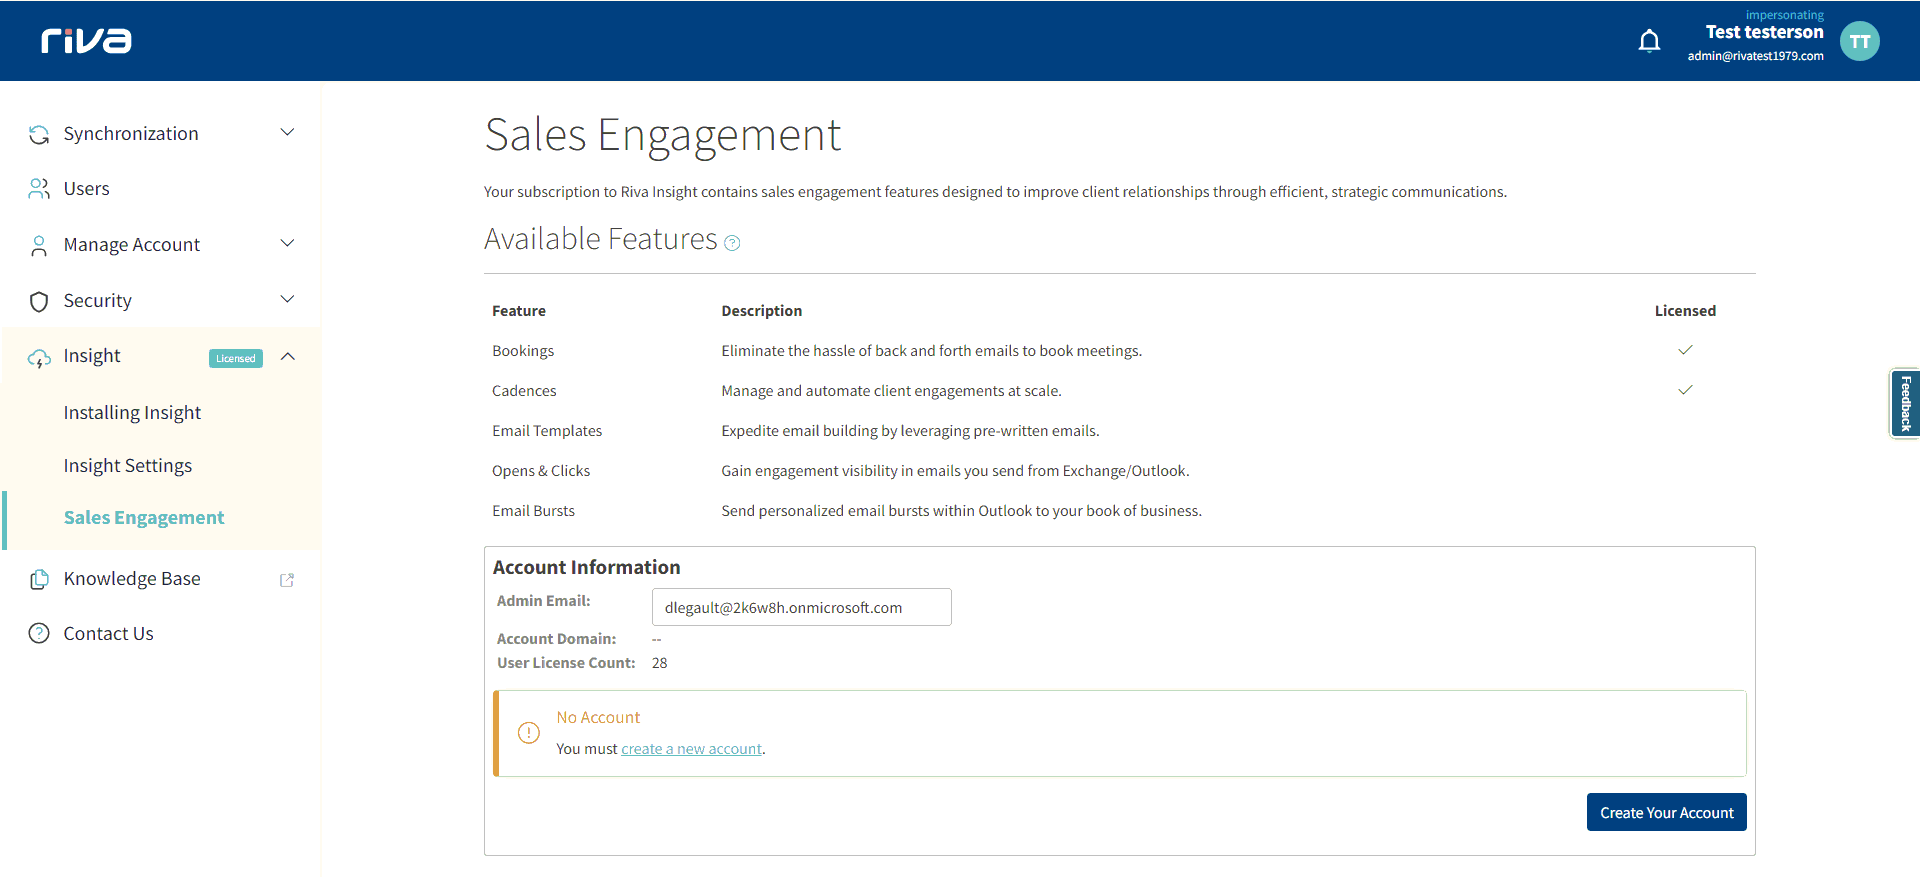
Step 3: Create your AccountConfigure Sales Engagement features, by navigating to Insight → Sales Engagement. The top section of the page will list the advanced features your organization is licensed for. The bottom section details your instance information.
Click on "Create Your Instance" to start the initialization process. This process can take a couple of minutes to complete.
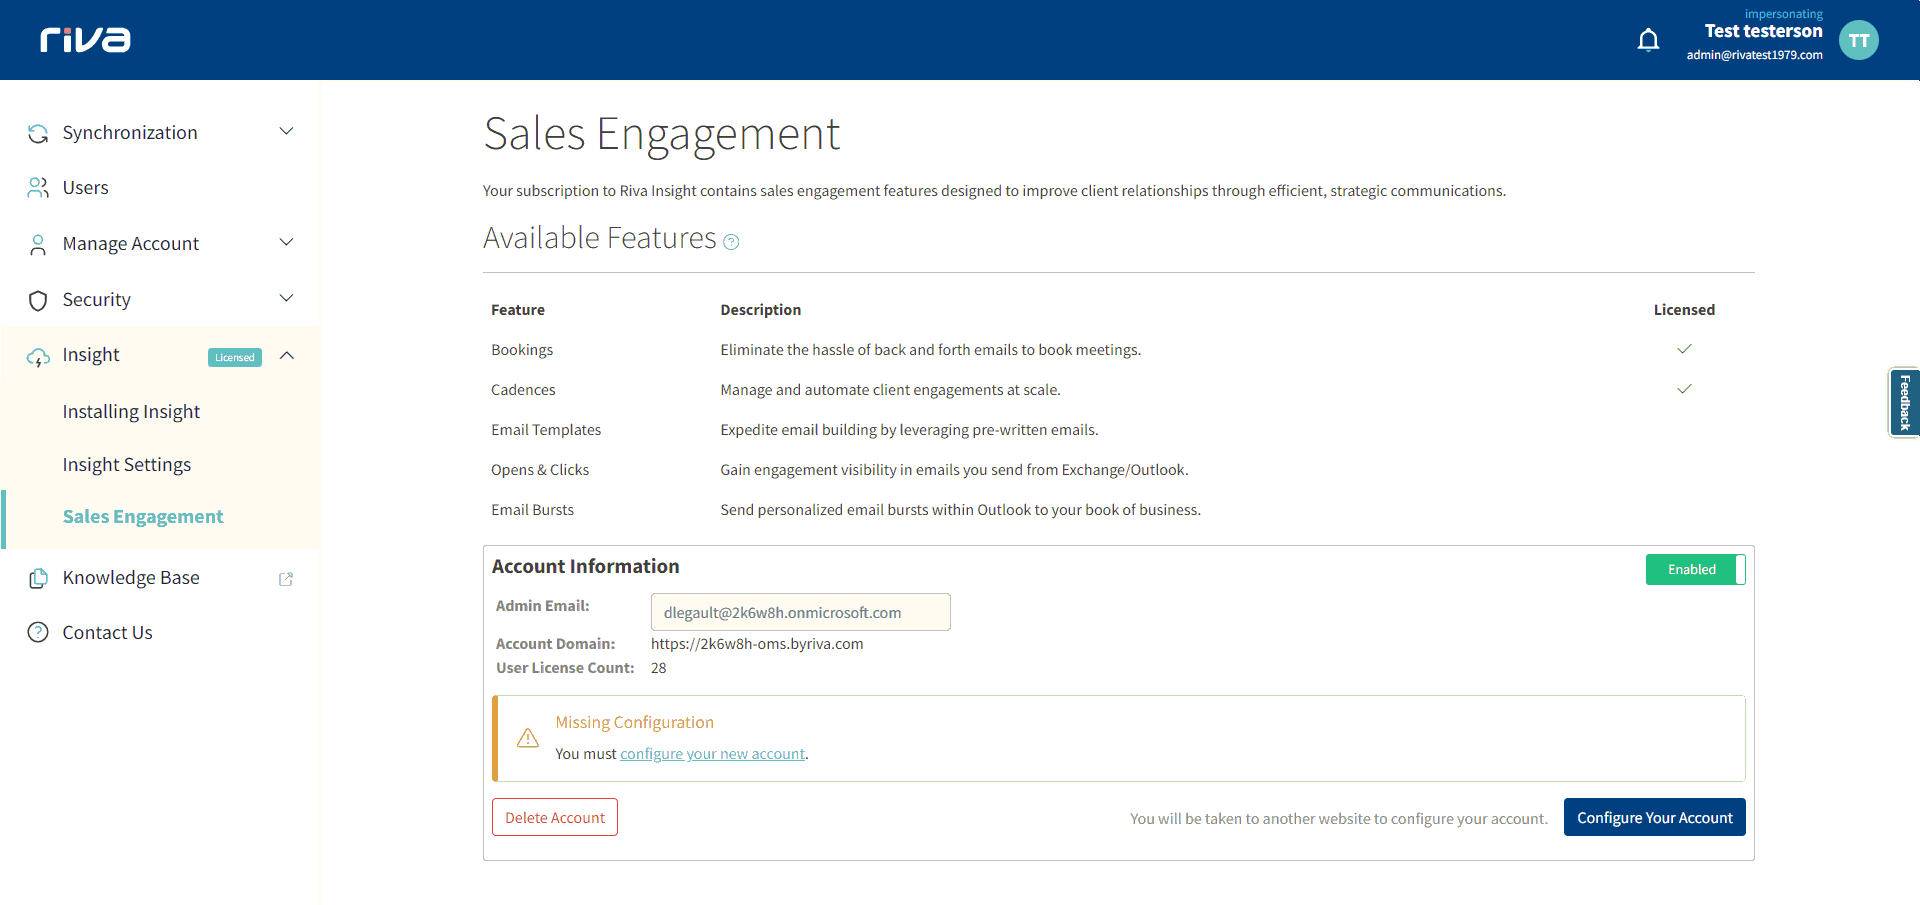
Step 4: Configure your AccountOnce the initialization process has been completed, it can take a few minutes. You will see a notification that the instance has been created but that the configuration is missing. Click “Configure your Account” to proceed to the final setup step.
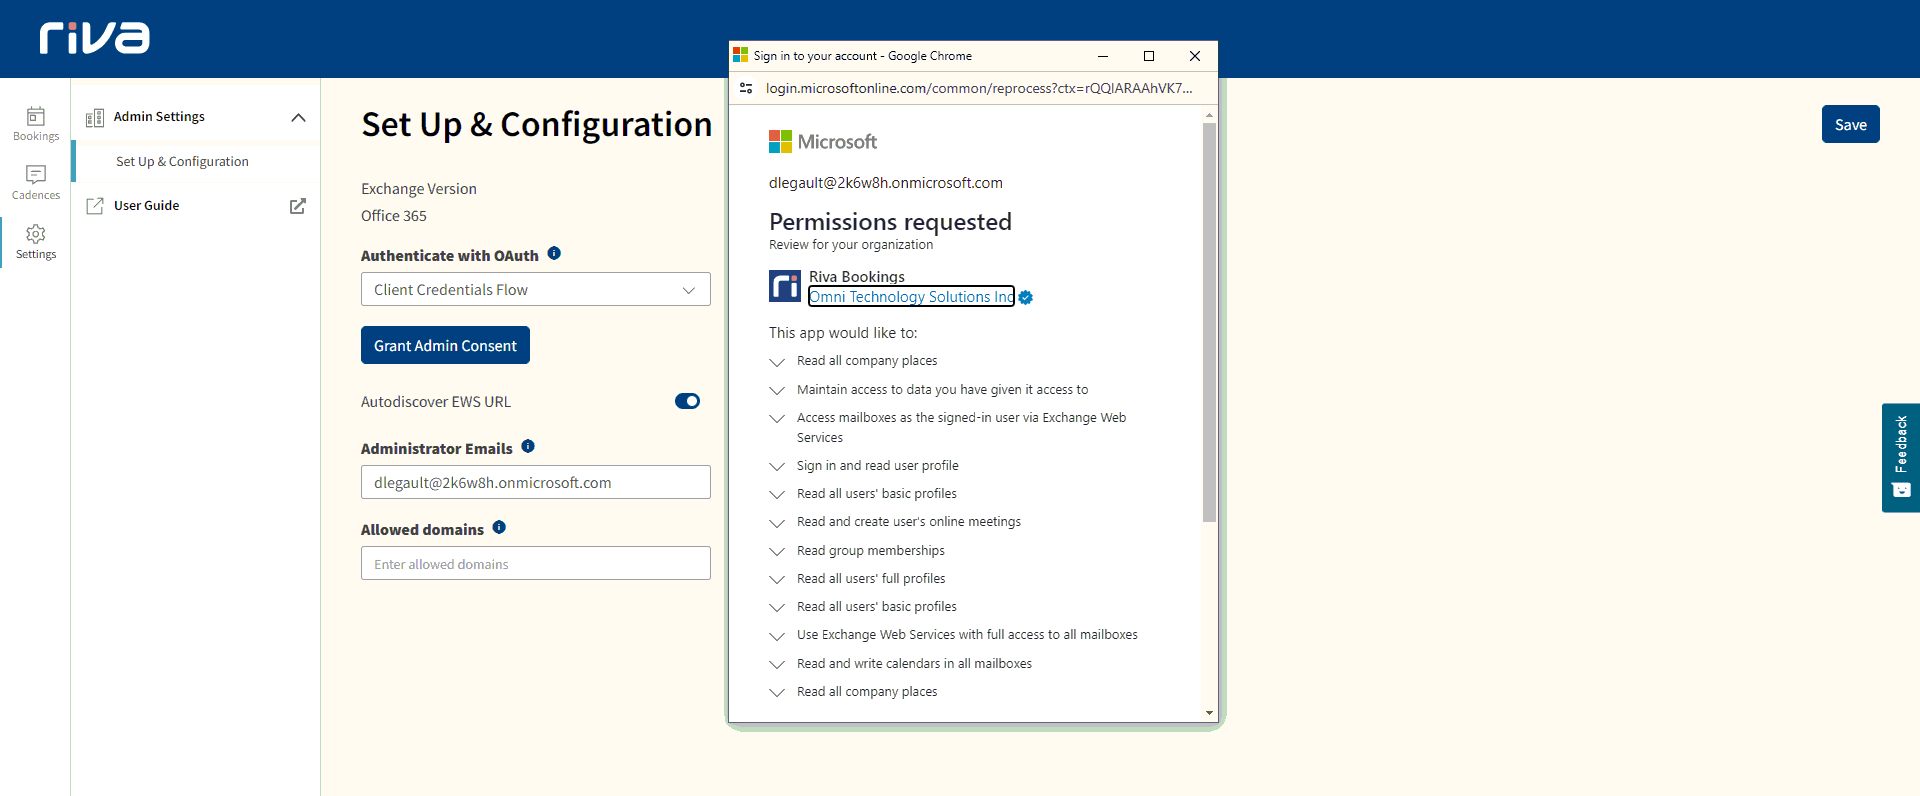
Step 5: AuthenticateA new tab will open and display the authentication page. From here we need to click on the “Grant Application Access Consent” button. There are some configuration options here that need to be set before moving on. Authenticate with Oauth As a part of the prerequisites a determination needed to be made on how we authenticate. Choose either:
OR
Once the above option is set, click on Grant Consent A new pop-up will appear prompting you to sign in with the admin account to accept permissions.
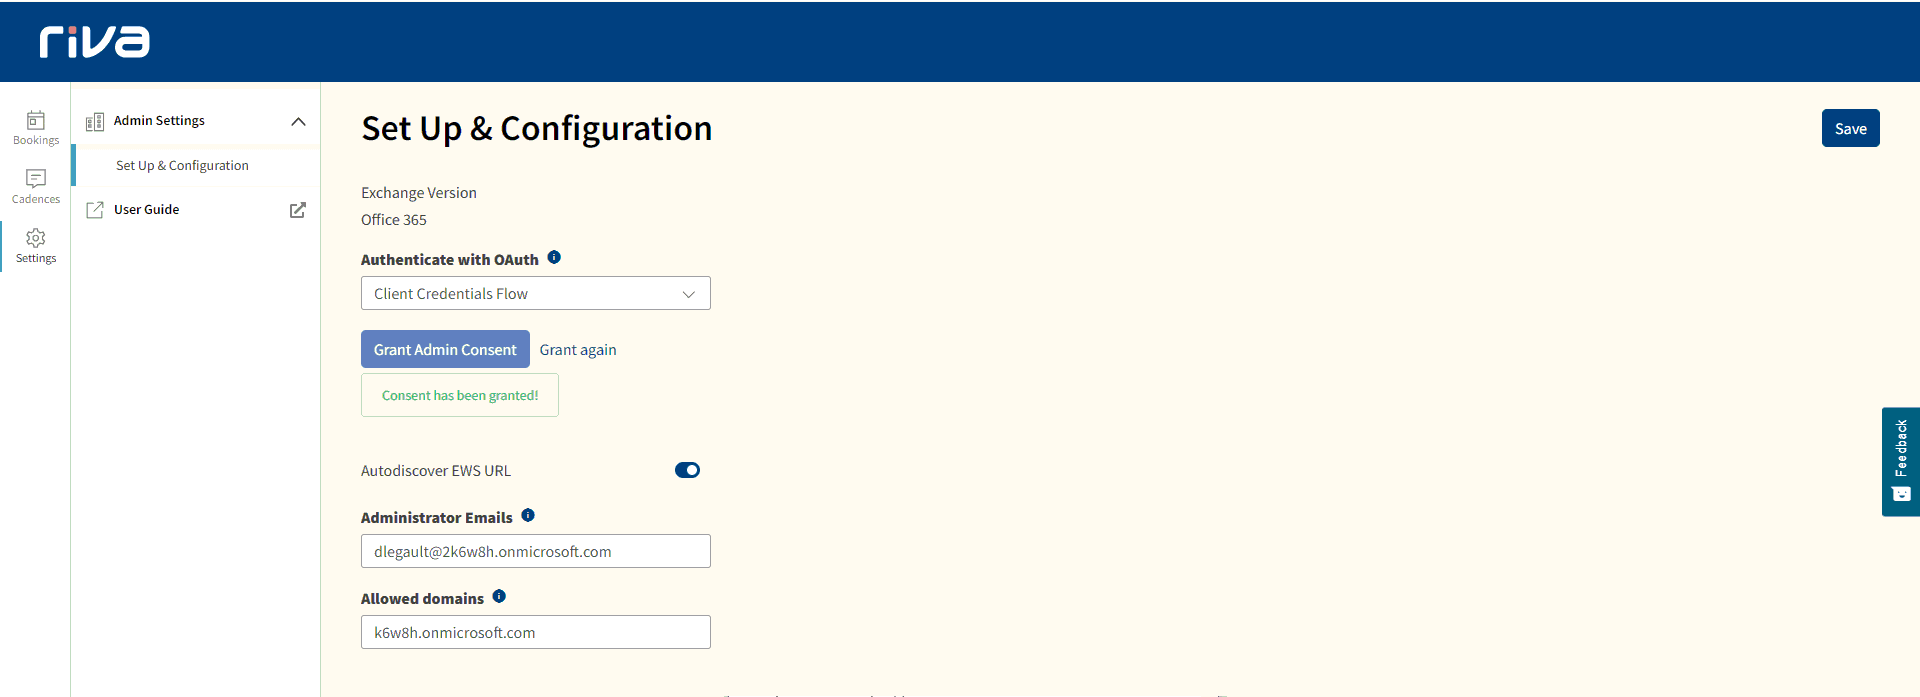
Step 6: Additional SettingsFrom here any additional admin users and domains can be entered. (if required). Autodiscover EWS URL
If you're not able to connect automatically and entering the information doesn't work. You can complete the following test Administrator Email
Allowable Domains
Save
Step 7: Helpful InformationAfter you log back into the Riva Cloud website, navigate to Sales Engagement features, by navigating to Insight → Sales Engagement. The setup is complete at this point. Some items of interest are:
Contact SupportIf you encounter an error or have questions, our support team is available to assist.
Article ID: 2516
Last updated: 23 May, 2024
Revision: 14
Views: 0
|
|||||||||||||||||||||||||||||||||||||||||||||||||||||||||||||||||||||||||||

.bmp)


.bmp)
