Applies to Riva Insight for Outlook.
For Riva Insight 2021.3 or higher.
This article is for your company's Riva Insight administrators to configure the display of CRM information in the Riva Insight context view.
- The Riva Insight context view used to be called the Insight panel. It is the display of read-only information from the CRM after an end user selects a supported item in Outlook or uses the Riva Insight Search field to find a supported record in the CRM.
- Specifically, by configuring the CRM Modules options of Riva Insight, the admins control which CRM fields are displayed in the context view of Riva Insight, exactly where they are displayed in the context view, and which icon accompanies a given field.
Your company's Riva Insight administrators can also configure the Track in CRM fields.
Contents:
How to Access Settings in Riva Insight
To get to the Settings page:
- In the top right corner of Riva Insight, select the menu icon, then choose Settings.
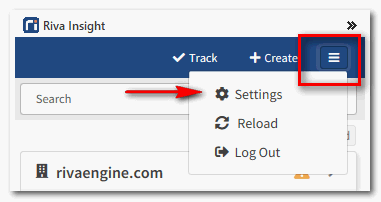
Result: The Settings window is displayed.
Adding a Display Field
To add a display field in Summary View:
- In Outlook, navigate to Riva Insight, open the top right menu icon, and select Settings. On the top menu, select CRM Modules.
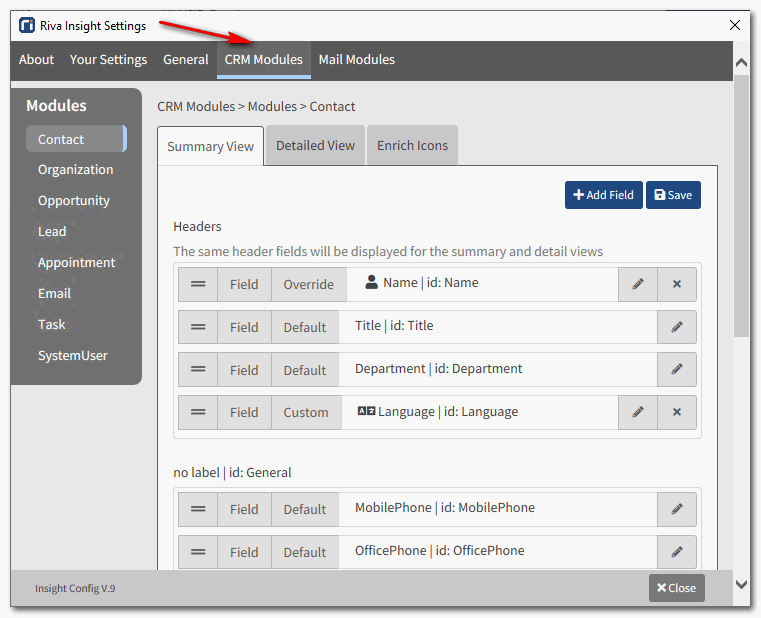
- On the side bar, select the CRM module that has a field you want to display in context view but cannot see in the Unassigned section when configuring the display. Click Add Field.
- In the field labeled Name, enter the name of the field. (Examples: Custom Language; Order Number.)
- In the field labeled CRM Fields, enter the API name of the field that exists in the CRM. Click Add Field.
- Select the Display Config tab. From the options, select an icon to display for this field.
- In the Insert CRM Field drop-down list, above the Label field, select the label you want to appear for the item.
- In the Value field, select the CRM value from the drop-down list that corresponds to the label.
- Optional: In the applicable fields, enter a URL or a Tooltip.
- Select Save.
Result: The UI switches back to the Summary View tab for the chosen module, and the custom display field appears in the Unassigned Fields section.
To add a display field in Detailed View:
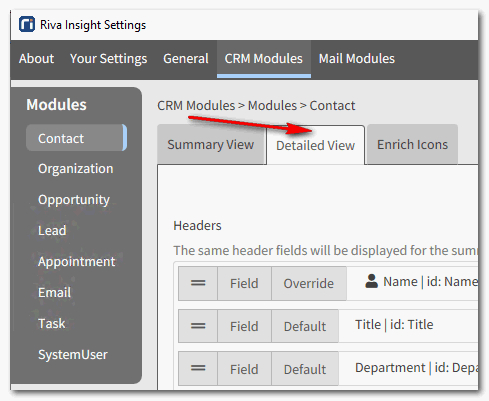
- On the top menu, select CRM Modules.
- On the side bar, select the CRM module that has a field you want to display in context view but cannot see in the Unassigned section when configuring the display. Select the Detailed View tab for the module.
- All other steps are the same as above.
Assigning a Display Field to an Area
To assign a display field to an area:
- From the Unassigned section on the Summary View tab and/or Detailed View tab, drag and drop the field into the Header or General section. Select Save.
The new display field is now ready to use.
Modifying a Display Field
To edit a display field:
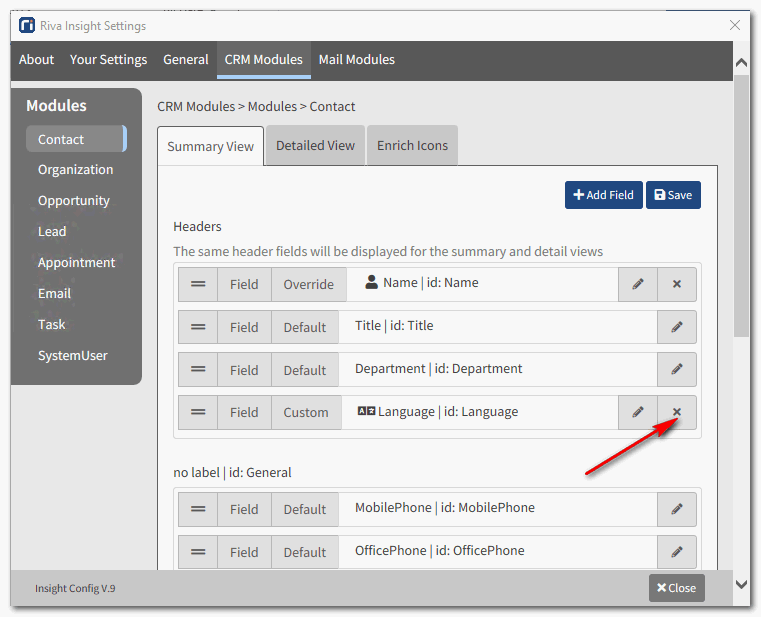
- In Settings, go to the CRM Modules top tab.
- Under Modules on the side bar, select the applicable module.
- On either the Summary View or Detailed View tabs, to the right of the desired field, select the pencil icon.

- To edit a CRM field, select the pencil icon next to the applicable field name.
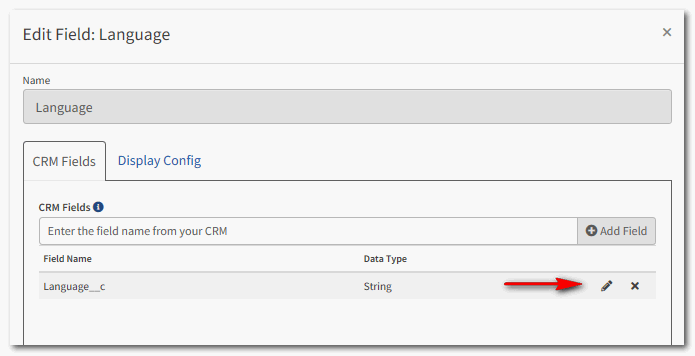
- Edit the field as desired. When finished, select Save.
Deleting a Display Field
To delete a display field:
- In Settings, go to the CRM Modules top tab.
- Under Modules on the side bar, select the applicable module.
- On either the Summary View or Detailed View tabs, to the right of the desired field, select the (x) icon as shown.
- A dialogue box will appear, asking to confirm the deletion. Select Delete.
Result: The display field is deleted.
More Configuration Options
For more display field options in Riva Insight, see the Riva Insight Administrator Guide.
