Riva CRM Integration - Documentation and Knowledge Base

Create an Office 365 OAuth Connection from Riva Cloud

Article ID: 2006
Last updated: 21 May, 2021

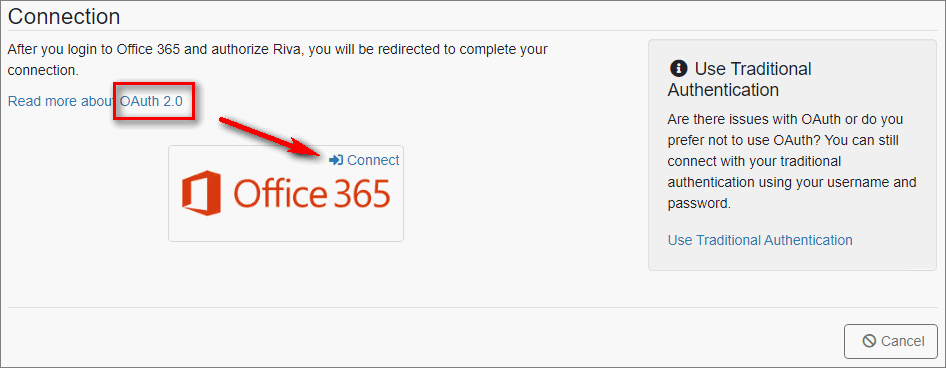
Contents:

Multi-Factor Authentication (MFA)

If your company requires Multi-Factor Authentication for the Riva connection account to Office 365, then you will be required to validate the account via the MFA mechanism (phone token or email address) when creating the connection.

Alternatively, you could submit a request to your Exchange/Azure administrator to exclude your service account from requiring MFA.

Create the Office 365 OAuth Connection to Riva Cloud

Creating the connection per se is followed by two closely related steps:

  1. Create the Office 365 OAuth connection to Riva Cloud.
  2. Whitelist the Riva Cloud IP address range.
  3. Prepare Office 365 Exchange permissions for the Riva Cloud connection.

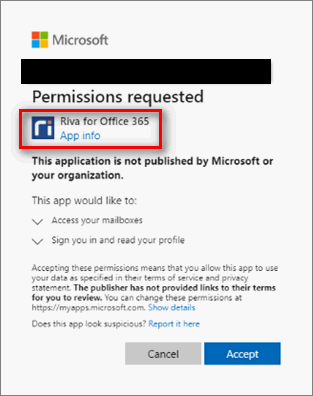
Step 1: Create the Office 365 OAuth connection to Riva Cloud

This step creates an OAuth Client Secret to connect to Office 365.

To create the Office 365 OAuth connection:

  1. Log in to https://www.rivacloud.com. (Detailed instructions to log in or sign in.)

  2. On the Get Started page, select Configure your email.

  3. Select the Office 365 logo.

  4. On the Connection page that appears, select Connect.

  5. In one or more Microsoft windows that appear, enter the information required to access the desired Office 365 account.

    Note: The required information may include Multi-Factor Authentication (MFA).

  6. If you see this Permissions requested page, select Accept.

  7. Do one of the following:

    • If the connection setup is successful, select OK. Result: The Office 365 OAuth connection is added to your Riva Cloud account.
    • If you experience an issue, see the following step.

Step 2: Whitelist the Riva Cloud IP Address Range

Riva Cloud must be able to connect to your Exchange Web Services server from the internet.

  • If Riva Cloud reports that the connection was not successful, contact your Office 365 administrator to confirm that the EWS host URL uses the correct website URL for your Exchange Web Services connection.

Step 3: Prepare Office 365 Exchange permissions for a Riva Cloud connection

This article was:   Helpful | Not helpful
Report an issue
Article ID: 2006
Last updated: 21 May, 2021
Revision: 8
Views: 121
Comments: 0