In Riva 2.4.46 or higher, sending the required files and logs of a Riva On-Premise instance to the Riva Success Team is no longer a manual process. Now, a few clicks suffice. The Riva Manager application then gathers all the required files into a password-protected .zip file for you to send to Riva Success.
Security Warning: Separately. The password and .zip file must be communicated separately.
To create a .zip file package for tech support:
-
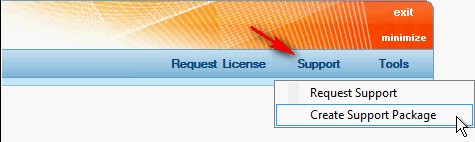
In the Riva Manager application, on the menu bar, select Support, and then choose Create Support Package.
-
In the Generate Technical Support Package window that appears, select the categories of files to include in the support package:
| To include the following: |
Do this: |
|
One or more sync policies with the related
- custom settings,
- directives,
- app.config files,
- licenses, and
- connection files. — Note: The support package does not include any connection credentials or sensitive data.
|
|
|
The relevant log files.
Note: This is recommended to help with troubleshooting.
|
-
Ensure that near the bottom left corner, under Log Files, the check box Include Log Files is selected.
Note: By default, all the log files produced in the last 14 days are included in the support package.
-
Ensure that the number of days is sufficient to capture all the errors under investigation.
|
|
Additional files, if requested by the Riva Success Team.
For example, Riva Success might ask for
- the CRM integration logs for specific users or
- a directory listing of the Transactions folder.
Warning: Do not send the contents of the entire Transactions folder: they are generally far too large to zip and send. If we need the contents of a subfolder, we will ask for it.
|
-
Under Additional Files, select Add.
-
In the Open window that appears, navigate to the file that you want to add to the package, select it, and then select Open.
Result: The file you have selected appears in the Additional Files box.
|
-
Near the lower right corner, under the automatically generated password, select Copy Password, and paste the password in a secure location.
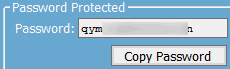
Warning: After the Generate Technical Support Package window is closed, the Riva Manager application has no access to the password. If the password is lost, the package cannot be opened and a new package must be generated.
-
Select Export.
-
In the Save As window that appears, navigate to the location where you want to save the export package, optionally change the File name, and select Save.
Expected Result: The support package is generated and saved with the specified name at the specified location.
-
If an Export Fail window appears, follow the instructions in it.
-
If the export is successful, send the .zip file to the Riva Success Team and separately communicate the password.
Response: A team member will acknowledge receiving the package and password and will use the package to troubleshoot the issue.
