Enabling the first sync policy for the first time is the test that confirms the successful deployment of Riva On-Premise.
To confirm the successful deployment of Riva On-Premise for HCL Notes:
- Monitor the initial sync cycle.
- Confirm the initial sync in an email client.
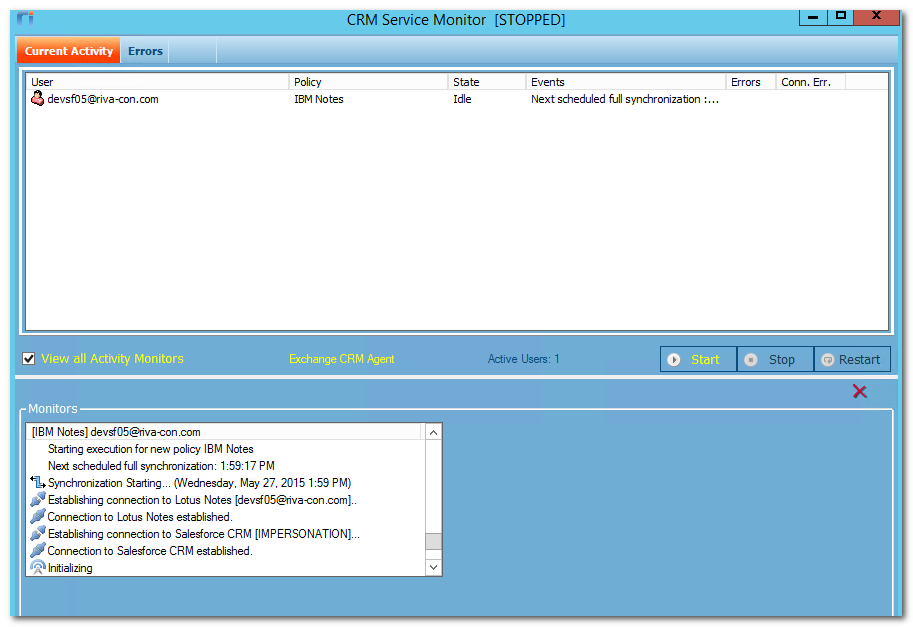
Step 1: Monitor the Initial Sync Cycle
-
Ensure that you start the Riva Service Monitor application before enabling the sync policy. To start the Monitor, open or run the "Riva\Riva Service Monitor.cmd" file.
Note: In Riva 2.4.46 or earlier, the file was named "CRM Service Monitor.cmd".
-
If this is the initial sync for five or fewer users, select the View all Activity Monitors check box.

-
In the Riva Manager application, on the menu bar, select Policies. In the right pane, right-click the sync policy object, and select Enable.
Result: The initial sync begins shortly. The Monitor's top list box displays the users in the sync queue. If in the Monitor you selected the View all Activity Monitors check box, an activity monitor window appears for every user and displays that it is initializing the user.
-
If you clear the View All Activity Monitors check box, select the check box to the left of the user(s) to monitor, and the application opens an activity monitor panel for every selected user.
What the Riva sync does
-
If there is a large number of contacts in the CRM, it may take several minutes to initialize every user before proceeding. Do not interrupt the initial sync. Let it continue.
-
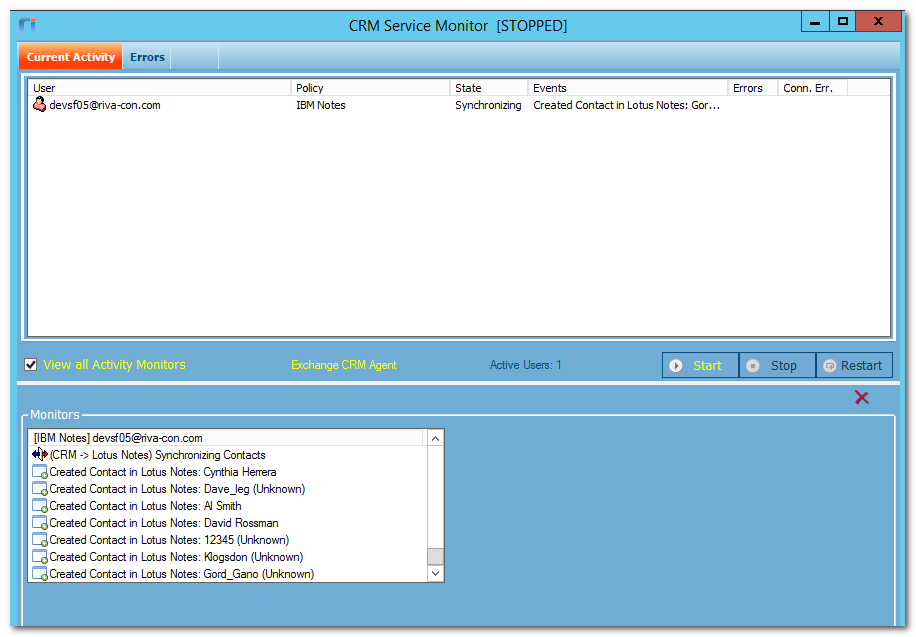
After completing its initializing activity, the system starts to synchronize data for each mailbox.
-
Depending on how the sync policy is configured, data is created in every mailbox (that is synced by Riva) in the following order:
- Contacts and leads are added to the syncing user's address book.
- Appointments, phone calls, and service call events are added to the syncing user's calendar.
- Tasks are added to the syncing user's task list.
- The email sync and drop folder structure is created in the syncing user's mailbox.
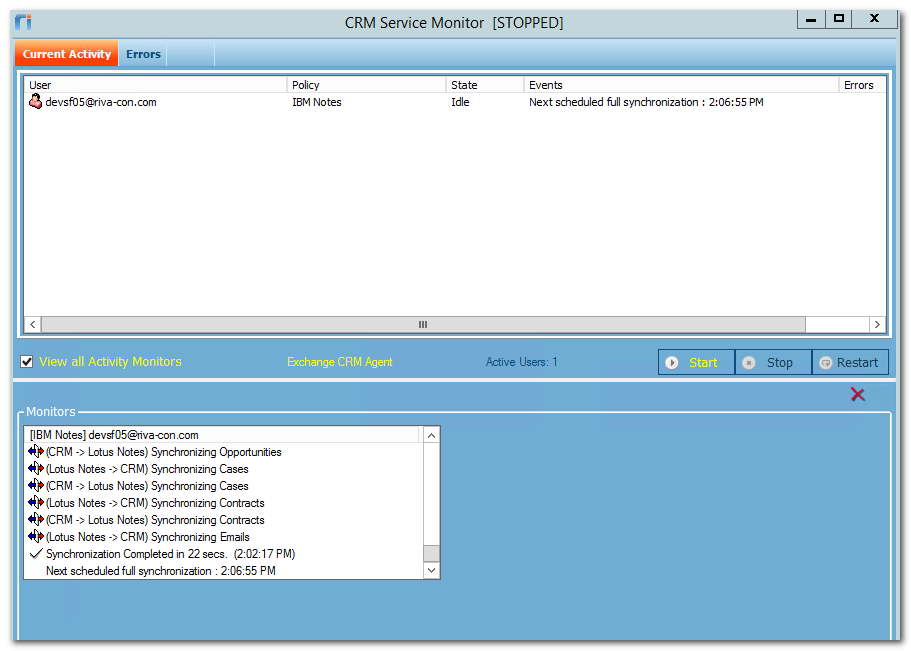
- Opportunities, cases, etc. are added into the email drop folder structure in the syncing user's mailbox.
-
After finishing the first sync for a syncing user, the Riva Service Monitor displays that status and indicates when the next full sync cycle is scheduled to start.
-
The Riva sync service performs full-sync and drop-folder-check sync cycles as scheduled.
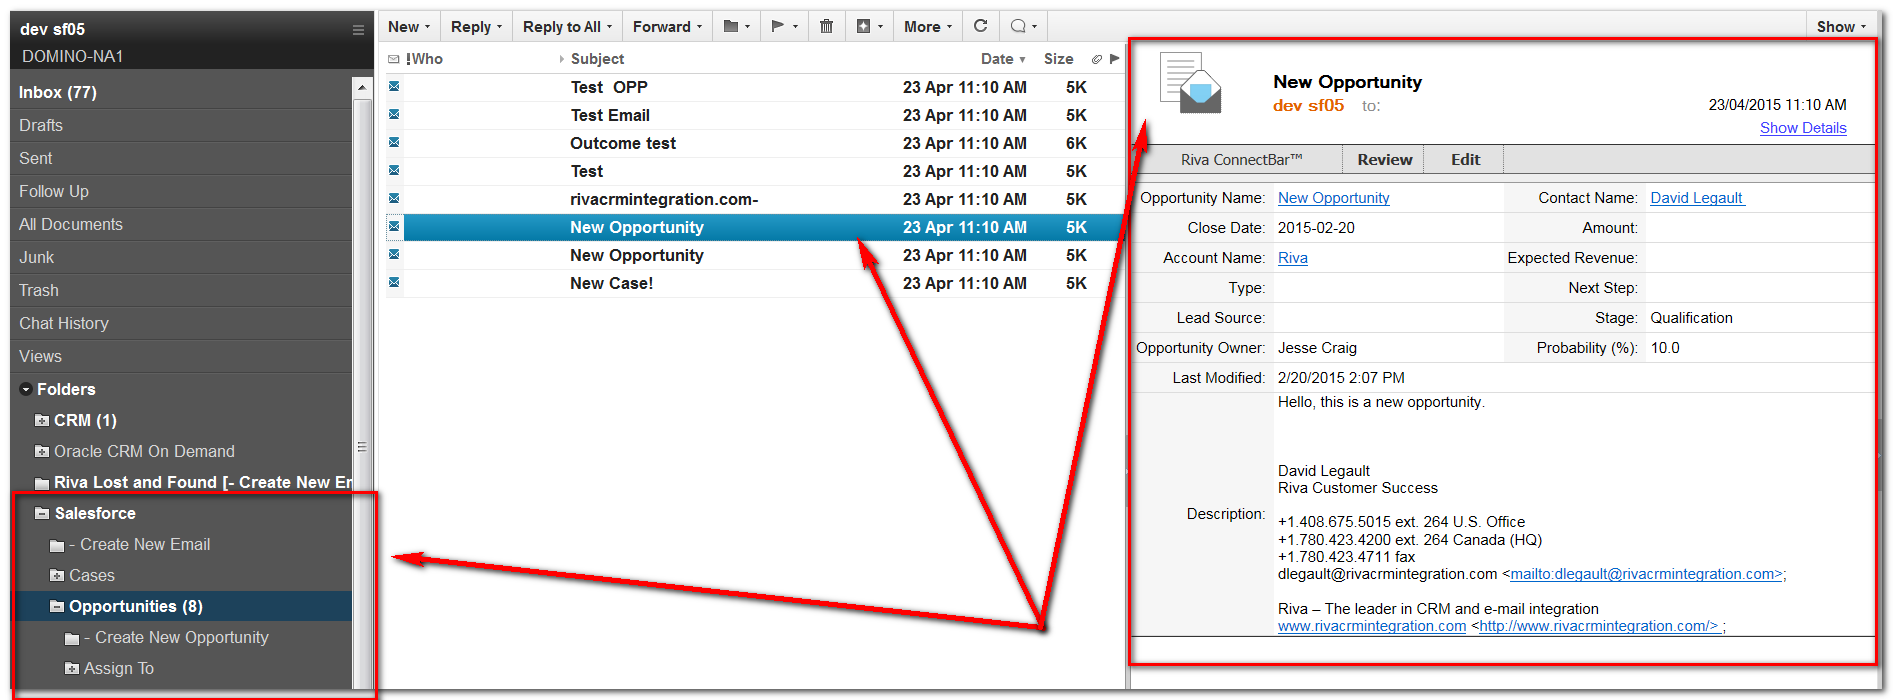
Step 2: Confirm the Initial Sync in an Email Client
The idea is to confirm what happens from an HCL Notes perspective: was the initial sync cycle successful for each syncing user that uses the email client?
-
In HCL Notes or INotes, access the syncing user's HCL Domino account.
-
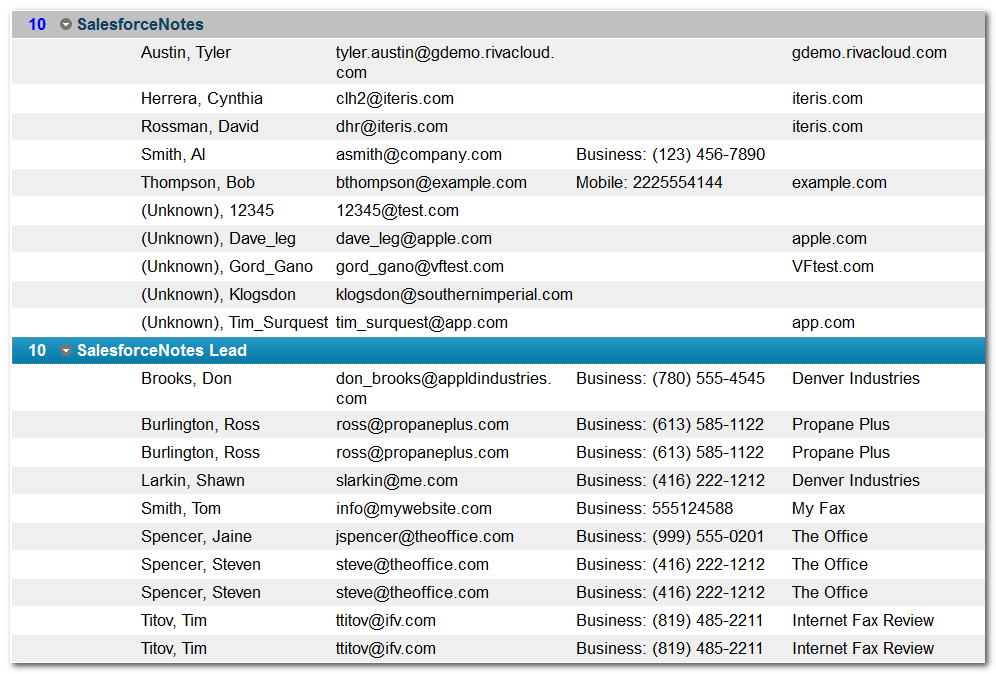
Look at the user's contacts. Ensure that the system has added contacts from the CRM and categorized them as contacts or leads.
-
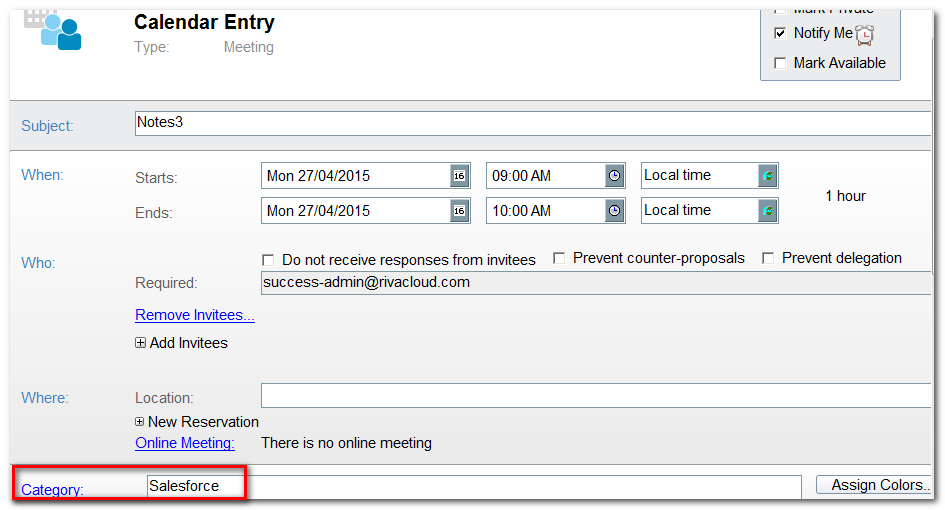
Look at the user's Calendar. Ensure that Notes displays CRM appointments, events, phone calls, and service call events and has assigned the applicable category.
-
Look at the user's mailbox. Ensure that the folder structure for the email sync and drop folders has been added. Ensure that if opportunities, cases, or other advanced module items were synced, the drop folders and quick connect emails are visible.