Enabling the first sync policy for the first time is the test that confirms a successful deployment of a Riva server.
This article will cover:
Steps to Enable a Sync Policy and Monitor the Initial Sync Cycle
-
Ensure that you start the CRM Monitor application before enabling the sync policy. Ensure the View all Activity Monitors option is checked.
-
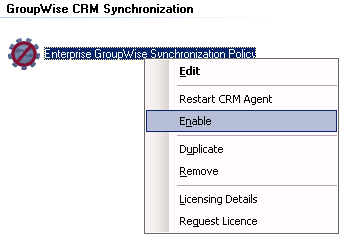
In Riva, under Policies, right-click the sync policy object and select Enable.
-
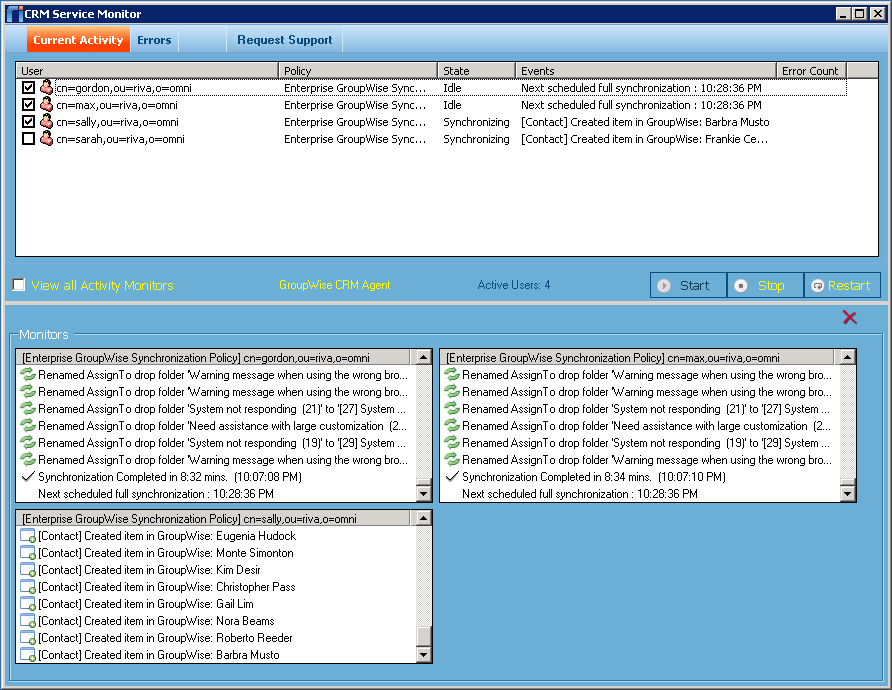
In the CRM Monitor, the target users will be displayed in the user queue. If the View all Activity Monitors option is checked, Riva will open an activity monitor window for each user that and display that it is initializing the user. You also have the option of selecting a few users from the list.
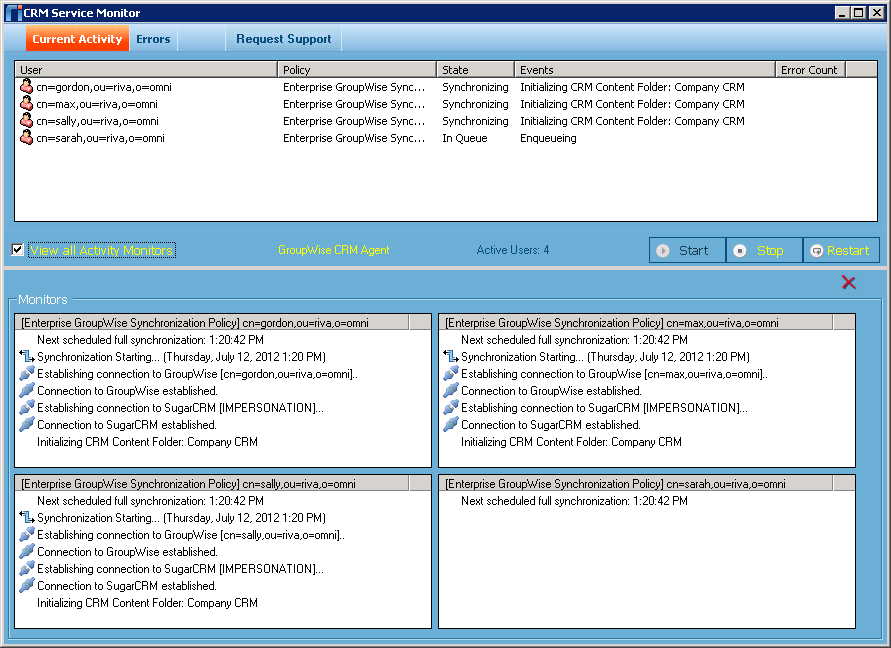
If there is a large number of contacts in the CRM, it may take Riva several minutes to complete the initializing for each user before proceeding. Do not interrupt the initial sync ... just let Riva continue.
-
Once the initializing activity has completed, Riva will start to create copies of the CRM data in GroupWise for the user.
Depending on how the sync policy is configured, Riva will create data in GroupWise in the following order:
- contacts and leads will be added to the target user's GroupWise address book
- appointments, phone calls and service call events (MS CRM) will be added to the target user's GroupWise calendar
- tasks will be added to the taarget user's GroupWise task list
- the email sync/drop folder structure will be created in the target user's GroupWise mailbox
- opportunities, cases, etc will be added into the email drop folder structure in the target user's GroupWise mailbox
-
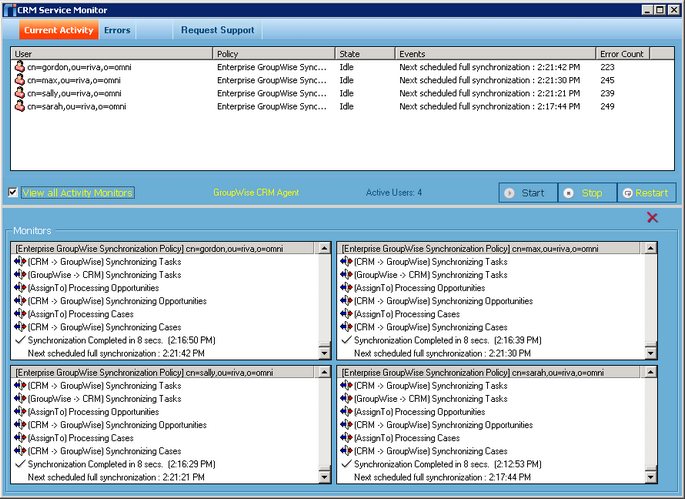
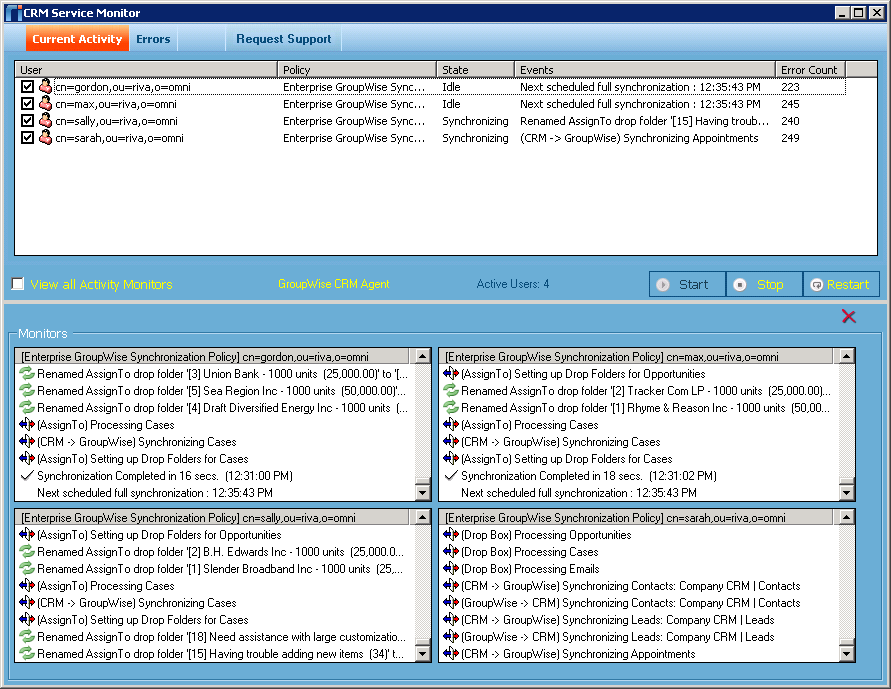
Once the initial sync for a target user has finished, Riva CRM will display that status and indicate when the next full sync cycle is scheduled to start.
-
The Riva CRM Agent sync service will then perform full sync and drop folder check sync cycles as scheduled.
What Happens in GroupWise
The next step is to confirm that the initial sync cycle was successful for each target user using the email client.
-
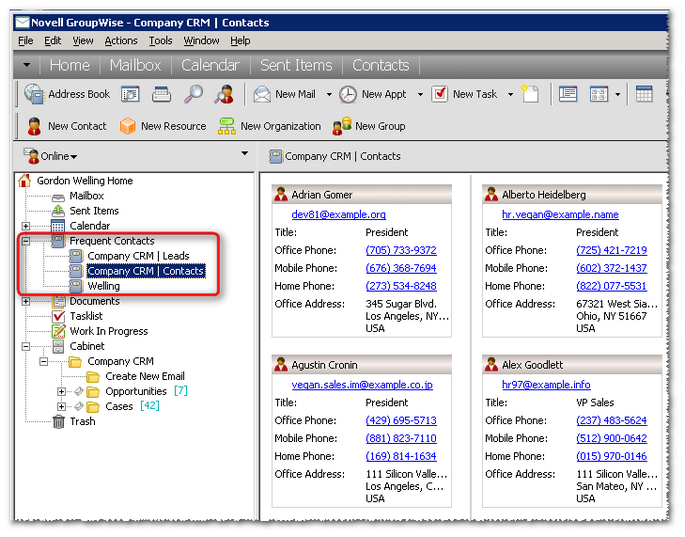
Access the target user's GroupWise mailbox in the GroupWise client.
-
Look at the user's Contacts. Riva will have added contacts and leads in separate contact books..
-
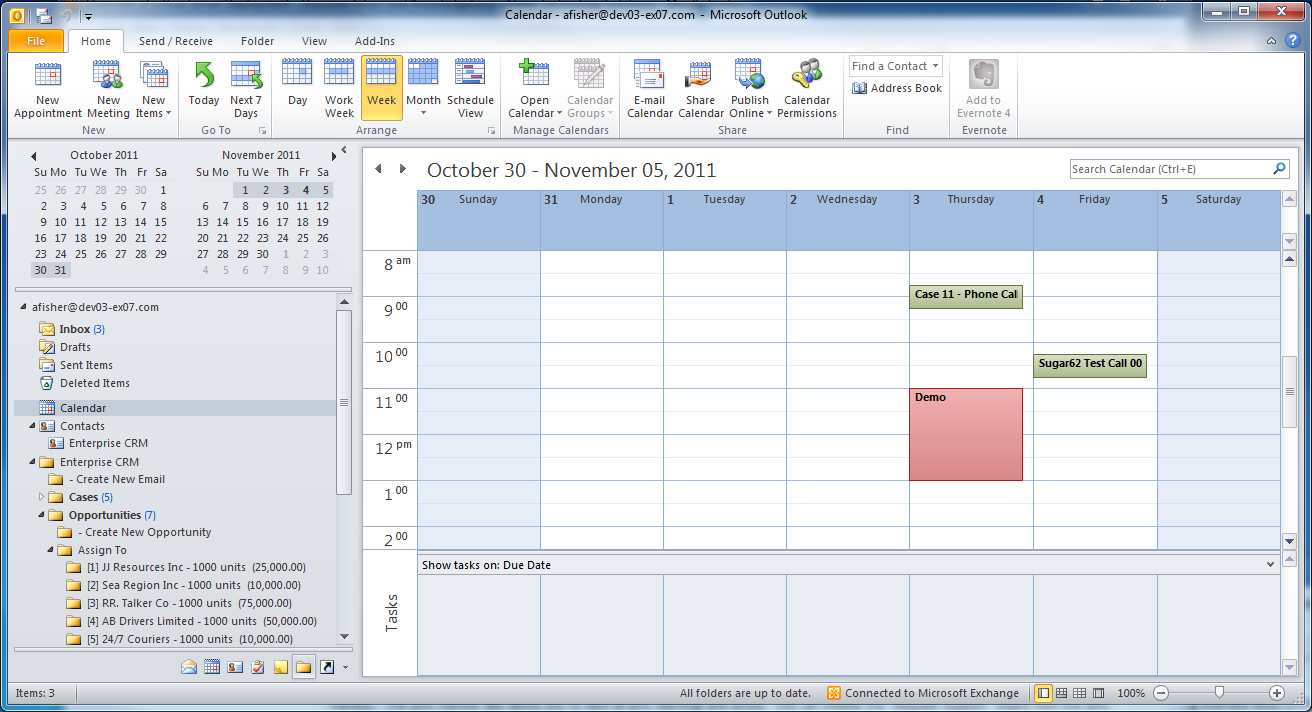
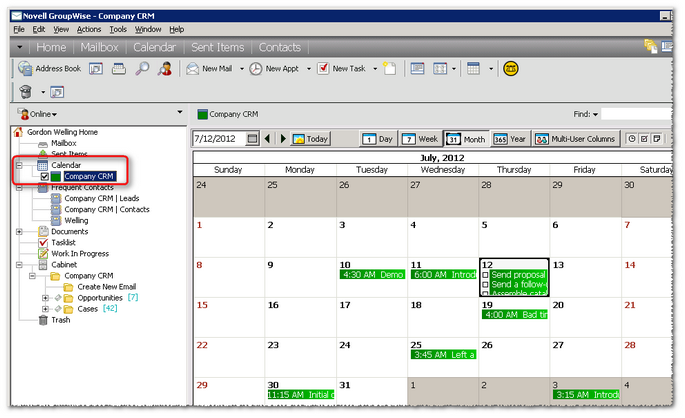
Look at the user's Calendar. Riva will display CRM appointments, events, phone calls, and service call events and assign the applicable category (and color).
-
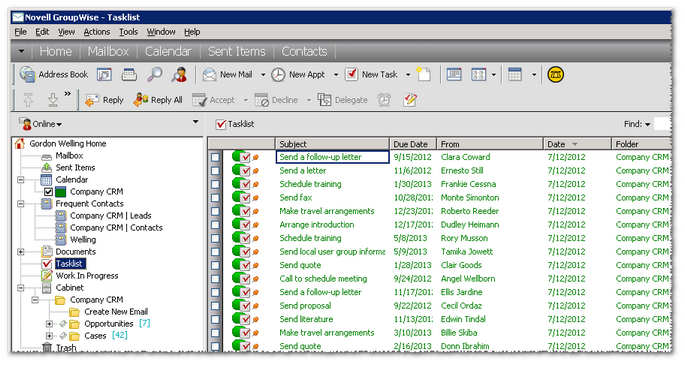
Look at the user's Task List. Riva has synced all open CRM tasks assigned to the user to the GroupWise task list.
-
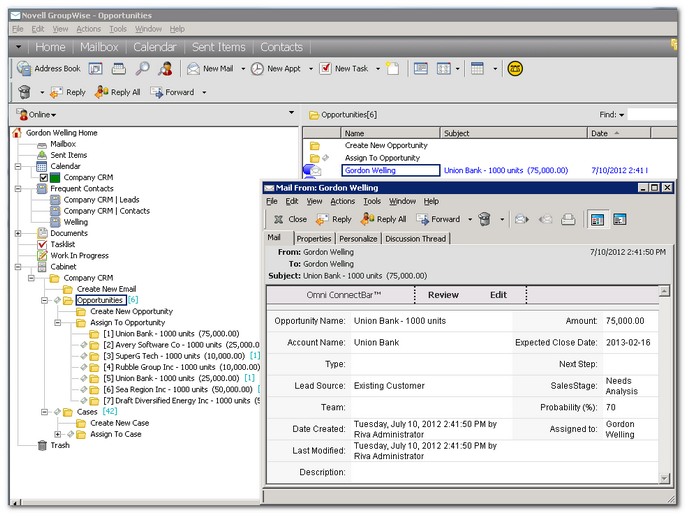
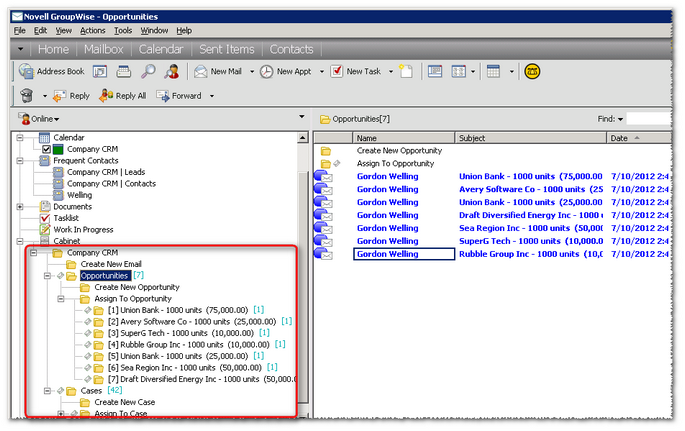
Look at the user's Mailbox. The folder structure for the email sync/drop folders will be added. If opportunities, cases or other advanced module items were synced, the drop folders and quick connect emails will be visible.
-
Open an Riva provided summary email. Riva will sync a summary email for each active assigned opportunity, case, quote or project. Each email is HTML formatted and provides a summary of the corresponding CRM item and an Omni QuickConnect Bar which provides a "Review" and an "Edit" link which will open the item in the CRM in the corresponding "view" or "edit" mode.