The Riva connection to Sage CRM requires the credentials of an admin account that can impersonate into the target CRM user accounts.
- Create a Sage CRM connection.
- Test the connection.
- Edit the connection.
Step 1: Create a Sage CRM Connection
-
Ensure that you have followed the procedure entitled Prepare Sage CRM for Riva.
-
Start the Riva Manager application. On the menu bar, select Setup. In the left pane, select CRM: Sage CRM to open the Sage CRM Wizard.
-
On the Welcome page, select Next.
-
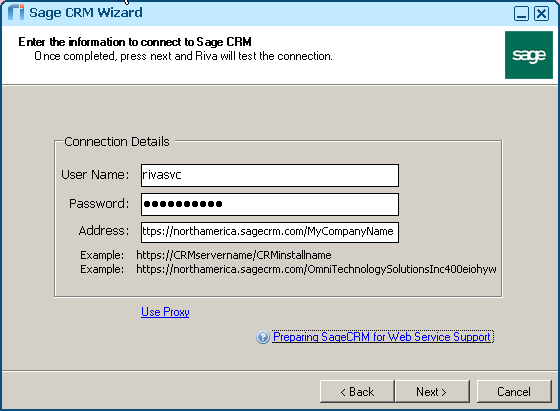
Provide the required information:
-
User Name: This must be an admin-level Sage CRM account that Riva will use to connect to the CRM system and impersonate into the target user accounts.
-
Password: Provide the password for the admin account.
-
Address:
-
On-Premise: Provide the website URL to log in to Sage CRM for your company account, for example https://northamerica.sagecrm.com/MyCompanyAccountName.
-
Sage CRM Professional (Cloud): Provide the web service URL to log in to the Sage CRM for your company account.
-
Use proxy: Specify a unique http/s proxy setting that will apply to this CRM connection.
-
Select Next.
-
(Riva 2.4.47 or higher.) On the Additional Connection Options page, optionally select the check box Is the connection user dedicated for synchronization: [user name]. For guidance, see Is the connection user dedicated for synchronization.
-
On the Successful Connection page, select Finish.
The Riva Manager application creates a Sage CRM connection object.
Step 2: Test the Sage CRM Connection
To test the connection to confirm that user impersonation is working:
-
In the Riva Manager application, on the menu bar, select Setup. In the right pane, double-click the Sage CRM connection object to open the CRM Connection Edit window.
-
Select the Connection Test tab, and select Run Test >>.
The CRM connection account is tested to ensure that the credentials are correct.
-
In the Test succeeded message box, select OK.
-
In the User E-mail field, enter the email address of a CRM target user, and select Run Test >>.
.png)
The system tests that the Sage CRM connection account is able to impersonate into the Sage CRM target user account.
-
In the Test succeeded message box, select OK.
-
In the CRM Connection Edit window, select Cancel to close the window.
Step 3: Edit the Sage CRM Connection
-
In the Riva Manager application, on the menu bar, select Setup.
-
In the right pane, double-click the Sage CRM connection to open the CRM Connection Edit window.
-
(Riva 2.4.46 or higher is required for this step.) Optional: On the General page, assign a user-friendly Display Name.
-
Save the connection.
