There are several reasons to uninstall a Riva On-Premise server:
If a corporate decision is made to switch
- to Riva Cloud, contact the Riva Success Team.
- to a non-supported email system or CRM, we recommend contacting the Riva Success Team to discuss the possibility that we add support for the new email or CRM system.
To uninstall and decommission the Riva On-Premise server:
- Optional: Clear the Riva-synced data from the target user email accounts.
- Stop and remove the Riva CRM Agent service.
- Delete the Riva installation folders.
Step 1: (Optional.) Clear Riva-Synced Data
Warning: This is a destructive non-reversible optional procedure.
Some environments want to remove Riva synced data from the target user emails accounts to prevent possible future data sync challenges with the CRM. This process removes all Riva-synced items from the user's email address book, calendar, and task items (including those originated in the email client), and AssignTo drop folders from target users
To clear Riva-synced data:
-
Open the Riva On-Premise sync policy.
-
Do one of the following:
-
For Exchange user accounts: Re-initialize all users, select the Clear re-init option, and select All modules. For a complete procedure, see Set the re-init options in Riva 2.4.40 or higher.
-
For GroupWise user accounts with a legacy connection: Select the Sync Start Time tab. Select Re-initialize All, and set the Sync Start Time to 10 years into the future. Save the policy.
Result: The CRM Sync Service is restarted, which wipes the data that Riva synced from the CRM to the email account.
-
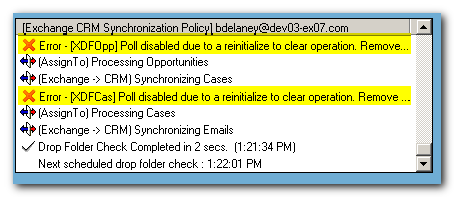
Start the Riva Service Monitor application, and confirm that the "Clear" sync has completed for all of the target users.
-
Ask the users to remove the empty address books, categories, and the SmartConvert drop folders from their accounts in their email clients.
Step 2: Uninstall the CRM Agent Service
To remove the Riva CRM Agent Service from the host Windows system:
-
Log in to the host Windows system as a local administrator account.
-
On the source Riva server, start the Riva Service Monitor application, and stop the service.
-
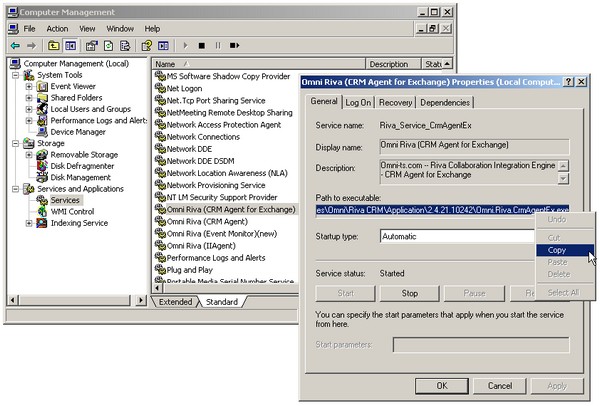
Start Windows Services, and confirm that the Omni Riva (CRM Agent for Exchange) or the Omni Riva (CRM Agent) status is blank. If the status is displaying "Stopping", see Riva service is "Stopping..." for instructions to force the service to stop.
-
In Windows Services, do one of the following:
-
For an Exchange environment: Open the properties of the Riva CRM Agent service, and copy the path to the service to the Windows clipboard.
-
For a GroupWise environment with a legacy connection: Open the properties of the Omni Riva (CRM Agent) service, and copy the path to the service to the Windows clipboard.
-
Open a CMD prompt with elevated privileges (Run as administrator).
-
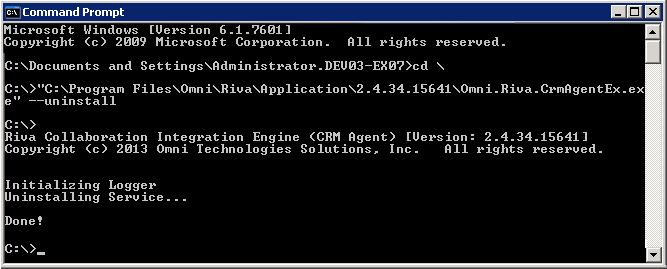
Type CD \, and press ENTER. Type a " (double quotation mark), click in the CMD prompt window, right-click, and select Paste. After \Omni.Riva.CrmAgentEx.exe, type a " (double quotation mark), type a space, type --uninstall, and press ENTER.
-
When Done! appears, press ENTER, and close the CMD prompt window.
-
Refresh Windows Services, and confirm that the Riva CRM Agent service has been removed from the list of installed services.
-
Close Windows Services.
Step 3: Delete the Riva Installation
The idea is to delete the Riva server folder structure.
To delete the Riva installation:
-
In the Riva Manager application, in the top left corner, double-click the Riva logo.
-
In the About Riva window that appears, in the top right corner, double-click the Riva version information.
Result: Windows Explorer displays the contents of the Riva path where the "Riva.exe" file is located.
-
Close all the open Riva application windows.
-
Optional: In Windows Explorer, navigate up one folder, and make a .ZIP file that contains the contents of the Riva folder structure.
-
In Windows Explorer, remove the Riva folder.
Applies to
- Riva On-Premise for Exchange.
- Riva On-Premise for GroupWise (legacy connection).
