Riva CRM Integration - Documentation and Knowledge Base

Create, Test, and Edit a GoldMine CRM Connection

Article ID: 402
Last updated: 29 Mar, 2018

Requirement: A connection to GoldMine that uses the credentials of a master account that can impersonate into the target GoldMine user accounts.

To create, test, and edit a GoldMine connection with Riva:

  1. Prepare the Riva server for GoldMine 9.2. Mandatory for GoldMine 9.2.
  2. Create a GoldMine connection.
  3. Optional: Assign a user-friendly Display Name.
  4. Test the GoldMine connection.
  5. Set the GoldMine contact sync options.
  6. Set the Enable Completed Activity Sync option.
  7. Set the Enable Completed Activity Deleted from GoldMine option.

Step 1: Prepare the Riva Server for GoldMine 9.2

GoldMine customers have reported an issue creating Riva connections to GoldMine 9.2. The following steps must be completed after the Riva server is installed and before creating a GoldMine connection:

  1. Ensure that Riva 2.4.34.15275 or higher is installed. If the version is too old, upgrade to the latest public release, unless a Riva staff member advises you to do otherwise.

  2. If connecting to GroupWise, create or edit an "Omni.Riva.CrmAgent.exe.config" file, and
    add the following XML code:

    <?xml version="1.0" encoding="utf-8"?>
    <configuration>
      <appSettings>
        <add key="
    Crm.SkipOrganizationMatchingByDomain" value="true" />
      </appSettings>
    </configuration>

IMPORTANT NOTE: System.AccessViolationException: Attempted to read or write protected memory - If this error occurs after a sync cycle is enabled, see Fix for errors with connections and sync to GoldMine 9.2 to enable the core sync of contacts, calendar items, and tasks. When the sync policy is created, ensure that the execution threads value for each policy is set to "1", and ensure that "SmartConvert" is disabled. Because the SmartConvert of email is not supported by this fix, all Riva sync policies must be modified to disable SmartConvert.

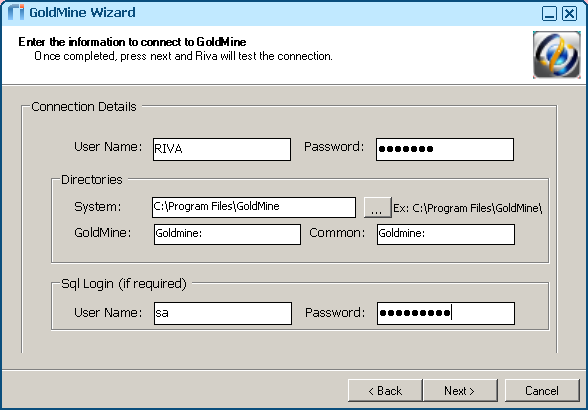
Step 2: Create a GoldMine Connection

  1. Ensure that you have followed the procedure Prepare GoldMine for Riva.

  2. Start the Riva Manager application. On the menu bar, select Setup. In the left pane, select CRM: GoldMine.

  3. On the GoldMine Wizard's Welcome page, select Next.

  4. Provide the required information.

    • User Name: This must be a master-level GoldMine account that Riva will use to connect to the GoldMine system.

    • Password: Provide the password for the master account.

    • System: Select the "..." button, browse, and select the local path to the installation folder for GoldMine. Note: This must be a local path. Do not use a mapped network drive or a UNC path.

    • GoldMine and Common: Use the values specified in the GM.INI file located in the installation folder of the GoldMine server.

    • SQL Login: If required, provide the username and password of the "sa" level account to the SQL database that GoldMine is connected to.

  5. Select Next.

  6. On the Successful Connection page, select Finish.

    The Riva Manager application creates a GoldMine connection object.

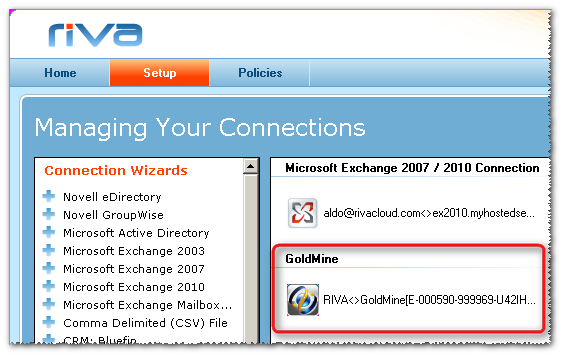
Step 3: (Optional.) Assign a User-Friendly Display Name

(The Display Name is supported in Riva 2.4.46 or higher.)
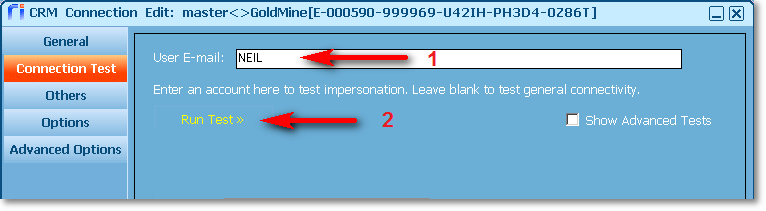
  1. Double-click the GoldMine connection object.

  2. In the CRM Connection Edit window that appears, assign a user-friendly Display Name.

Step 4: Test the GoldMine Connection

To confirm that user impersonation is working:

  1. Double-click the GoldMine connection object.

  2. In the CRM Connection Edit window, select the Connection Test tab, and select Test Connection.

    The GoldMine connection account is tested to ensure that the credentials are correct.

  3. In the Test succeeded message box, select OK.

  4. In the User E-Mail field, enter the user name for a GoldMine target user, and select Run Test.

    The system tests that the Riva connection account is able to impersonate into the GoldMine target user account.

  5. In the Test succeeded message box, select OK.

Step 5: Set the GoldMine Contact Sync Options

  1. In the CRM Connection Edit window, select the Others tab.

  2. Set the Contact sync options.

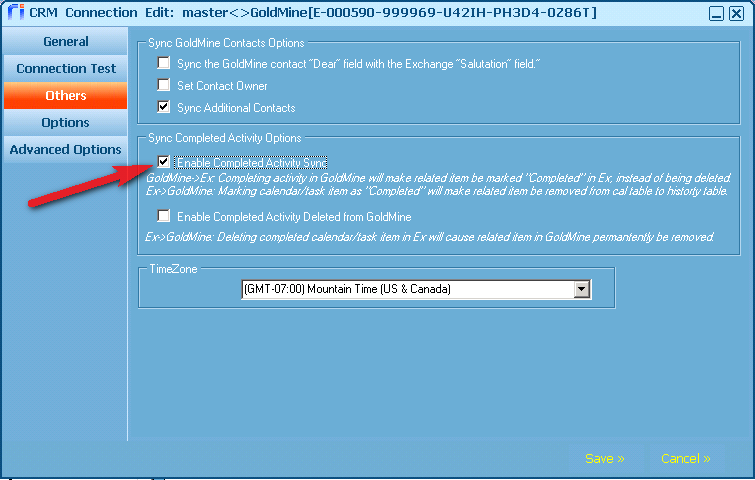
Step 6: Set the Enable Completed Activity Sync Option

By default, this option is enabled, because GoldMine 9.0 and later versions contain a COMPLETEID table in the database, which GoldMine 8.5 does not. If you are using GoldMine 8.5, disable this option (clear the check box).

When items are completed in the GoldMine calendar, they move from the dbo.Cal table to the dbo.Conthist table.

If this option is selected, Riva updates the item in Exchange and assigns a Completed category to the item, to let the user know that the status has changed to Completed in GoldMine.

If the option is disabled (the check box is cleared), Riva recognizes that the item has moved from the dbo.CAL table when Completed in GoldMine and removes the item from Exchange and puts it in the Deleted Items folder.

Step 7: Set the Enable Completed Activity Deleted from GoldMine Option

If the Enable Completed Activity Sync check box is selected, Riva syncs the item as completed and adds the Completed category. By default, Riva does not sync deletes of completed calendar items in Exchange back to GoldMine. In order to synchronize a deletion that is made in Outlook and have that calendar item deleted in GoldMine, select this option.

Notes about completing recurring appointments:

  • If one instance in a series is completed in GoldMine, both the original instance and completed copy appear in Exchange simultaneously. This is because the instance of the appointment exists in both the CAL table and CONTHIST table.

  • If your sync policy is set to sync only the first item from a recurring series (Exchange to GoldMine) and the one instance of that appointment in GoldMine is marked as completed, this essentially breaks the link to all remaining Exchange appointments in that series. This causes the entire series to be marked as Deleted by CRM.

Article ID: 402
Last updated: 29 Mar, 2018
Revision: 14
Views: 7475
Also read

Also listed in