|
Article ID: 2522
Last updated: 23 May, 2024
OverviewRiva's web experience offers a comprehensive solution for enhancing your meeting scheduling and engagement tracking. This guide provides insights into creating, viewing, editing cadences, and monitoring engagements. It highlights the flexibility in cadence creation, including the ability to add steps, follow-ups, and various integrations. Only the Riva Insight Web Add-in supports Sales Engagement Features, if you're using the Windows Add-in - Contact our support team to upgrade.
ContentsAdding Phone Call Task or Other Task Key FeaturesCadence Creation
Cadence Engagement
Creating CadencesAccess CadencesTo Access Cadences: Navigate to Cadences on the left-hand menu bar > + Create Cadence within the Riva platform.
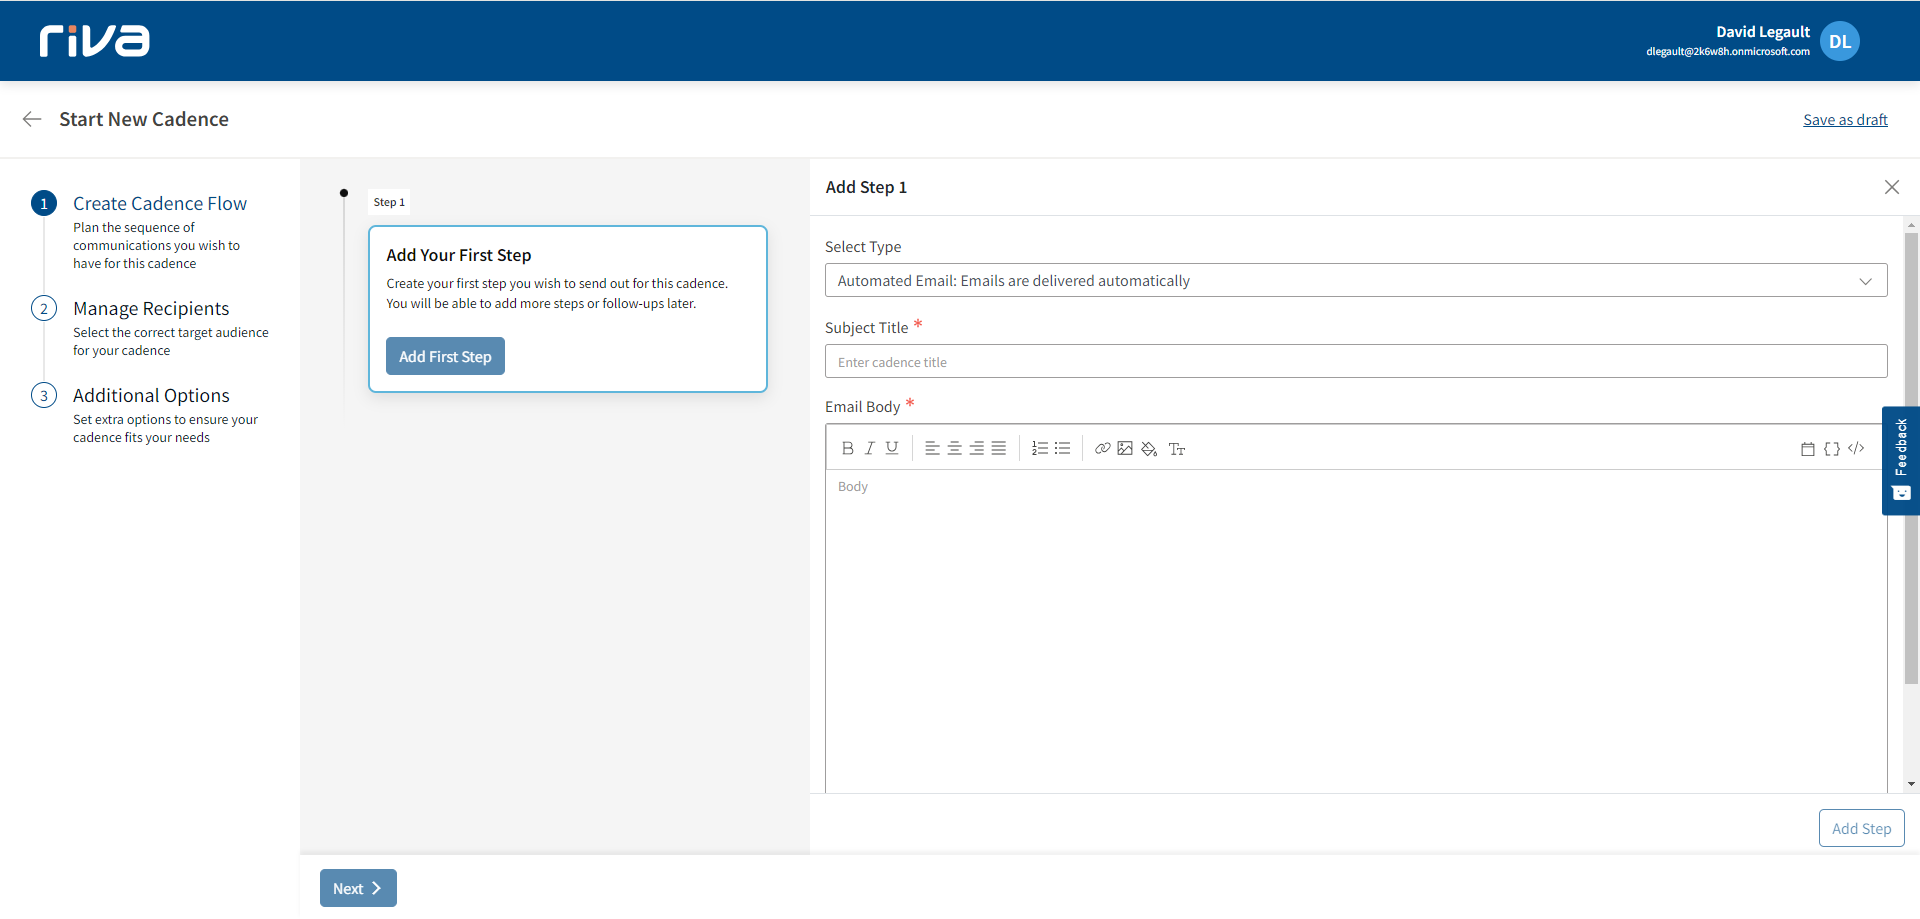
Step 1 - Create Cadence FlowOnce you have started your Cadences, you can plan your communication sequence, add booking links, CRM merge fields, and use AI for content generation.
Select Cadence TypeThere are three different types of Cadences:
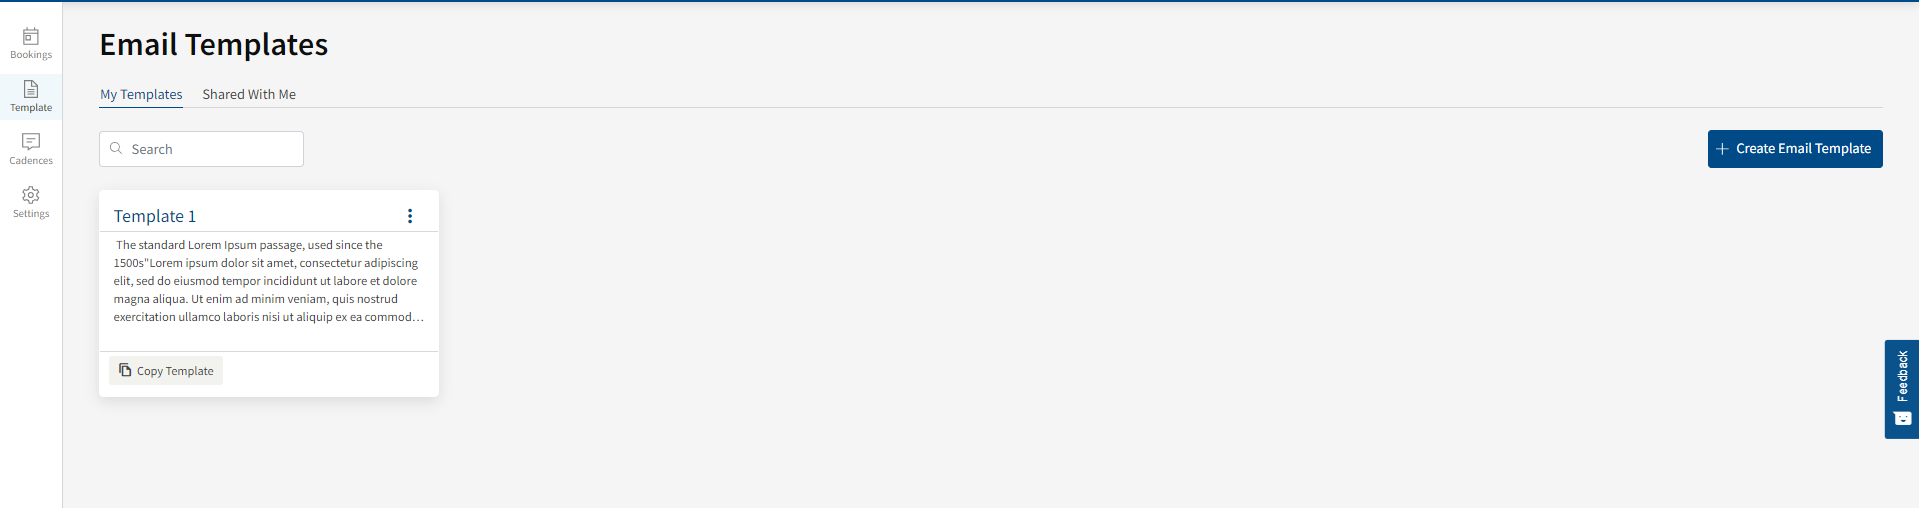
Subject titleAdd your preferred subject. Cadence BodyAdd and format the Cadence body as needed, keep in mind that image attachments are not supported, you can however use inline images. Adding Email TemplateIf an option is missing or not available, ensure you are licensed to access this feature: Contact our Support Team
You also have the option of using a template from a previously created Automated Email step. This will insert the template details into the cadence step email body. Once you have either used a template to populate the Email Body or created your own new body, indicate when you want this cadence to occur. Select how many days after and the time from when the recipient was added.
Add Follow-upOnce a step has been created as an Automated Email in the cadence, you can add follow-ups which are triggered based on certain conditions: Follow-ups are much the same as they are in the original step, except for an additional option to send the Follow-up as a new email thread. Once you have created your first cadence step you can add additional steps. For more information please see the section on Cadence Steps
Adding Phone Call Task or Other TaskAdding a Phone Call Task or Other Task step has similar options to an Automated Email; however, you will notice there is no option to use templates. Once you have added the step's Title and Description, you can also indicate a priority when this step is due. There is also a checkbox to determine if the recipient should only be moved forward in your process when the task is "Completed". Alternatively, you can also choose to remove the recipient based on the outcome of the set task.
Cadence StepsAfter completing a single cadence step, you can add multiple steps until the planned sequence is complete. Also, notice you have the option of adding and editing Follow-ups for each previously created step. To do this select Add New Step: Click +New Step to create additional email steps. Once a cadence is saved, you can not go back and add steps or follow-ups. To make adjustments to the flow, first clone the existing cadence and then you can add additional steps.
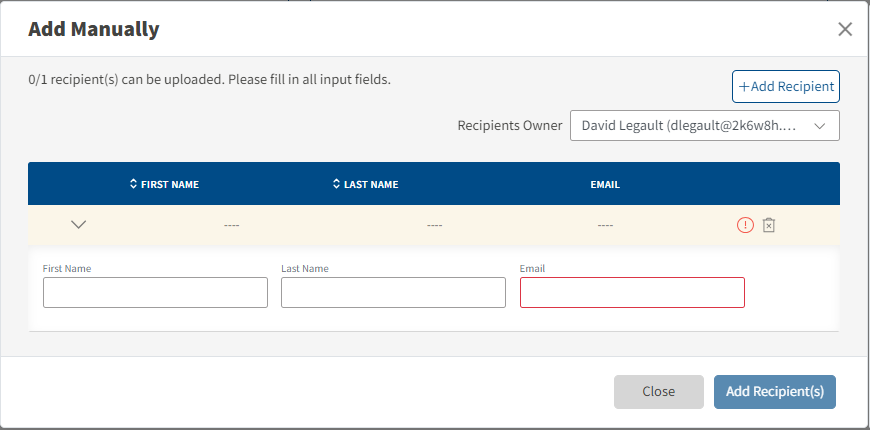
Step ViewAs you add steps you will see them listed in the order of when they are to occur. You will also notice that only Automated Emails have Follow-ups. Phone Call Tasks or Other Tasks do not include an option for a Follow-up. Once you have included all of the steps in your Cadence, you can select Next. Note: You can come back to both edit and add additional steps. Step 2 - Manage RecipientsSelect your target audience, add recipients manually, or import via CSV or Salesforce. Salesforce integration needs to be enabled before it will be an available option
Note: For Salesforce integration, edit the recipient details and click Save to Salesforce.
Note: The first Row needs to include the following headers.
Once your contact or contacts are added, click on Next.
Step 3 - Additional Options
Once you are satisfied with your Cadence, click on Publish. Managing CadencesOnce you have published your Cadence you will be able to track the progress and analytics of each of your Cadences or create a new Cadence. From the main dashboard, you can also drill deeper into an individual Cadence to see specific details relating to each Step of your Cadence. As well you can also Edit, Add Recipients, Clone, Pause, or Delete a Cadence from the details screen.
Article ID: 2522
Last updated: 23 May, 2024
Revision: 7
Views: 0
|


.bmp)


