Overview
This article outlines the requirements to install and get started with Riva Admin Center
Prerequisites
- Install the following
- .NET 6.0 Runtime (v6.0.15)Windows x64 Installer
- ASP.NET Core 6.0 Runtime (v6.0.15) Windows x64 Installer
- Upgrade to Riva Sync 2023.1 (add link to DL)
- Set up Azure Active Directory for Riva Admin Center
Installation Guide
- Download Riva Admin Center Package to your machine and extract the files
- Open Command Prompt as Administrator and navigate to the Riva Admin Center Folder
- Install the service using the command Avio.Services.exe --install

- Other commands available
- --install - Installs the service
- --reinstall - Removes existing service and installs the updated service
- --uninstall - Removes the service
- --help - provides a list of available commands
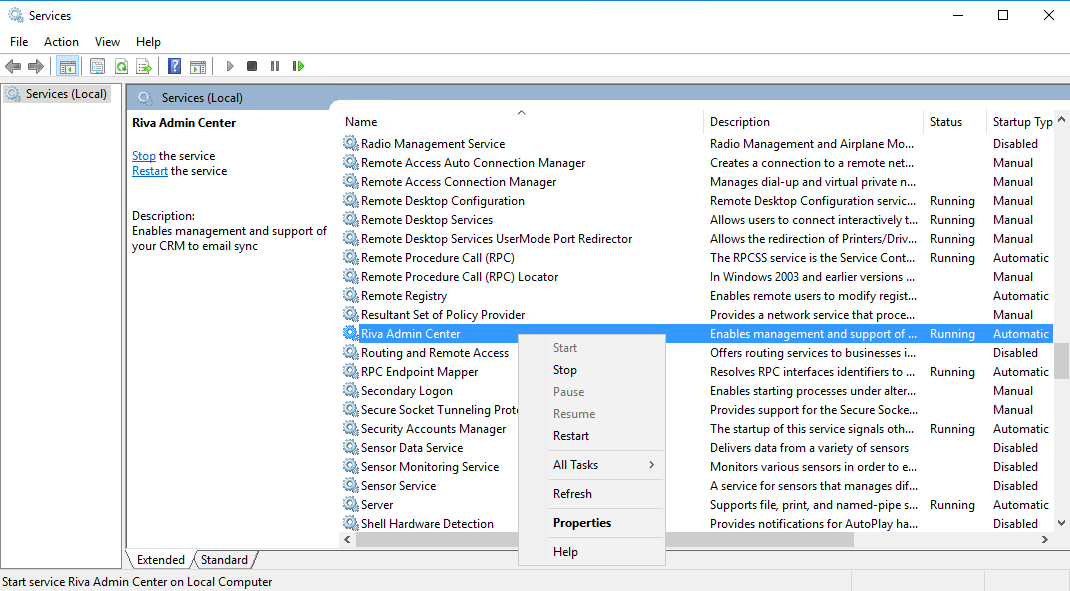
- Navigate to Window Services and start the Riva Admin Center service
- Open your choice of browser and navigate to 'http://localhost:7200' URL as specified in the Redirect URI specified in the AAD
First-time configuration set-up guide
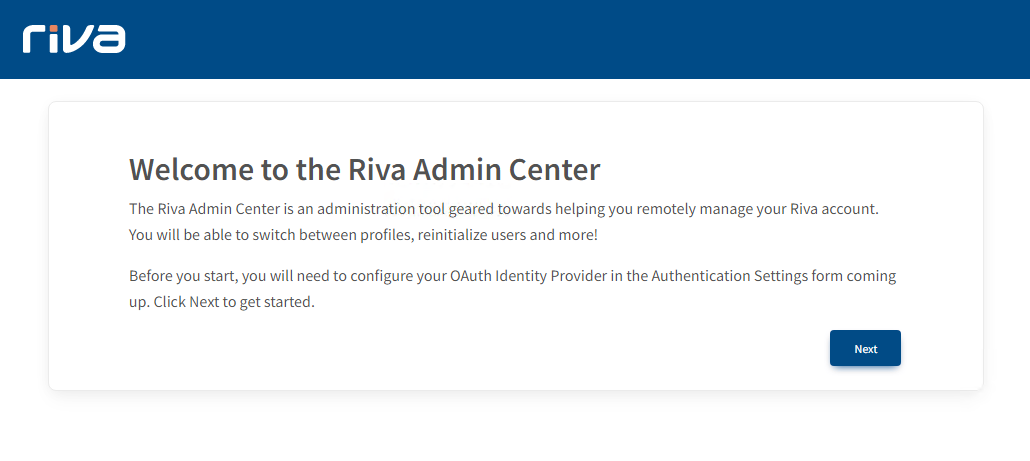
The Riva Admin Center starts and presents the welcome page. Click on Next to start the initial set-up.
- Tenant ID and Client ID can be copied from Azure Active Directory set-up.
- Domain is your organization's domain. It's your email address after '@'
- Login Endpoint - https://login.microsoftonline.com/
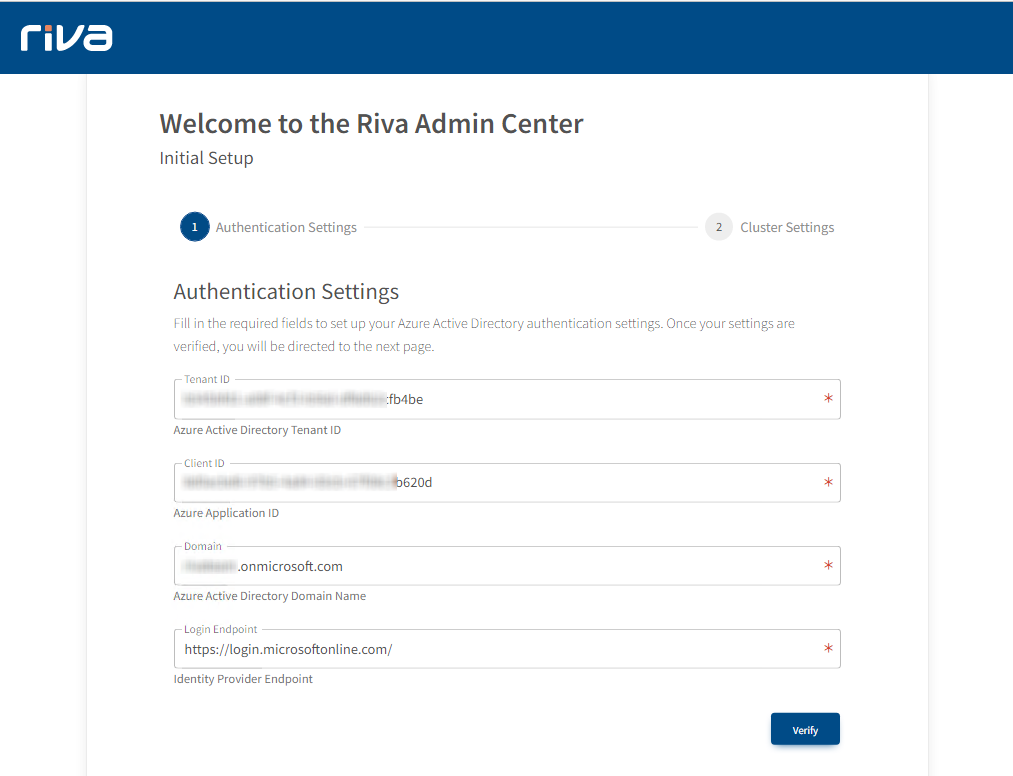
- Click on Verify and you will be prompted to log in to Microsoft to authenticate.
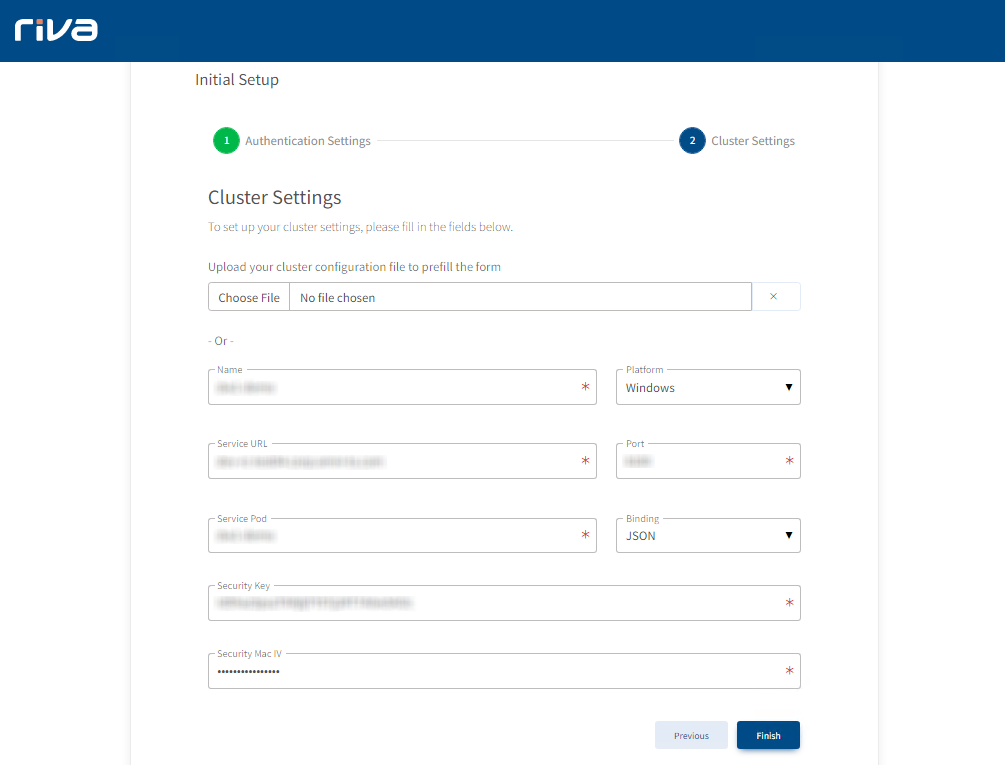
- Next, you would have the Cluster Settings which would allow accessing all profiles available on the pod. Details for this page would be provided by the Riva Success Team.
- Once successfully configured, all functionality available with Riva Admin Center is available to use.
