Riva CRM Integration - Documentation and Knowledge Base

Riva Insight OnPremise: Windows Active Directory Authentication

Article ID: 2302
Last updated: 18 Feb, 2022

Considerations before using Windows Active Directory Authentication

If using "Salesforce" as your CRM, we highly encourage you to use "Login with Salesforce" to log into Riva Insight:

  • "Login with Salesforce" accesses CRM data based on the permissions of the the user that is logged in
  • "WindowsAD" accesses CRM data based on the Riva Sync CRM connection, which is typically an Admin or Service Account that would provide access to data that the user would otherwise not have access to.

Configure Riva Insight On-Premise to use Windows Active Directory Authentication

To configure Riva Insight On-Premise to use Windows Active Directory Authentication:

  1. Open "AppSettings.xml" from {root}\Riva\Riva Insight\Insight\App_Data\
  2. Look for the "/Insight/Auth/Options" key and change the value to "WindowsAD"
  3. Restart IIS, or Restart the "Insight" Application Pool for the settings to take effect
  4. If you have Internet Explorer or Edge opened, close them
  5. If Outlook is open, close and reopen Outlook

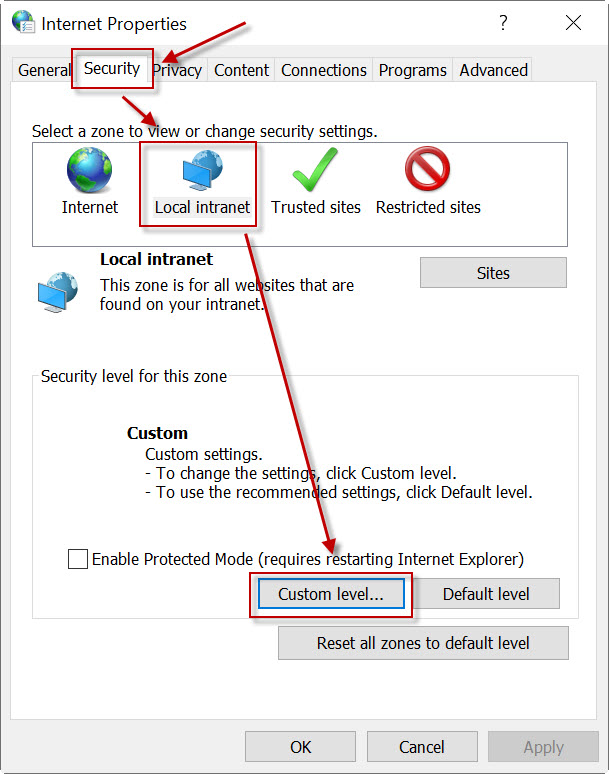
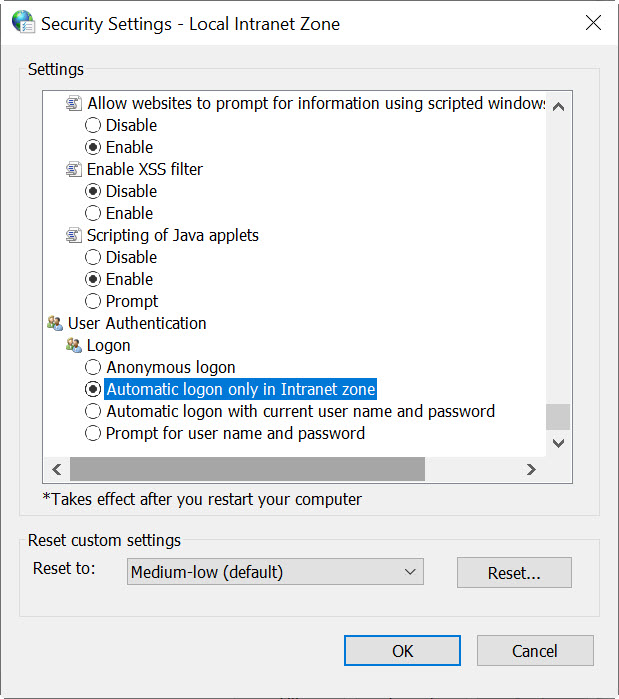
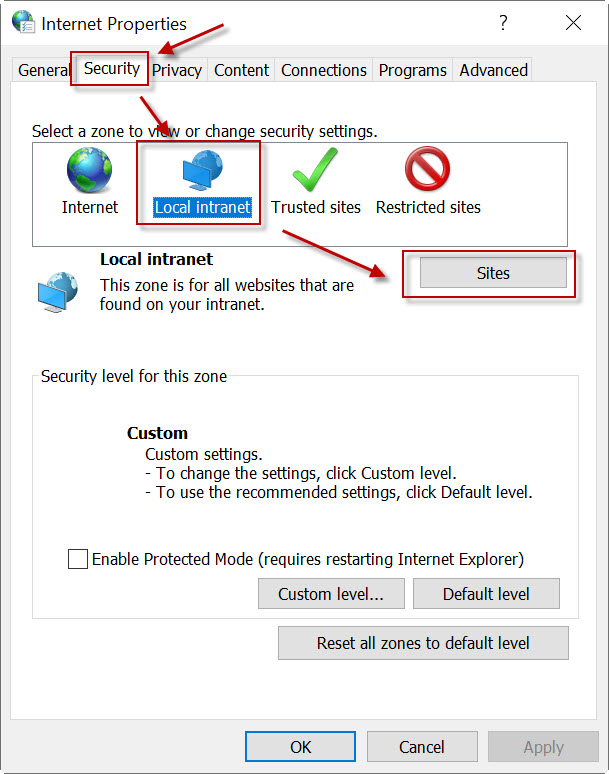
Configure Browser for Windows Active Directory Authentication

If you are not automatically logged into Riva Insight, you may need to add Riva Insight into the Local Intranet zone, and/or change the zone settings for automatic logon. The settings can be updated through the "Internet Options" settings within the Microsoft Windows "Control Panel". Alternatively, the settings can also be managed through your organization domain policy.

  1. From the Control Panel, open Internet Options:
  2. In the Internet Options Window:
    1. Click on the "Security" tab
    2. Select the "Local Intranet Zone"
    3. Click in the "Sites" button
  3. In the Zone Settings window:
    1. Click on "Advanced" (another window will open up)
    2. Type in the server name you use to access Riva Insight.
      For Example, if your Insight URL is "https://myserver.corp.com/Insight", then enter "https://myserver.corp.com/"
    3. Click on "Add" to add it to the list.
    4. Click "Close" to, then "OK" to close the Zone Settings windows
  4. Back on the Internet Options Window, ensure you still have the "Local Intranet" zone selected, and click on "Custom Level":
  5. The Security Settings windows will open:
    1. Scroll to the very bottom and you will see the "User Authentication" section
    2. Select either of the following options:
      1. Automatic logon only in Intranet Zone (suggested)
      2. Automatic logon with current username and password
    3. Click OK until all of the windows have closed.
  6. If you have Internet Explorer or Edge opened, close them
  7. If Outlook is open, close and reopen Outlook

This article was:   Helpful | Not helpful
Report an issue
Article ID: 2302
Last updated: 18 Feb, 2022
Revision: 3
Views: 0
Comments: 0