Riva CRM Integration - Documentation and Knowledge Base

Create & Test Client Secret-Based Dynamics CRM OAuth Connection

Article ID: 1789
Last updated: 09 Sep, 2021
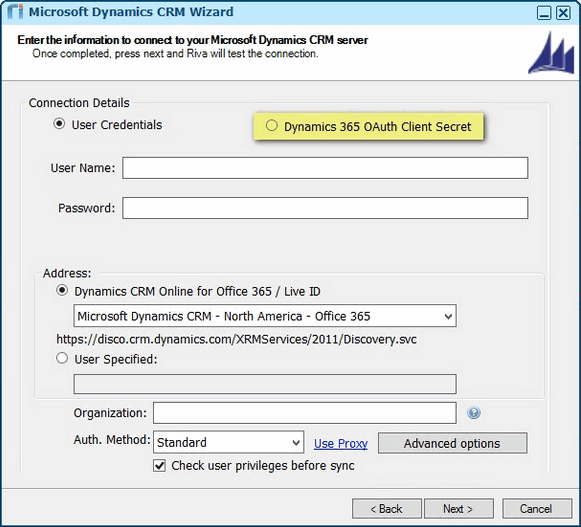
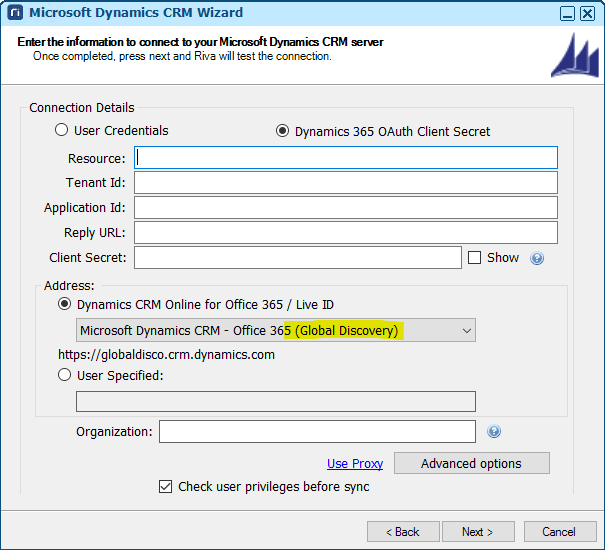
Applies to Riva On-Premise 2021.1.7.7431 or higher.
For earlier versions of Riva, see the procedure to upgrade to a Microsoft Dynamics Global Discovery connection for Riva On-Premise.

  1. Open the Riva Manager application.

  2. On the menu, click Add CRM, and then select Microsoft Dynamics CRM 2011+.

  3. On the Welcome page, click Next.

  4. On the Connection Details page, select Dynamics 365 OAuth Client Secret.

  5. Provide the information required for the OAuth Client Secret connection, as described below the screen shot.

    Connection Details:

    Address:

    Use Proxy: Required only if you need to deploy proxy services. For more information, see Configure "Use Proxy" settings in CRM and email connections.

    Advanced Options: Opens the Advanced Options window, where you can apply advanced options or custom options to this connection. For tips and instructions on how to use the window, see Best practice....

  6. Click Next.

  7. If you receive the following error,

    ,

    click OK, and ensure that all fields were filled with the required information. After entering the information, click Next again.

  8. On the Dynamics 365 login screen that appears, log in with the user granted OAuth access for the created App in Azure for Dynamics 365.

    Note: After successfully logging in to Dynamics, you will receive confirmation that the connection was successfully created.

This article was:   Helpful | Not helpful
Report an issue
Article ID: 1789
Last updated: 09 Sep, 2021
Revision: 14
Views: 43
Comments: 0